
Learning how to use a rifle sling can dramatically enhance your shooting accuracy, comfort, and rifle retention. This comprehensive guide covers various sling types and practical methods, from basic carrying to advanced shooting stances. Mastering these techniques will transform your rifle handling, making you a more efficient and confident shooter in any situation.
How to Use a Rifle Sling
Hey there, fellow shooting enthusiast! Have you ever wondered if you’re getting the most out of that strap attached to your rifle? That seemingly simple piece of gear, often overlooked, is actually a game-changer. It’s not just for slinging your rifle over your shoulder like a backpack. Oh no, a rifle sling is a versatile tool that, when used correctly, can dramatically improve your shooting accuracy, comfort, and overall rifle handling. Many people own a sling but never truly learn how to use a rifle sling to its full potential.
Think about it: how often do you see experienced shooters using a sling, not just for carrying, but actively integrating it into their shooting stance? There’s a reason for that. Properly using a rifle sling creates a stable connection between your body and the rifle, reducing wobble and allowing for more precise shots. Whether you’re a hunter, a competitive shooter, or just enjoy hitting targets at the range, understanding how to use a rifle sling can elevate your skills to a whole new level. This guide is designed to walk you through everything you need to know, from basic adjustments to advanced shooting techniques, so you can truly master how to use a rifle sling.
We’re going to dive deep into the world of rifle slings, exploring their types, proper adjustments, and most importantly, how to use a rifle sling in various scenarios. We’ll cover everything from carrying your rifle comfortably during a long hike to achieving rock-solid stability for that critical shot. So, let’s get that sling off your shoulder and put it to work. By the end of this, you’ll not only know how to use a rifle sling, but you’ll understand why it’s an indispensable part of your shooting kit.
Key Takeaways
- Enhanced Stability for Accuracy: A rifle sling is not just for carrying; it’s a vital tool for improving shooting stability by creating tension between your body and the rifle, reducing sway and improving accuracy.
- Versatile Carrying Options: Understanding how to use a rifle sling allows for hands-free transport in various configurations (single-point, two-point, three-point), ensuring comfort and quick access tailored to your activity.
- Two Primary Shooting Methods: Master both the “Loop Sling” for maximum stability in static positions and the “Hasty Sling” for quicker, moderate stability when time is critical, adapting how to use a rifle sling to your needs.
- Proper Adjustment is Crucial: The effectiveness of your rifle sling hinges on correct adjustment for both carrying and shooting. Too loose, and it’s ineffective; too tight, and it’s uncomfortable and hinders movement.
- Practice Makes Perfect: Integrating a rifle sling into your shooting routine requires practice. Regularly rehearse carrying, transitioning, and shooting with the sling to build muscle memory and efficiency.
- Safety and Retention: Beyond performance, how to use a rifle sling also contributes to rifle retention, keeping your firearm secure on your person, preventing accidental drops, and maintaining control.
Quick Answers to Common Questions
What is the primary benefit of using a rifle sling for shooting?
The primary benefit is enhanced shooting stability. A sling creates tension between your body and the rifle, reducing natural sway and allowing for more precise aim, especially in unsupported positions.
Can I use a single-point sling for shooting stability?
Single-point slings are generally designed for rapid manipulation and transitions, offering less inherent stability for precision shooting compared to two-point slings. While they offer some retention, they don’t create the same firm shooting platform.
What is the difference between the “Loop Sling” and the “Hasty Sling” methods?
The “Loop Sling” provides maximum stability for static, precision shooting by wrapping the sling high on your bicep and creating a rigid support structure. The “Hasty Sling” is quicker to deploy, offering moderate stability by simply slipping your weak arm through the sling loop and pulling the rifle into tension.
How tight should my sling be for carrying?
For carrying, your sling should be tight enough to keep the rifle secure and prevent excessive swinging, but loose enough to allow comfortable movement and quick access. It should not restrict your breathing or movement.
Is a padded sling necessary?
A padded sling is not strictly necessary for function, but it significantly improves comfort, especially when carrying a rifle for extended periods or with heavier firearms. It helps distribute the weight and prevents the strap from digging into your shoulder.
📑 Table of Contents
Understanding Your Sling: Types and Components
Before we learn how to use a rifle sling, it’s essential to understand what kind of sling you have and its basic parts. Slings come in a few main types, each with its own advantages, and knowing yours will help you learn how to use a rifle sling most effectively.
Types of Rifle Slings
- Two-Point Slings: This is the most common type. It attaches to the rifle at two points, usually near the buttstock and the fore-end. It’s incredibly versatile for both carrying and shooting, making it a great choice for learning how to use a rifle sling.
- Single-Point Slings: This sling attaches to the rifle at a single point, typically on the receiver behind the pistol grip. It allows for quick transitions between shoulders and easy manipulation of the rifle, though it offers less stability for carrying or shooting compared to a two-point.
- Three-Point Slings: Less common today, these slings wrap around the shooter’s body and the rifle, offering hands-free retention but can be complex and cumbersome to adjust and operate.
Key Components of a Rifle Sling
Most slings, especially two-point slings, share common features:
- Webbing/Strap: The main material of the sling, usually nylon, leather, or similar durable fabric.
- Swivels/Attachments: The hardware that connects the sling to the rifle. These can be quick-detach (QD) swivels, hooks, or traditional loops.
- Adjusters/Buckles: Mechanisms (like buckles, cam locks, or quick-adjust tabs) that allow you to change the length of the sling. This is crucial for learning how to use a rifle sling correctly for different purposes.
- Padding: Some slings include a padded section for comfort during long carries.
Understanding these components is the first step in mastering how to use a rifle sling. Now, let’s get into the practical application.
Adjusting Your Sling for Carry and Retention
One of the primary uses of a rifle sling is for carrying your firearm comfortably and securely, keeping your hands free. Learning how to use a rifle sling for transport is just as important as using it for shooting.
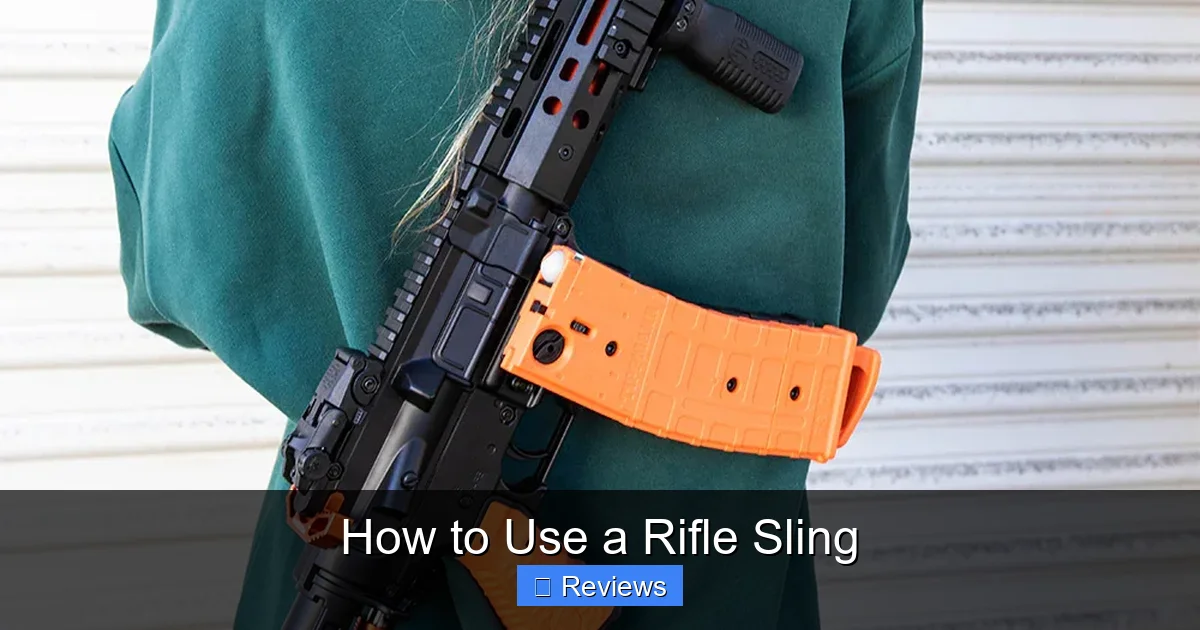
Visual guide about How to Use a Rifle Sling
Image source: byrna.com
Proper Length for Carrying
The correct length of your sling for carrying depends on your body type, the rifle, and how you prefer to carry it. As a general rule, you want the rifle to hang comfortably without swinging too much, but also allow you quick access. To determine how to use a rifle sling for ideal length:
- With the rifle slung across your body (muzzle down, strong side hip), you should be able to quickly grasp the rifle’s grip with your strong hand without significant effort.
- It should not be so long that the muzzle drags on the ground or gets in the way of your knees when walking.
- It should not be so tight that it restricts breathing or movement.
Adjust the buckles until it feels just right. This initial adjustment is key to learning how to use a rifle sling for everyday handling.
Single-Point Carry Techniques
Single-point slings are favored for their freedom of movement and quick transitions. Here’s how to use a rifle sling of the single-point variety:
- Traditional Single-Point: Wear the sling over your head and one shoulder, or simply around your neck. The rifle will hang vertically in front of you, muzzle down. It’s excellent for keeping the rifle central and allowing ambidextrous shooting. The downside is that the rifle can swing freely when you move, so it’s not ideal for long walks.
- Adding a Retention Bungee: Some users add a bungee cord or a secondary retention strap to secure the rifle more closely to the body when moving, mitigating the swing issue.
When learning how to use a rifle sling like this, focus on maintaining control of the rifle even with the freedom it offers.
Two-Point Carry Techniques
Two-point slings offer more stability and are excellent for a variety of carry methods:
- African Carry (Muzzle Down, Strong Side): Sling the rifle across your back, muzzle pointing down towards your weak side hip. The sling goes over your strong shoulder. This is a secure, comfortable way to carry for long periods, keeping the rifle out of the way but still accessible.
- Slinging Strong Side (Muzzle Up/Down): Wear the sling over your weak shoulder, with the rifle hanging vertically on your strong side. You can carry it muzzle up or down. Muzzle up is generally safer when moving through brush or around people. Muzzle down keeps the rifle lower and can be quicker to shoulder.
- Back Carry (Traditional Backpack Style): For extended hikes, you can wear the sling over both shoulders like backpack straps. Ensure the sling is adjusted to keep the rifle high enough that it doesn’t interfere with your legs. This is a very stable way to learn how to use a rifle sling for hands-free transport.
The beauty of learning how to use a rifle sling in a two-point configuration is its adaptability. Experiment to find what works best for your activity.
Mastering the Sling for Shooting Stability
This is where the rifle sling truly shines beyond just carrying. Learning how to use a rifle sling to enhance your shooting stability is a fundamental marksmanship skill. By creating tension between your arm, the sling, and the rifle, you form a solid shooting platform.
The Loop Sling Method (Classic Marksmanship)
This is often considered the most stable shooting method using a sling, ideal for prone, sitting, or kneeling positions where maximum accuracy is needed. Here’s how to use a rifle sling in the loop configuration:
- Loosen the Sling: Adjust your two-point sling so it’s quite loose, or if it has a specific loop adjustment feature, loosen that.
- Insert Your Arm: Pass your weak arm (non-shooting arm) through the sling loop from top to bottom, bringing the sling up your arm.
- Rotate and Tighten: Twist your arm counter-clockwise (for right-handed shooters) so the sling snugs up high on your bicep, close to your armpit.
- Create Tension: Pull the sling tightly against your arm. The front swivel of the sling should be wrapped around the outside of your forearm.
- Secure the Grip: Rest your weak hand firmly under the rifle’s fore-end, ensuring the sling is taut between your bicep and the rifle. Your hand isn’t supporting the rifle’s weight; the sling is.
When done correctly, the sling becomes an extension of your skeletal structure, distributing the rifle’s weight and creating a very stable platform. This is a crucial technique for learning how to use a rifle sling for precision.
Hasty Sling Method (Quick Deployment)
The hasty sling offers less stability than the loop sling but is much quicker to get into. It’s perfect when you need to achieve moderate stability rapidly. Here’s how to use a rifle sling using the hasty method:
- Adjust Sling Length: Ensure your sling is adjusted to a comfortable carrying length.
- Slip Arm Through: With the rifle slung over your shoulder, slip your weak arm between the sling and the rifle.
- Secure on Bicep: Bring your weak hand up and over the sling, then grasp the rifle’s fore-end. The sling should be resting on the outside of your weak arm’s bicep.
- Apply Tension: Pull the rifle into your shoulder, applying outward tension on the sling with your weak arm.
The hasty sling uses the tension from your arm to steady the rifle. It’s a faster way to incorporate how to use a rifle sling for stability in dynamic situations.
Integrating the Sling with Shooting Positions
Learning how to use a rifle sling isn’t just about the sling itself, but how it interacts with different shooting positions:
- Prone Position: This is where the sling’s stability truly shines. Whether using the loop or hasty method, the sling helps anchor the rifle, reducing vertical and horizontal movement. With your body low to the ground, the sling takes away much of the muscle strain, allowing for finer aiming.
- Sitting Position: Often used when going prone isn’t possible, the sitting position also benefits greatly from a sling. Your elbows can be braced on your knees, and the sling further solidifies the rifle into your shoulder pocket. This dramatically improves how to use a rifle sling for stability from a seated position.
- Kneeling Position: Similar to sitting, a kneeling stance can be greatly improved. Bracing your weak elbow on your weak knee, the sling adds another point of contact and tension, reducing wobble.
- Standing Position: While challenging, even in the standing position, a sling can offer some benefit. The hasty sling, combined with a good standing form, can help reduce the natural sway of the rifle, especially for sustained aiming.
Practice how to use a rifle sling in each of these positions. The goal is to build a “human tripod” where the rifle is firmly supported by your body and the sling.
Advanced Sling Techniques and Practical Applications
Beyond basic carrying and shooting, there are several advanced ways to integrate how to use a rifle sling into your operations, enhancing both safety and efficiency.
Transitioning Between Positions
A well-adjusted sling allows for smooth transitions. If you’re moving from a low-ready position to a shooting stance, a sling can keep the rifle controlled. For example, with a single-point sling, the rifle hangs centrally, making it easy to bring up to the shoulder regardless of which direction you’re facing or which shoulder you choose to shoot from. With a two-point, you can use quick-adjust features to tighten the sling for movement and loosen it for shooting, all without removing the rifle from your body.
Slinging for Movement and Hands-Free Operation
Learning how to use a rifle sling effectively means you can free up your hands when needed. This is invaluable in situations like climbing, carrying gear, or providing first aid. The “African Carry” with a two-point sling, or simply carrying the rifle slung across your back, keeps it secure and out of the way. When using a single-point sling, you can “park” the rifle by securing the muzzle or stock against your body with your free hand when temporarily not needed, preventing it from swinging. This versatility is a core benefit of knowing how to use a rifle sling.
Emergency Readiness
In emergency scenarios, a rifle sling can be a crucial piece of gear for retention. If you need to sprint, climb, or even defend yourself without the rifle in your hands, the sling ensures it stays with you. For instance, if you stumble, the rifle won’t hit the ground. If you’re carrying another person or object, your rifle can remain securely attached to your body, ready for deployment when needed. This passive retention capability is a powerful aspect of how to use a rifle sling for safety and preparedness.
Maintenance and Care for Your Sling
To ensure your sling always performs when you need it, a little care goes a long way. This is part of understanding how to use a rifle sling for the long term.
- Inspect Regularly: Check for fraying, tears, or damage to the webbing. Ensure all buckles, adjusters, and swivels are functioning correctly and free from corrosion.
- Clean as Needed: If your sling gets dirty, especially after being exposed to mud, sand, or saltwater, clean it according to the manufacturer’s instructions. Usually, a mild soap and water solution works well for nylon slings. Leather slings might require specific leather conditioners.
- Check Attachments: Periodically ensure the swivels or attachment points on your rifle are secure and tightened. Loose attachments can lead to the sling detaching or making noise.
By taking care of your sling, you ensure it’s always ready to assist you, whether for carrying or for improving your aim. This diligent approach is part of truly understanding how to use a rifle sling effectively.
Conclusion
Congratulations! You’ve just taken a deep dive into the world of rifle slings and, more importantly, learned how to use a rifle sling like a pro. From understanding the different types and their components to mastering various carry methods and shooting techniques, you now have the knowledge to transform your rifle handling. Remember, a rifle sling is far more than just a carrying strap; it’s a fundamental tool for improving your accuracy, ensuring comfort during transport, and enhancing overall firearm retention and control.
The key to truly mastering how to use a rifle sling lies in practice. Spend time at the range experimenting with the loop sling and hasty sling methods. Adjust the length for different carry positions and practice transitioning between them. The more you integrate your sling into your shooting routine, the more natural and effective it will become. You’ll soon find that a properly used sling becomes an extension of your body, providing a stable platform and freeing your hands when you need them most.
So, go forth, adjust your sling, and practice with confidence. You’ve gained invaluable knowledge on how to use a rifle sling that will make you a more capable and efficient shooter. Happy shooting!
🎥 Related Video: How To Install Your Q.uick D.etach Swivels To Your AR15/Rifle Sling (BCM QD’s)
📺 Gear And Guns
Frequently Asked Questions
What types of rifles can use a sling?
Most rifles, including hunting rifles, sporting rifles, and tactical carbines, are designed to accommodate a sling. They typically have built-in swivel studs or attachment points, or can be easily modified to accept them.
How do I choose the right sling for my rifle?
Choosing the right sling depends on your primary use. For hunting and general shooting, a versatile two-point sling is often best. For tactical applications requiring quick transitions, a single-point or a two-point with quick-adjust features might be preferred.
Can a sling prevent accidental drops?
Yes, a properly used sling acts as a retention device, keeping the rifle securely attached to your body. This significantly reduces the risk of accidental drops, especially when moving, climbing, or in dynamic situations.
Is it safe to carry a loaded rifle with a sling?
Carrying a loaded rifle with a sling requires strict adherence to firearm safety rules, including keeping the muzzle pointed in a safe direction and your finger off the trigger. Always ensure your rifle’s safety is engaged when carrying.
How does a sling improve accuracy?
A sling improves accuracy by creating a stable third point of contact (or fourth, if using a bipod) between your body, the rifle, and the ground. This reduces muscle fatigue and natural body sway, allowing for a steadier hold and more consistent shot placement.
Should I practice with my sling before using it in the field?
Absolutely! Practicing with your sling before using it in the field is highly recommended. This builds muscle memory for adjustments, transitions, and shooting techniques, ensuring you can operate efficiently and safely when it counts.