Sighting in a rifle scope for 100 yards is a crucial skill for any shooter, ensuring your shots hit where you aim. This comprehensive guide breaks down the process, from gathering essential gear and proper scope mounting to bore sighting, precise adjustments, and verifying your zero. Follow these practical steps to achieve consistent accuracy and confidence with your rifle.
There’s a special kind of satisfaction that comes from looking through your rifle scope, lining up the crosshairs, and watching your bullet strike exactly where you intended. But this precision isn’t just luck; it’s the result of properly sighting in your rifle scope. For many shooters, 100 yards is the golden standard—the distance where most rifles truly shine, and the foundational zero for almost all other shooting distances.
Whether you’re new to shooting or a seasoned enthusiast looking to refine your technique, learning how to sight in a rifle scope for 100 yards is an essential skill. It builds confidence, improves accuracy, and ensures that when it truly matters, your equipment is performing at its peak. This comprehensive guide will walk you through every step, from preparing your gear to making those final, precise adjustments, turning frustration into consistent hits.
Forget the guesswork and wasted ammunition. We’ll break down the process into easy-to-understand steps, using simple language and practical tips. By the end of this article, you’ll not only know how to sight in a rifle scope for 100 yards, but you’ll also understand the ‘why’ behind each action, empowering you to become a more capable and confident shooter. Let’s get started on the path to pinpoint accuracy!
Key Takeaways
- Preparation is Key: Before heading to the range, ensure your scope is correctly mounted, bore-sighted, and you have all necessary gear, including a stable shooting rest and appropriate targets.
- Understand Your Scope: Familiarize yourself with your scope’s adjustments (clicks, MOA/MRAD) and how they translate to bullet impact at 100 yards.
- Start Close, Then Go to 100: While bore sighting gets you on paper, start shooting at 25 or 50 yards to confirm you’re hitting the target before moving to 100 yards for fine-tuning.
- Shoot for Groups: Don’t adjust after every shot. Shoot 3-5 shot groups to accurately assess your rifle’s point of impact and make informed adjustments.
- Adjust Systematically: Move your point of impact towards your point of aim. If your shots are low, adjust “up.” If they’re left, adjust “right.” Remember the “UP/RIGHT” rule for most scopes.
- Verify Your Zero: Once you believe your rifle is sighted in, shoot a final 3-5 shot group to confirm your adjustments and ensure consistent accuracy at 100 yards.
- Practice and Document: Sighting in is not a one-time event. Regularly check your zero, practice good shooting fundamentals, and document your scope settings for different ammunition types.
Quick Answers to Common Questions
What is the ideal distance to start bore sighting before shooting at 100 yards?
It’s generally recommended to bore sight your rifle and then take your first shots at a closer range, typically 25 or 50 yards. This ensures you’ll hit the target paper and can make initial coarse adjustments before moving back to 100 yards for fine-tuning.
How many shots should I take in a group to adjust my scope?
Shoot 3-5 shot groups. This provides a reliable average of where your rifle is consistently hitting, allowing you to make more accurate adjustments based on the group’s center rather than a single shot.
Should I clean my rifle barrel during the sighting-in process?
Generally, it’s best to start with a clean barrel. However, some rifles might have a “cold bore shift” or shoot differently after the first few shots. For sighting in, avoid excessive cleaning between groups unless accuracy degrades significantly or you’re starting a fresh session. A clean barrel can slightly alter the first few shots’ point of impact.
What does MOA stand for, and how does it relate to scope adjustments?
MOA stands for Minute of Angle. At 100 yards, 1 MOA is approximately 1.047 inches. If your scope has 1/4 MOA clicks, each click will move your bullet’s impact by about 0.25 inches at 100 yards.
What if my shots are consistently grouping but just not in the center?
This is a good problem to have! It means your rifle is accurate, but your scope needs adjustment. Simply measure the distance from the center of your group to the bullseye, calculate the necessary clicks (using your scope’s MOA/MRAD value), and adjust your turrets accordingly. For example, if your group is 2 inches low, adjust your elevation turret “UP” the calculated number of clicks.
📑 Table of Contents
Why 100 Yards? Understanding the Standard
You might wonder why 100 yards is such a critical distance for sighting in a rifle scope. It’s not arbitrary; it’s a sweet spot that balances practicality with ballistic principles, making it the ideal starting point for most rifle calibers.
Ballistics and Common Shooting Distances
At 100 yards, the bullet’s trajectory is relatively flat for most common rifle cartridges. This means that atmospheric conditions, bullet drop, and wind drift have less pronounced effects compared to longer distances. By sighting in your rifle scope for 100 yards, you establish a reliable zero that serves as a baseline. From this zero, you can then easily calculate and adjust for bullet drop and windage at longer ranges (200, 300, 500 yards, etc.) using your scope’s adjustments or a ballistic calculator. It’s the most practical distance to achieve a precise zero before stretching your rifle’s capabilities.
What “Sighted In” Truly Means
When we talk about “sighting in” a rifle scope, we mean adjusting the scope’s internal mechanisms (reticle) so that the bullet’s point of impact (POI) consistently matches your point of aim (POA) at a specific distance. For us, that distance is 100 yards. A rifle that is “sighted in” for 100 yards will place its bullets exactly where the crosshairs are aimed when shooting at that range. This precision is vital for everything from competitive shooting to hunting, ensuring ethical and accurate shots.
Essential Gear You’ll Need
Before you even think about firing a shot, gather all the necessary equipment. Having everything organized and ready will make the process of sighting in your rifle scope for 100 yards much smoother and more efficient.

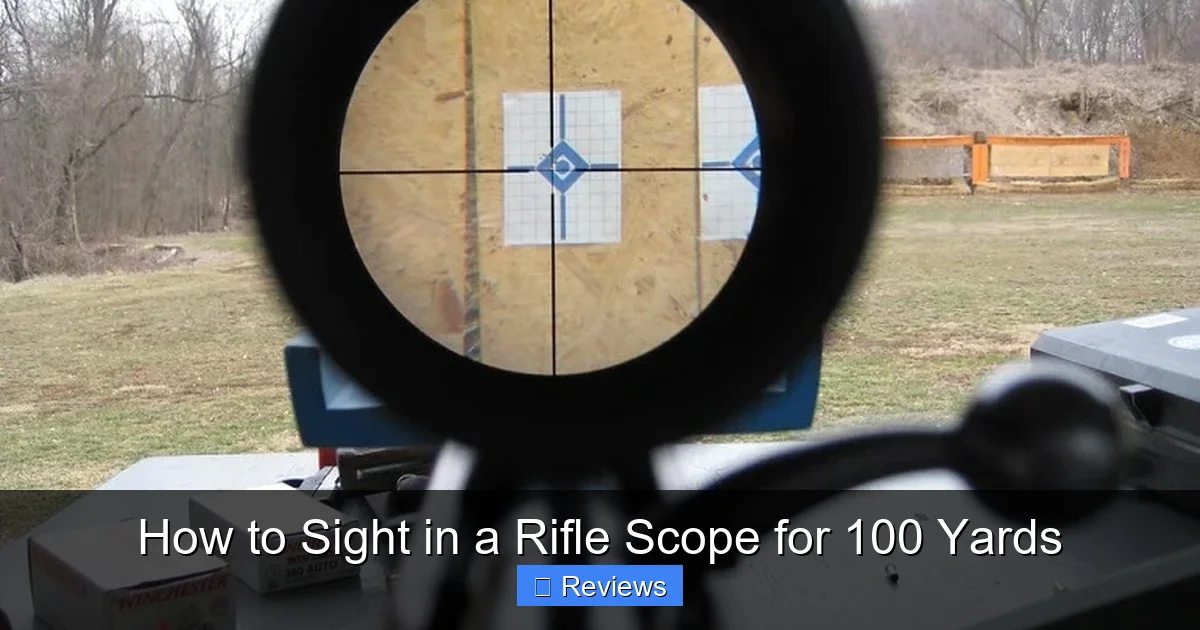
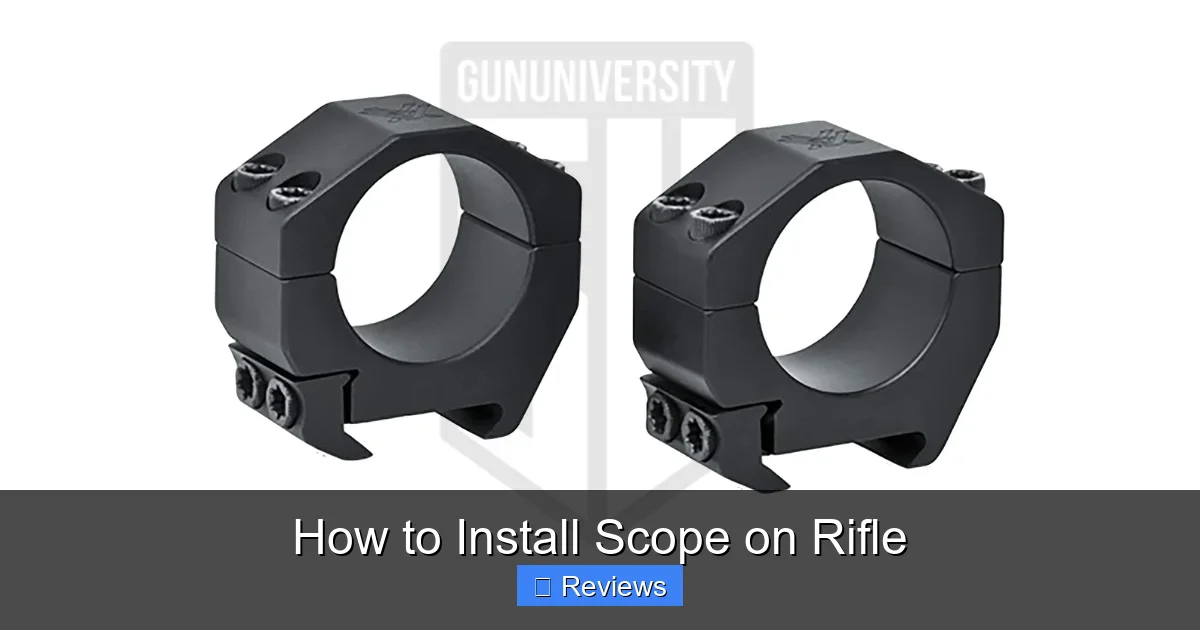
Visual guide about How to Sight in a Rifle Scope for 100 Yards
Image source: cdn.shopify.com
Your Rifle and Scope
Of course, you’ll need your rifle and the scope you intend to zero. Make sure your rifle is clean and in good working order. Your scope should be securely mounted to the rifle. We’ll cover mounting briefly, but ideally, this is done beforehand with proper torque specifications.
Ammunition Choice
This is crucial! Always use the specific type of ammunition you plan to shoot regularly with your rifle. Different bullet weights, manufacturers, and even different lots of the same brand can have varying points of impact. If you sight in your rifle scope for 100 yards with one brand of ammo and then switch, your zero will likely shift. Bring plenty of it – at least 20-40 rounds, possibly more if you’re starting from scratch or encounter issues.
Shooting Rest or Bipod
To sight in a rifle scope for 100 yards accurately, you need maximum stability. A solid shooting bench with a front and rear rest, or a sturdy bipod combined with a rear bag, is absolutely essential. Eliminate as much human error as possible to accurately assess where your rifle is actually shooting.
Target Selection
Use targets that provide a clear, precise aiming point. Bullseye targets are common, but a target with a grid pattern can be extremely helpful for making adjustments, as you can easily count squares to measure your group’s deviation from the center. Make sure the aiming point is small enough to allow for precise aiming at 100 yards.
Cleaning Supplies and Tools
Bring a basic cleaning kit (rod, patches, solvent, oil) to clean your barrel if needed, especially if it’s a new rifle or one that hasn’t been shot much. You’ll also need the appropriate tools for your scope adjustments (e.g., small screwdriver, coin, or simply your fingers for finger-adjustable turrets) and potentially a torque wrench for checking scope ring screws.
Before You Start: Pre-Sighting Checks
A little preparation goes a long way. These steps ensure your scope is properly set up and gets you “on paper” before you even fire a round at 100 yards.
Mounting Your Scope Correctly
Proper scope mounting is foundational. If your scope isn’t mounted correctly, you’ll chase your tail trying to sight it in. Here’s what to look for:
- Secure Rings: Ensure the scope rings are tightened to the manufacturer’s specified torque. Too loose, and the scope will shift; too tight, and you can damage the scope tube.
- Level Reticle: Use a scope leveling kit or a simple bubble level to ensure your scope’s vertical crosshair is perfectly plumb with the rifle’s bore. An unlevel reticle will cause horizontal shift at longer distances when adjusting for elevation.
- Proper Eye Relief: Sit behind the rifle in your natural shooting position. Adjust the scope forward or backward in the rings until you have a full, clear field of view without any “black crescent” shadows around the edges. This is your eye relief. Once found, tighten everything down securely.
Eye Relief and Reticle Focus
We just touched on eye relief. It’s critical for comfort and consistency. Next, focus the reticle. Look at a plain, light-colored surface (like the sky or a wall) and adjust your scope’s diopter ring (usually at the eyepiece) until the reticle appears perfectly sharp and black. This adjustment is for your eye, not the target, and prevents eye strain and parallax errors at close range.
Bore Sighting (The First Step)
Bore sighting is a critical step that saves ammunition and frustration. It’s a rough alignment of your scope’s reticle with the rifle’s bore, getting you “on paper” at a closer range so you can make fine adjustments at 100 yards. There are two common methods:
- Magnetic or Laser Bore Sighter: This device inserts into the muzzle or magnetically attaches to it, projecting a laser dot downrange. You then adjust your scope’s reticle to align with that dot.
- Manual Bore Sighting (Bolt Action Rifles): For bolt-action rifles, you can remove the bolt, place the rifle securely on a rest, and look directly down the barrel at a target placed 25-50 yards away. Center the bullseye in the exact middle of the bore. Then, without moving the rifle, look through the scope and adjust its reticle until it’s also centered on the bullseye.
Even after bore sighting, your rifle will rarely be perfectly zeroed. Bore sighting just ensures your first shots will hit the target somewhere, allowing you to begin the actual sighting-in process.
Understanding Your Scope’s Adjustments (Clicks, MOA/MRAD)
Before you start turning turrets, understand how your scope adjusts. Most scopes use either MOA (Minute of Angle) or MRAD (Milliradian) increments. You’ll find this information on your scope’s turrets or in the manual.
- MOA: One MOA is approximately 1.047 inches at 100 yards. Most scopes adjust in 1/4 MOA clicks, meaning each click moves the point of impact about 1/4 inch at 100 yards. Some tactical scopes might be 1/2 or 1/8 MOA per click.
- MRAD: One MRAD (or Mil) is 3.6 inches at 100 yards. Most MRAD scopes adjust in 0.1 MRAD clicks, meaning each click moves the point of impact about 0.36 inches at 100 yards.
Knowing your click value is essential for making precise adjustments when you sight in a rifle scope for 100 yards. For example, if your shots are 2 inches low and your scope adjusts in 1/4 MOA clicks, you’d need to adjust “up” by 8 clicks (2 inches / 0.25 inches/click = 8 clicks).
The Step-by-Step Process to Sight in a Rifle Scope for 100 Yards
Now that your rifle is prepped and you understand your scope, it’s time for the actual shooting and adjusting. Take your time, be patient, and focus on consistency.
Setting Up Your Range
- Safety First: Always follow all range safety rules. Wear eye and ear protection.
- Stable Position: Set up your rifle on a stable shooting bench with a front and rear rest. Your goal is to eliminate as much movement as possible.
- Target Placement: Place your target at 100 yards. If you’re unsure if you’ll hit paper (especially after bore sighting), you can start at 25 or 50 yards to ensure your shots are hitting the target, then move to 100 yards once you’re consistently on paper.
The First Shots (Group Analysis)
Don’t just shoot once and adjust. The goal is to see where your rifle *actually* shoots, not just where one stray bullet lands.
- Load and Aim: Load 3-5 rounds into your magazine. Aim precisely at the center of your target.
- Consistent Technique: Focus on consistent breath control, trigger pull, and follow-through for each shot.
- Shoot a Group: Fire 3-5 shots, aiming at the exact same point for each shot. Take your time between shots to let the barrel cool slightly and maintain focus.
- Analyze the Group: After your group is fired, safely unload your rifle and observe your target. The goal is to determine the center of your group, not just an individual bullet hole. If your group is 4 inches low and 2 inches left, that’s what you need to correct.
Adjusting Your Scope (Windage and Elevation)
This is where you bring your point of impact (where the bullets hit) to your point of aim (where you intended them to hit).
- Measure Deviation: Measure the distance from the center of your group to the center of your aiming point. For instance, you might be 3 inches low and 2 inches left at 100 yards.
- Calculate Clicks: Using your scope’s click value (e.g., 1/4 MOA per click), calculate how many clicks you need.
- Elevation: If 3 inches low at 100 yards with 1/4 MOA clicks: 3 inches / 0.25 inches/click = 12 clicks. Since your shots are low, you need to adjust “UP.”
- Windage: If 2 inches left at 100 yards with 1/4 MOA clicks: 2 inches / 0.25 inches/click = 8 clicks. Since your shots are left, you need to adjust “RIGHT.”
Remember: Most scopes adjust in the direction you want the bullet to move. If shots are low, adjust UP. If shots are left, adjust RIGHT.
- Make Adjustments: Turn your scope’s elevation and windage turrets the calculated number of clicks. Be deliberate and count carefully.
The Walk-Back Method (Refining Your Zero)
After your initial adjustments, don’t expect perfection immediately. The process of how to sight in a rifle scope for 100 yards is iterative.
- Repeat the Process: Fire another 3-5 shot group, aiming at the same point.
- Re-Evaluate: Check your new group. Is it closer to the bullseye? If so, great! Measure the new deviation and make further, smaller adjustments.
- Continue Adjusting: Keep shooting groups and making adjustments until your groups are centered or very close to the bullseye. The goal is for the center of your group to be exactly where your crosshairs are aiming.
Sometimes, after making significant adjustments, it helps to “settle” the scope by lightly tapping the turrets. This ensures the internal mechanisms have moved completely.
Verifying Your Zero
Once you’re satisfied with your adjustments, it’s time for a final verification.
- Clean Barrel (Optional): If you’ve shot many rounds, a quick barrel cleaning might be in order, as a clean barrel can sometimes slightly change your point of impact for the first few shots.
- Final Group: Shoot a fresh 3-5 shot group, taking extra care with your shooting fundamentals.
- Confirm Zero: This group should ideally be centered on your aiming point, indicating that you have successfully learned how to sight in a rifle scope for 100 yards. If it’s still slightly off, make tiny, final adjustments.
Troubleshooting Common Sighting Issues
Even with the best preparation, you might encounter some challenges when you sight in a rifle scope for 100 yards. Here are a few common problems and their solutions.
Inconsistent Groups
If your groups are erratic and spread out, making it hard to find a center point, several factors could be at play:
- Shooter Error: Poor fundamentals (jerking the trigger, inconsistent cheek weld, flinching) are often the culprits. Focus on dry firing practice and slow, deliberate shots.
- Unstable Rest: Ensure your rifle is rock-solid on its rest. Any wobble will lead to inconsistent impacts.
- Ammunition: Inexpensive or inconsistent ammunition can lead to poor groups. Try a different, higher-quality brand or type.
- Loose Components: Check all screws: scope rings, scope base, action screws, and even stock screws. Anything loose will cause flyers.
- Barrel Fouling/Heat: A very dirty barrel or an excessively hot barrel can cause groups to open up. Clean your barrel and allow it to cool between groups.
Running Out of Adjustment
If you’ve adjusted your scope all the way in one direction and still can’t get on target, it usually points to a significant mechanical misalignment.
- Improper Scope Mount: Your scope rings might be misaligned, or the scope base itself might be canted or loose. Re-check the mounting entirely, ensuring everything is level and torqued correctly.
- Damaged Scope: Less common, but possible. If the scope has taken a hard knock, its internal mechanisms might be damaged.
- Incorrect Base/Ring Height: Sometimes, especially with very large objective scopes, the rings might be too high or low, creating an extreme angle that exceeds the scope’s adjustment range.
- Extreme Bore Sighting Error: If your initial bore sighting was way off, it could put you in a situation where you run out of adjustment.
Scope “Creep”
This is when your zero seems to shift after a few shots, even though you haven’t touched the turrets. It’s frustrating because it looks like you’ve forgotten how to sight in a rifle scope for 100 yards, but it’s often a mechanical issue.
- Loose Rings/Base: The most common cause. The recoil causes the scope to shift within the rings or the entire base to move on the receiver. Re-torque everything to spec.
- Faulty Scope: The internal adjustment mechanism of the scope itself might be failing to hold zero. If everything else is rock-solid, the scope might need repair or replacement.
- Barrel Harmonics/Contact: If your barrel is touching the stock at any point other than the receiver, it can negatively affect accuracy and shift your point of impact as the barrel heats up. Check for a free-floating barrel.
Beyond 100 Yards: Maintaining Your Zero
Sighting in your rifle scope for 100 yards is a crucial first step, but maintaining that zero and understanding its limitations is equally important for continued accuracy.
Environmental Factors
Temperature, humidity, and barometric pressure can all affect bullet flight, albeit usually in minor ways at 100 yards. For more precise shooting or longer distances, these factors become more significant. Wind, however, is a major factor even at 100 yards. A slight crosswind can easily push your bullet a few inches off target. Always practice in varying conditions to understand how your rifle and ammunition perform.
Regular Checks
Your rifle’s zero isn’t permanent. Bumps, drops, changes in ammunition, cleaning procedures, or even just repeated firing can cause it to shift. It’s a good practice to verify your zero every time you go to the range, especially before an important hunt or competition. Fire a 3-shot group at 100 yards to ensure everything is still aligned.
Documenting Your Settings
Keep a shooting log! Record the date, ammunition type, environmental conditions, and your scope’s elevation and windage settings. This is incredibly useful if you change ammunition or need to re-zero after a significant event. You can also note down “come-ups” for different distances if your scope has ballistic turrets, allowing you to quickly adjust your zero for 200, 300, or more yards based on your 100-yard zero.
Conclusion
Learning how to sight in a rifle scope for 100 yards is a fundamental skill that every shooter should master. It’s the cornerstone of accurate shooting, instilling confidence in both your equipment and your abilities. While it might seem like a detailed process, breaking it down into manageable steps—from meticulous preparation and bore sighting to thoughtful group analysis and precise adjustments—makes it achievable for anyone.
Remember, patience and consistency are your best friends on the range. Don’t rush the process, focus on solid shooting fundamentals, and always prioritize safety. By following the guidelines in this article, you’ll be well on your way to achieving a consistent, reliable zero at 100 yards, ready for whatever shooting challenges come your way.
Now, go forth, practice, and enjoy the rewarding experience of watching your shots land exactly where you intend. Happy shooting!
Frequently Asked Questions
How often should I re-sight in my rifle scope?
It’s a good practice to re-verify your zero before any important shooting session, like hunting season or a competition. Also, check your zero if you drop your rifle, change ammunition types, or notice any accuracy issues. Environmental changes or prolonged storage can also subtly shift your zero.
Can I sight in my scope at 50 yards instead of 100?
Yes, you can initially sight in at 50 yards to get “on paper” and achieve a basic zero. However, for most rifles, 100 yards provides a more precise zero due to flatter trajectories and finer adjustments. Many ballistic calculators can tell you what your point of impact should be at 100 yards if you zero at 50, but it’s always best to confirm at 100 yards if possible.
What is parallax, and how does it affect sighting in?
Parallax is an optical illusion that makes the reticle appear to shift relative to the target when your eye isn’t perfectly centered behind the scope. If your scope has a parallax adjustment (usually a side knob or objective ring), adjust it until the reticle appears stationary on the target when you subtly move your head. Incorrect parallax can cause significant aiming errors, especially at 100 yards and beyond.
My scope turrets don’t have clear markings for MOA or MRAD; how do I know my click values?
Check your scope’s manual; it will clearly state the click value (e.g., 1/4 MOA, 0.1 MRAD). If you don’t have the manual, you can often find it online by searching your scope’s make and model. As a last resort, you can perform a “tall target test” to empirically determine your click value, but this is more advanced.
What’s the difference between point of aim and point of impact?
Point of aim (POA) is where you place your scope’s crosshairs on the target. Point of impact (POI) is where the bullet actually strikes the target. The goal of sighting in a rifle scope for 100 yards is to make your POA and POI consistently coincide at that specific distance.
Is it better to adjust the scope or aim off-center?
Always adjust your scope. The purpose of a properly sighted scope is so that you can consistently aim at the bullseye and hit the bullseye. “Holding over” or “holding off” (aiming away from the center) should only be done for specific long-range shots or wind correction once a precise zero has been established, not as a substitute for sighting in.