
Sighting a rifle scope is essential for accuracy, whether you’re a hunter or target shooter. This guide walks you through the entire process, from securely mounting your scope and performing initial boresighting to precise live-fire adjustments at the range. By understanding clicks, MOA, and proper technique, you’ll learn how to sight a rifle scope effectively, ensuring your shots hit their mark every time.
How to Sight a Rifle Scope
Ever wondered why your shots aren’t quite hitting where you aim, even with a high-quality rifle and scope? The answer often lies in whether your rifle scope is properly “sighted in,” or “zeroed.” Sighting a rifle scope correctly is one of the most critical steps for any shooter, transforming your firearm from an educated guesser into a precision instrument. It doesn’t matter if you’re chasing the buck of a lifetime, competing for tight groups on paper, or simply enjoying a day at the range; a properly sighted scope is the key to confidence and success.
For many, the process of sighting in a rifle scope might seem a bit daunting at first glance. There are clicks, MOA, Mils, windage, elevation, and a whole host of other terms that can make your head spin. But don’t worry! This comprehensive guide is designed to break down the entire process into easy, manageable steps. Think of me as your personal range buddy, here to share everything you need to know about how to sight a rifle scope with clarity and confidence. We’ll cover everything from the basic gear you’ll need to the nuanced adjustments that turn near misses into bullseyes.
So, grab a coffee, get comfortable, and let’s demystify the art of sighting in a rifle scope. By the end of this article, you’ll have a solid understanding of the techniques, tools, and patience required to achieve pinpoint accuracy. Remember, a well-aimed shot begins with a properly sighted scope, and the satisfaction of watching your bullet strike exactly where you intended is truly unmatched. Let’s get started on your journey to becoming a more accurate shooter!
Key Takeaways
- Safety is Paramount: Always follow fundamental firearm safety rules, including wearing eye and ear protection, and pointing the muzzle in a safe direction.
- Proper Scope Mounting is Crucial: A securely mounted and leveled scope with correct eye relief is the foundation for accurate sighting and consistent performance.
- Boresighting Saves Time and Ammo: Performing an initial boresight, either manually or with a laser, gets your shots “on paper” quickly, reducing the number of live rounds needed.
- Understand Your Scope’s Adjustments: Learn what MOA or Milradian clicks mean for your scope’s windage and elevation turrets to make precise adjustments.
- The “Shoot-Adjust-Shoot” Method Works: Fire a group of shots, calculate the center, adjust the scope, and repeat until your groups are consistently hitting the bullseye at your desired zero distance.
- Patience and Practice are Key: Sighting in takes time and a methodical approach. Don’t rush the process, and practice proper shooting fundamentals for best results.
Quick Answers to Common Questions
How often should I sight in my rifle scope?
You should verify your rifle’s zero before every hunting season or important shooting event. Also, re-sight after any significant impact to the rifle, changing ammunition, or if you suspect your zero has shifted.
What is MOA and how does it relate to scope adjustments?
MOA stands for Minute of Angle, an angular unit of measurement. At 100 yards, 1 MOA is approximately 1 inch. If your scope adjusts in 1/4 MOA clicks, it means each click moves your bullet’s impact point 1/4 inch at 100 yards, 1/2 inch at 200 yards, and so on.
Is boresighting really necessary?
While not strictly necessary for final zeroing, boresighting is highly recommended. It significantly reduces the amount of ammunition needed to get your shots “on paper,” saving you time and money at the range.
Can I sight my scope indoors?
Initial boresighting can be done indoors, but the final, precise zeroing must be done with live ammunition at an outdoor or indoor shooting range where you can shoot at your desired zero distance.
What if my shots are inconsistent even after trying to sight in?
Inconsistent shots often point to issues beyond the scope’s adjustment. Check your shooting fundamentals (stance, grip, trigger control), ensure your scope is mounted securely, and confirm your barrel is clean and not overheating. Ammunition quality can also play a role.
📑 Table of Contents
Understanding the Basics Before You Start
Before we even think about turning screws or pulling triggers, it’s vital to understand what we’re trying to achieve and gather the necessary tools. Think of this as laying the groundwork for a solid house – without it, everything else crumbles. This foundational knowledge will make the entire process of how to sight a rifle scope much smoother.
What is “Sighting In” (Zeroing)?
“Sighting in,” also known as “zeroing,” is the process of adjusting your rifle scope so that the bullet’s point of impact matches your scope’s point of aim at a specific distance. When your rifle is “zeroed” at 100 yards, for example, it means that if you aim precisely at the center of a target 100 yards away, your bullet will theoretically strike the center of that target. This alignment is crucial for consistent accuracy.
Essential Gear You’ll Need
Having the right tools on hand makes a world of difference. Don’t start the process of how to sight a rifle scope without these:
- Your Rifle and Scope: Obvious, but ensure they are clean and in good working order.
- Ammunition: Use the exact ammunition you plan to use for hunting or target shooting. Different loads can impact differently. Bring plenty!
- Shooting Rest or Bipod & Sandbags: A stable shooting platform is absolutely non-negotiable for consistent groups.
- Targets: Paper targets with a clear aiming point (like a bullseye or grid) are ideal.
- Scope Mounting Tools: Torque wrench, appropriate hex keys or screwdrivers for your scope rings and bases.
- Cleaning Kit: A clean barrel is a consistent barrel.
- Spotting Scope or Binoculars: To see your shots on target without constantly walking downrange.
- Eye and Ear Protection: MANDATORY for any live-fire session.
- Pen and Paper: To record your adjustments and shot groups.
Safety First, Always!
I cannot stress this enough: firearm safety is paramount. Before you even think about how to sight a rifle scope, internalize and practice these rules:
- Always treat every firearm as if it were loaded.
- Never point the muzzle at anything you are not willing to destroy.
- Keep your finger off the trigger until your sights are on the target and you are ready to shoot.
- Be sure of your target and what is beyond it.
Follow all range rules, wear your eye and ear protection, and always be aware of your surroundings.
Mounting Your Scope Properly

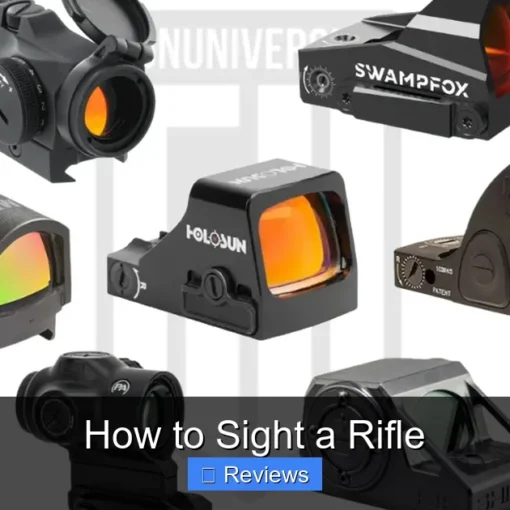
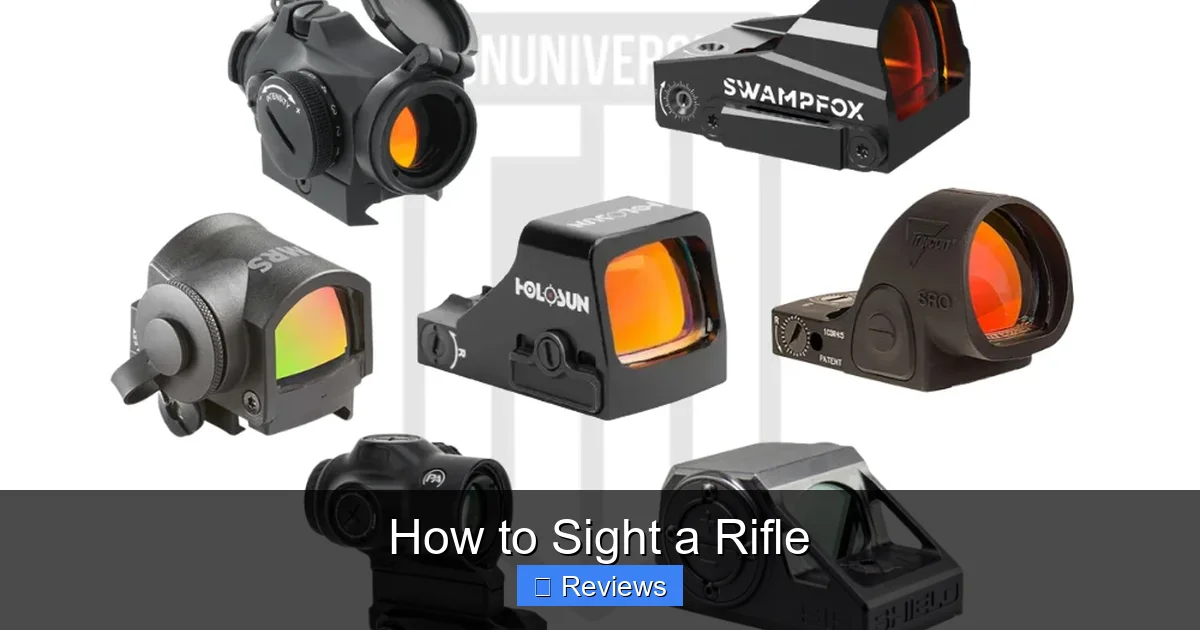
Visual guide about How to Sight a Rifle Scope
Image source: atncorp.com
Before you can even think about how to sight a rifle scope, it needs to be attached to your rifle correctly. A poorly mounted scope will never hold its zero, leading to endless frustration and wasted ammunition. Take your time with this step; it’s the bedrock of accuracy.
Rings and Bases – The Foundation
Your scope rests on rings, which attach to bases, which in turn attach to your rifle receiver.
- Choose Quality: Don’t skimp on rings and bases. They don’t need to be the most expensive, but cheap, flimsy options will cause headaches.
- Install Bases First: Ensure the bases are clean and properly seated on your rifle. Use the recommended torque settings for screws if provided. A dab of threadlocker (like blue Loctite) on the screws can prevent them from loosening from recoil.
Achieving Proper Eye Relief
Eye relief is the distance between your eye and the scope’s ocular lens (the one closest to your eye) where you get a full, clear field of view.
- Shoulder the Rifle: With the rifle shouldered naturally, close your eyes, then open them. Adjust the scope’s position in the rings until you see a full, clear picture without any black rings (vignetting) around the edges.
- Recoil Safety: Ensure there’s enough eye relief (usually 3-4 inches) to prevent the scope from hitting your brow under recoil, especially with powerful calibers. This is often called “scope bite” and it’s not fun!
Leveling the Scope
An un-leveled scope will cause your bullet’s point of impact to shift horizontally when you adjust for elevation, and vice-versa. This is known as “cant” and it makes learning how to sight a rifle scope much harder.
- Use a Leveling Tool: There are various scope leveling kits available that make this process easy.
- The Plumb Bob Method: Hang a plumb bob or a perfectly vertical string with a weight at the bottom a distance away. Align the vertical crosshair of your scope with the string.
- Ensure Parallelism: Make sure your rifle is level in its rest before leveling the scope.
Tightening Everything Up
Once eye relief and level are set, carefully tighten the scope rings.
- Alternating Screws: Tighten the screws on each ring alternately and incrementally, just like tightening lug nuts on a car tire. This ensures even pressure.
- Torque Settings: Always use a torque wrench set to the manufacturer’s recommended specifications (for rings and bases). Overtightening can damage your scope tube; undertightening can cause the scope to shift under recoil.
The Initial Setup – Boresighting
Boresighting is a crucial step in how to sight a rifle scope because it gets your first shots “on paper” at a close distance without wasting a lot of ammunition. It’s an approximation, not a precise zero, but it’s incredibly helpful.
What is Boresighting? Why Bother?
Boresighting roughly aligns your scope’s crosshairs with the rifle’s bore (the inside of the barrel). This ensures that your first shots at the range will at least hit the target, allowing you to make finite adjustments. Without boresighting, your first shots could miss the entire target board, leaving you frustrated and confused.
Manual Boresighting (Bolt-Action Method)
This method is simple and effective for many rifles, especially bolt-actions.
- Safety First: Ensure the rifle is unloaded and pointed in a safe direction. Remove the bolt from a bolt-action rifle.
- Secure the Rifle: Place the rifle securely in a stable rest or vise.
- Look Through the Bore: Look through the barrel (from the chamber end) at a target about 25 yards away. Center the bullseye of the target exactly in the middle of the bore.
- Adjust the Scope: Without moving the rifle, look through the scope. Using the scope’s windage (left/right) and elevation (up/down) adjustment turrets, move the crosshairs until they are centered on the same point you saw through the bore.
- Double-Check: Go back and forth between looking through the bore and the scope to ensure alignment.
Laser Boresighting (Pros and Cons)
Laser boresighters project a laser dot down the barrel, making the process very quick.
- Arbor Boresighters: These fit into the muzzle.
- Chamber Boresighters: These are shaped like a cartridge and fit into the chamber.
- Pros: Quick, convenient, can be done indoors or without disassembling the rifle (for chamber types).
- Cons: Not as precise as manual boresighting in some cases, batteries can die, can be expensive. Always verify with live fire.
Setting Windage and Elevation
Your scope has two primary adjustment turrets:
- Elevation Turret: Usually on top, adjusts the vertical (up/down) position of your point of impact.
- Windage Turret: Usually on the right side, adjusts the horizontal (left/right) position of your point of impact.
Most scopes have caps covering these turrets. Remove them. You’ll hear distinct “clicks” as you turn them. We’ll delve into what these clicks mean in the next section. For boresighting, just get the crosshairs close to the bore’s view or the laser dot.
Heading to the Range – The Live Fire Process
This is where the rubber meets the road! With your scope mounted and boresighted, it’s time to refine your zero with live ammunition. This is the heart of how to sight a rifle scope accurately.
Choosing Your Distance
Start close, then move out.
- Initial “Getting on Paper” Distance (25 yards): Even after boresighting, your first shots might be off. Starting at 25 yards ensures you hit the target and can see where your bullet is impacting.
- Desired Zero Distance (e.g., 100 yards): Once you’re consistently hitting the bullseye at 25 yards, move to your primary zero distance (often 100 yards for many rifles and cartridges).
The First Shots – Getting on Paper
Set up your target at 25 yards. Load a single round and fire.
- Fire a Single Shot: Aim carefully at the center of the target.
- Observe Impact: Using your spotting scope, note where the bullet hit.
- Adjust: If you missed the paper entirely, try another shot. If you’re on paper but far off, make a rough adjustment using your turrets.
- Group, Then Adjust: Once you’re consistently hitting the paper, fire a group of three shots, aiming precisely at the center each time. A three-shot group gives you a better idea of your rifle’s true point of impact.
- Find the Center: Identify the center of your group.
Adjusting Your Scope: Clicks, MOA, and Mils Explained
This is where understanding your scope’s adjustments becomes crucial for how to sight a rifle scope with precision.
- MOA (Minute of Angle): A Minute of Angle is an angular measurement. Roughly, 1 MOA spreads out to 1 inch at 100 yards, 2 inches at 200 yards, and so on. Most hunting scopes adjust in 1/4 MOA or 1/2 MOA clicks.
- If your scope is 1/4 MOA per click, then 4 clicks move your point of impact 1 inch at 100 yards.
- At 25 yards, 1/4 MOA is about 1/4 inch. So, 4 clicks would move your impact 1/4 inch * 4 = 1 inch at 25 yards.
- Mil (Milliradian): Mils are another angular measurement, commonly used in tactical scopes. 1 Mil equals 3.6 inches at 100 yards. Most Mil scopes adjust in 0.1 Mil increments.
- If your scope is 0.1 Mil per click, then 10 clicks move your point of impact 1 Mil (3.6 inches) at 100 yards.
- At 25 yards, 0.1 Mil is about 0.09 inches (or roughly 1/10th of an inch). So, 10 clicks would move your impact 0.9 inches at 25 yards.
Rule of Thumb for Adjusting: Move your point of impact towards where the bullet actually hit. If your group is 2 inches low and 1 inch left at 100 yards with a 1/4 MOA scope:
- Elevation: Your shots are low, so you need to move the point of impact UP. Turn the elevation turret in the “UP” direction (usually counter-clockwise). You need to move 2 inches, so 2 inches / (1/4 inch per click) = 8 clicks UP.
- Windage: Your shots are left, so you need to move the point of impact RIGHT. Turn the windage turret in the “R” (Right) direction (usually clockwise). You need to move 1 inch, so 1 inch / (1/4 inch per click) = 4 clicks RIGHT.
Always check your scope’s manual for specific click values and direction of adjustment markings (UP, R).
The “Shoot-Adjust-Shoot” Method (Grouping)
This is the most effective way to zero your scope:
- Shoot a Group: Fire a tight group of 3-5 shots, aiming consistently at the center of the target.
- Analyze the Group: Identify the center of this group. Measure how far and in what direction it is from your aiming point.
- Make Adjustments: Using your scope’s click values (MOA or Mil), adjust your windage and elevation turrets to move the point of impact precisely to your aiming point.
- Shoot Another Group: Fire another group of 3-5 shots.
- Repeat: Continue this process until your groups are consistently centered on the bullseye.
Patience is key here. Don’t chase individual shots; always adjust based on the center of a group.
Fine-Tuning at Your Desired Zero Distance
Once you’re centered at 25 yards, move your target out to your intended zero distance (e.g., 100 yards). Repeat the “shoot-adjust-shoot” method until your groups are consistently hitting the bullseye at this distance. Once achieved, congratulations! You have successfully learned how to sight a rifle scope.
Advanced Tips and Common Mistakes
Achieving a perfect zero is fantastic, but there’s always more to learn and common pitfalls to avoid. These tips will help you maintain accuracy and prevent future frustrations when you next learn how to sight a rifle scope.
Confirming Your Zero at Different Distances
Your rifle will be “zeroed” at one specific distance (e.g., 100 yards). Due to bullet drop, it won’t hit the exact same spot at 50, 150, or 200 yards.
- Develop a Ballistic Table: Once zeroed, shoot groups at various distances (e.g., 50, 75, 150, 200 yards) and record how high or low your bullet impacts. This creates a “dope card” for your specific rifle and ammunition.
- Holdovers/Hold-unders: You can then use this data to “hold over” (aim high) or “hold under” (aim low) at different ranges without adjusting your turrets.
Parallax Adjustment
Many higher-end scopes have a parallax adjustment knob, usually on the side or as part of the objective lens.
- What is Parallax? It’s the apparent shift of the reticle relative to the target when you move your eye slightly off-center from the scope’s optical axis. It can cause aiming errors.
- How to Adjust: Look through the scope and move your head slightly. If the crosshairs appear to move against the target, adjust the parallax knob until the reticle appears stationary relative to the target. Adjust for the distance you are shooting.
Understanding Ballistics
The trajectory of your bullet isn’t a straight line. Gravity pulls it down, and wind pushes it sideways. Understanding basic external ballistics will help you make more educated shots, especially at longer ranges. Ballistic calculators (apps or online tools) can predict bullet drop and wind drift for your specific ammunition and conditions.
Common Mistakes to Avoid
Even after understanding how to sight a rifle scope, these errors can throw off your zero:
- Inconsistent Shooting Form: If you’re not holding the rifle consistently or jerking the trigger, your groups will be erratic, making it impossible to adjust accurately. Practice good fundamentals.
- Rushing the Process: Sighting in takes time. Don’t try to rush it. Each adjustment should be deliberate and based on clear data from a group.
- Chasing Individual Shots: Never adjust your scope based on a single shot. Always fire a group and adjust to the center of that group.
- Improper Scope Mounting: As discussed, a loose or un-leveled scope will lead to endless frustration.
- Forgetting to Torque: Always use a torque wrench to ensure screws are tight but not overtightened.
- Ignoring Barrel Heat: A hot barrel can cause shots to “walk” or spread out. Allow your barrel to cool between groups.
- Using Different Ammunition: If you zero with one type of ammo and then switch to another, expect your point of impact to shift.
Conclusion
Congratulations! You’ve navigated the ins and outs of how to sight a rifle scope, from the very first screw to the final, precise adjustment. This isn’t just a technical skill; it’s an art that combines patience, precision, and a deep understanding of your equipment. A properly sighted rifle scope is more than just an accessory; it’s a direct extension of your intent, ensuring that when you aim, your bullet goes exactly where you want it to.
Remember, the goal isn’t just to put holes in paper, but to achieve consistent accuracy that builds confidence and maximizes your ethical shooting potential, whether in the field or on the range. The process requires a methodical approach, attention to detail, and a commitment to safety above all else. Don’t be discouraged if your first attempts aren’t perfect; like any skill, sighting in improves with practice and experience.
Take these lessons, head to the range, and apply what you’ve learned. You’ll soon discover the immense satisfaction that comes from making precise, ethical shots every single time. Happy shooting, and may your aim always be true!
Frequently Asked Questions
What’s the ideal distance to zero a rifle scope?
The ideal zero distance depends on your rifle, caliber, and intended use. For most hunting rifles and common calibers, a 100-yard zero is very popular as it offers a good balance for typical hunting ranges and allows for easier calculation of bullet drop at longer distances. However, some prefer 50 yards for shorter ranges or 200 yards for flatter-shooting cartridges.
How do I know which way to turn the adjustment turrets?
Most scope turrets are clearly marked with “UP” and “R” (Right) arrows. To move your point of impact UP, turn the elevation turret in the direction of the “UP” arrow. To move your point of impact RIGHT, turn the windage turret in the direction of the “R” arrow. Remember: adjust the scope’s crosshairs towards where the bullet actually hit the target.
What is “scope bite” and how can I prevent it?
“Scope bite” is when the scope’s ocular lens strikes your forehead during recoil. It’s painful and potentially dangerous. You can prevent it by ensuring proper eye relief when mounting the scope. Make sure there’s enough space (typically 3-4 inches) between your eye and the scope’s rear lens when the rifle is shouldered naturally.
Should I clean my barrel before sighting in?
Yes, it’s generally a good practice to clean your barrel thoroughly before you begin the sighting-in process. A clean barrel provides the most consistent baseline for accuracy. However, be aware that the first few “fouling shots” after cleaning can sometimes impact slightly differently as the bore settles.
Can different ammunition types affect my rifle’s zero?
Absolutely. Different ammunition brands, bullet weights, and bullet types will almost certainly have a different point of impact, even if they’re the same caliber. Always sight in your rifle with the specific ammunition you intend to use for hunting or serious target shooting.
My scope won’t adjust anymore, what’s wrong?
If your scope turrets stop adjusting, check a few things. First, ensure you haven’t reached the full extent of the scope’s internal adjustment range; some scopes have limited travel. Also, confirm the turret caps are removed and the turrets aren’t seized. If it’s a new issue, it might indicate a mechanical problem with the scope itself, possibly requiring professional service.

