Sighting a rifle is an essential skill for any shooter, ensuring your shots hit where you aim. This guide will walk you through the fundamental steps, from setting up your gear safely to making precise scope adjustments. By understanding the process and practicing good shooting fundamentals, you’ll achieve remarkable accuracy and confidence with your firearm.
Welcome, fellow firearm enthusiast! Whether you’re a seasoned hunter, a competitive shooter, or simply enjoy a day at the range, knowing how to sight a rifle correctly is perhaps one of the most critical skills you can master. It’s the art and science of ensuring your rifle’s point of aim perfectly matches its point of impact at a given distance. Without a properly sighted rifle, even the most expensive firearm or the steadiest hand will struggle to hit the mark.
Imagine aiming squarely at a target, pulling the trigger, and consistently missing by several inches – or even feet! Frustrating, right? That’s what happens when your rifle isn’t sighted in. This comprehensive guide is designed to demystify the process of how to sight a rifle, breaking it down into easy-to-understand steps. We’ll cover everything from getting your gear ready to making those precise adjustments that bring your shots right on target. So, grab a cup of coffee, get comfortable, and let’s learn how to achieve pinpoint accuracy together.
Why Sighting Your Rifle is So Important
The core purpose of sighting a rifle is to calibrate your aiming device (be it an optic or iron sights) with the bullet’s actual trajectory. When you look through your scope and place the crosshairs on a target, you want to be confident that the bullet will land exactly where those crosshairs rest at your chosen distance. This calibration is called “zeroing” your rifle. A properly zeroed rifle translates directly to consistent hits, ethical hunting, and maximum enjoyment from your shooting experience. It’s about building confidence in your equipment and your abilities.
Key Takeaways
- Safety is Paramount: Always follow fundamental firearm safety rules, including eye and ear protection, before, during, and after the sighting process.
- Gather Essential Gear: You’ll need a stable shooting rest, appropriate targets, ammunition, and the right tools for your optic adjustments to begin.
- Understand Your Optics: Familiarize yourself with your scope’s adjustments (MOA/MRAD) and how they relate to point of impact changes on your target.
- Start Close, Then Extend: Begin by bore sighting or shooting at a very close range (25 yards) to get “on paper,” then move to your desired zeroing distance (e.g., 100 yards).
- Shoot Consistent Groups: Fire several shots (3-5 per group) to identify your rifle’s average point of impact, which is crucial for accurate adjustments.
- Adjust Incrementally: Make small, calculated adjustments to your scope’s windage and elevation turrets based on where your groups are hitting relative to your aim point.
- Practice and Verify: Sighting is an ongoing process. Regularly verify your zero and practice your shooting fundamentals to maintain accuracy over time.
Quick Answers to Common Questions
What does “sighting a rifle” mean?
Sighting a rifle, also known as “zeroing,” means adjusting your scope or iron sights so that the point where you aim (reticle) aligns precisely with where the bullet impacts the target at a specific distance.
How much ammunition do I need to sight a rifle?
It’s advisable to bring at least 20-40 rounds of the exact ammunition you plan to use. If you’re starting from scratch or are new to the process, having 50-60 rounds provides a comfortable buffer.
What is the best distance to sight a rifle?
The best zeroing distance depends on your rifle’s caliber and intended use. Common distances are 100 yards for most centerfire rifles, 50 yards for rimfire, or 200 yards for longer-range shooting. Many prefer a 100-yard zero for versatility.
What is bore sighting, and do I need it?
Bore sighting is an initial alignment of your scope with the rifle’s barrel, usually done with a laser or by visually looking down the bore. While not a perfect zero, it’s highly recommended as it gets your first shots “on paper,” saving you time and ammunition.
My shots are hitting low and left. Which way do I adjust my scope?
To move your point of impact up, adjust your elevation turret in the “UP” direction. To move your point of impact right, adjust your windage turret in the “R” (Right) direction. Always adjust the scope in the direction you want the bullet to move.
📑 Table of Contents
1. Safety First: The Golden Rule of Shooting
Before we even think about setting up targets or touching ammunition, we absolutely must talk about safety. This isn’t just a suggestion; it’s a non-negotiable requirement for anyone handling firearms. Prioritizing safety will protect you, those around you, and your equipment.
Essential Safety Precautions
- Always Treat Every Firearm as if it Were Loaded: This is the cardinal rule. Never assume a gun is unloaded.
- Always Keep the Muzzle Pointed in a Safe Direction: A “safe direction” means a direction where an accidental discharge would cause no injury or damage. Never point it at anything you are not willing to destroy.
- Always Keep Your Finger Off the Trigger Until Ready to Shoot: Your finger should remain outside the trigger guard until your sights are on the target and you are ready to fire.
- Always Be Sure of Your Target and What is Beyond It: Confirm your target, and understand the backdrop. Never shoot blindly.
- Use Eye and Ear Protection: Shooting ranges are loud, and spent casings or bullet fragments can cause injury. Always wear appropriate eye protection (shooting glasses) and hearing protection (earmuffs or earplugs).
- Understand Your Firearm: Know how to safely load, unload, and operate your specific rifle. If you’re unsure, consult the owner’s manual or seek professional instruction.
Seriously, take these rules to heart. They are the foundation of responsible shooting.
2. Gathering Your Essential Gear
Preparation is key when you want to sight a rifle effectively. Having all your necessary tools and equipment ready before you head to the range will save you time, frustration, and ensure a smooth process.
What You’ll Need
- Your Rifle and Optic: Of course! Make sure your scope is securely mounted according to the manufacturer’s instructions. Loose mounts are a primary cause of inaccurate shooting.
- Ammunition: Bring plenty of the *exact same type* of ammunition you intend to use for hunting or target shooting. Different brands, bullet weights, or types can have drastically different points of impact. Bring at least 20-40 rounds, possibly more if you’re new to the process or starting from scratch.
- Stable Shooting Rest: This is crucial. A solid bench rest, sandbags, or a bipod will help eliminate shooter error and allow you to accurately assess where your rifle is actually shooting. Consistency is key here.
- Targets: High-contrast targets with a clear aiming point are best. Bullseye targets are popular, but anything with a defined center will work. Paper targets are generally preferred for sighting in.
- Tools for Scope Adjustment: Many scopes come with finger-adjustable turrets, but some might require a flathead screwdriver, a coin, or an Allen wrench. Check your scope’s manual.
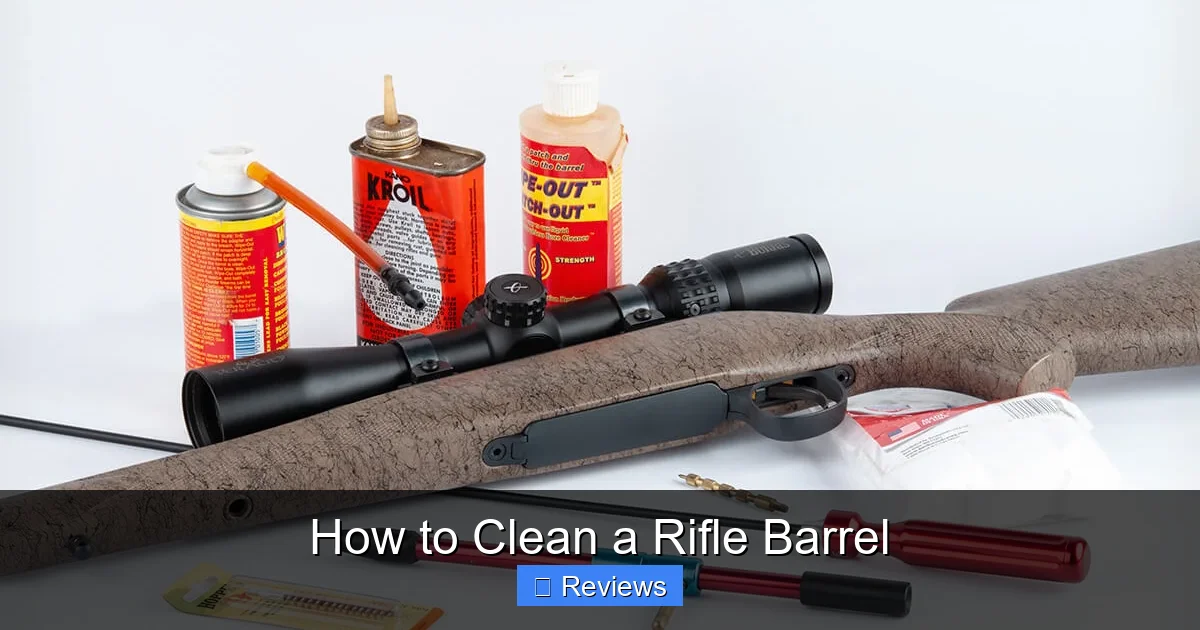
- Cleaning Kit: A clean barrel is a happy barrel. A basic cleaning kit can help maintain accuracy throughout your session, especially if you’re firing many rounds.
- Spotting Scope or Binoculars: Unless you’re shooting at very close range, a spotting scope or good binoculars will save you countless trips downrange to check your shots.
- Pen and Paper: To record your adjustments and shot groups. This documentation is invaluable for learning and troubleshooting.
3. Understanding Your Optics and Ballistics
Before you start turning turrets, it’s vital to understand how your scope works and some basic ballistic principles. This knowledge empowers you to make educated adjustments.
Magnification and Reticles
Your scope’s magnification helps you see the target clearer, but don’t automatically crank it up to max. For initial sighting at 25 or 50 yards, a lower magnification (e.g., 6-9x) might be easier to manage, allowing for a wider field of view. The reticle (crosshairs) is your aiming point. Different reticles have different features (simple crosshairs, mil-dots, BDC reticles), but for sighting, you’re primarily concerned with the central aiming point.
MOA and MRAD: The Language of Adjustments
Most rifle scopes adjust in either Minutes of Angle (MOA) or Milliradians (MRAD, often called “Mils”).
- MOA: One MOA subtends approximately 1.047 inches at 100 yards. For practical purposes, we often round it to 1 inch at 100 yards. This means if your scope adjusts in 1/4 MOA clicks, each click will move your point of impact 1/4 inch at 100 yards. At 50 yards, a 1/4 MOA click moves it 1/8 inch, and at 200 yards, it moves it 1/2 inch. The adjustment value scales with distance.
- MRAD/Mils: One MRAD subtends exactly 3.6 inches at 100 yards. If your scope adjusts in 0.1 MRAD clicks, each click will move your point of impact 0.36 inches at 100 yards. Like MOA, this value scales with distance.
Knowing your scope’s adjustment type and click value is absolutely crucial. Check your scope’s manual or the markings on the turrets.
Zeroing Distance
The “zeroing distance” is the distance at which your bullet crosses your line of sight. Common zeroing distances for rifles are 100 yards (for many centerfire rifles), 50 yards (for rimfire or certain carbines), or even 200 yards for long-range setups. Your choice depends on your primary use for the rifle. For instance, a 100-yard zero is a great all-around choice for many hunting rifles, as it offers a manageable trajectory for common game distances.
4. The Sighting-In Process: Step-by-Step Accuracy
Now for the fun part! This is where you actually learn how to sight a rifle and get it hitting where you want. We’ll start with the initial setup and move through the firing and adjustment phases.
Step 4.1: Initial Setup – Bore Sighting (Highly Recommended)
Bore sighting is a fantastic way to get your rifle “on paper” quickly, saving you time and ammunition. It aligns the scope’s reticle with the rifle’s bore (the inside of the barrel).
There are two common methods:
- Laser Bore Sighter: This is the easiest. A small laser device is inserted into the muzzle or chamber, projecting a laser dot onto your target. You then adjust your scope’s crosshairs to align with that laser dot. Simple and effective.
- Manual Bore Sighting (Bolt-Action Rifles): With the rifle unloaded and safely secured, remove the bolt. Look through the bore from the chamber end and center a distant object (like your target’s bullseye) in the barrel. Without moving the rifle, look through the scope and adjust its crosshairs to align with that same object.
Bore sighting won’t perfectly zero your rifle, but it should get you very close, meaning your first shots will likely hit the target at 25 yards.
Step 4.2: Setting Up at the Range and Firing Your First Group
Head to the shooting range and set up your target at a short distance first. For initial sighting, 25 yards is often ideal. It’s close enough that even a rifle significantly off will still hit the paper. Secure your rifle firmly on your shooting rest. Remember your eye and ear protection!
Visual guide about How to Sight a Rifle
Image source: 5.imimg.com
Load your rifle (just one round initially if you’re very unsure, otherwise 3-5 rounds for a group). Aim carefully at the center of your target. Focus on good shooting fundamentals:
- Breathing: Take a deep breath, exhale half, hold your breath while you shoot.
- Sight Picture: Ensure your reticle is perfectly aligned with your target’s aim point.
- Trigger Control: Apply slow, steady pressure to the trigger, “squeezing” it until the shot breaks, rather than jerking it.
- Follow Through: Maintain your aim and grip briefly after the shot.
Fire 3 shots, aiming at the exact same point each time. This creates a “group.” Do not adjust your aim after each shot. The goal is to see where the rifle *actually* shoots.
Step 4.3: Analyzing Your Group and Making Adjustments
After firing your 3-shot group, safely unload your rifle and make it clear. Use your spotting scope or binoculars to examine the target.
- Find the Center of Your Group: Mentally (or physically, by drawing a small circle) find the average center of your 3-shot group.
- Measure the Distance: Measure how far the center of your group is from your original aim point (the bullseye), both horizontally (left/right – windage) and vertically (up/down – elevation).
- Calculate Adjustments: This is where your MOA/MRAD knowledge comes in. Let’s say you’re zeroing at 25 yards with a 1/4 MOA scope.
- At 100 yards, 1 MOA = 1 inch.
- At 25 yards, 1 MOA = 0.25 inches (1/4 of an inch).
- So, if your scope clicks are 1/4 MOA, each click moves your impact 1/16th of an inch at 25 yards (0.25 inches / 4 clicks = 0.0625 inches per click).
Let’s say your group is 1 inch low and 0.5 inches left of the bullseye at 25 yards.
To move the impact up 1 inch: You need 4 MOA of adjustment (1 inch / 0.25 inches per MOA). Since each click is 1/4 MOA, you’ll need 16 clicks up (4 MOA * 4 clicks/MOA).
To move the impact right 0.5 inches: You need 2 MOA of adjustment (0.5 inches / 0.25 inches per MOA). Since each click is 1/4 MOA, you’ll need 8 clicks right (2 MOA * 4 clicks/MOA). - Adjust Your Turrets: Most scopes have “UP” and “R” (Right) arrows on their turrets. Turn the elevation turret “UP” for the calculated number of clicks. Turn the windage turret “R” for the calculated number of clicks. (Always turn the adjustment *towards* where you want the bullet to hit).
Step 4.4: Repeat and Refine at Your Desired Zero Distance
Once you’ve made your initial adjustments, fire another 3-shot group at 25 yards. You should see your group move much closer to the bullseye. Repeat the measure, calculate, and adjust process until you are consistently hitting the bullseye at 25 yards.
Now, move your target out to your desired zeroing distance (e.g., 100 yards). Fire another 3-shot group. Again, find the center of your group and measure its deviation from the bullseye. This time, remember that your MOA/MRAD click values correspond directly to their stated values at 100 yards (e.g., 1/4 MOA click moves impact 1/4 inch at 100 yards).
Continue this process of firing groups and making adjustments until your 3-shot groups are consistently centered on your target at your chosen zeroing distance. A good zero means your groups are consistently hitting the bullseye.
Pro Tip: Once you’re happy with your zero, consider “resetting” your turrets. Many scopes allow you to loosen the turret cap and re-index it to “0,” so you know your current zero is at “0” on both windage and elevation. This is very useful for making future adjustments in the field.
5. Refining Your Technique and Advanced Tips
Sighting a rifle isn’t just about turning dials; it’s also about consistent shooting technique. Even with a perfectly zeroed rifle, poor fundamentals will lead to inaccurate shots.
Consistent Shooting Fundamentals
- Stable Position: Always strive for the most stable shooting platform possible. Your body should be relaxed but solid.
- Natural Point of Aim: Allow your body to naturally settle on the target without muscular tension. If you have to strain to hold the rifle on target, you’ll fight yourself and introduce wobble.
- Breathing Control: Master your breath hold during the shot.
- Trigger Control: A smooth, consistent trigger press is critical to avoid jerking the rifle off target.
- Follow Through: Continue to hold the rifle steady and maintain your sight picture for a moment after the shot. This helps you recover from recoil and observe where your shot went.
Advanced Tips for Enhanced Accuracy
- Shoot More Groups: Don’t just rely on one good 3-shot group. Fire multiple groups (e.g., two 3-shot groups, or a single 5-shot group) to confirm your zero. The more data points you have, the more confident you can be in your adjustments.
- Different Distances: Once you have a good zero at your primary distance, experiment at other ranges. Knowing your bullet’s trajectory at 25, 50, 150, and 200 yards will make you a much more versatile shooter. Note that depending on your zero, a bullet might hit slightly high at an intermediate distance.
- Environmental Factors: Wind, temperature, and humidity can all affect bullet trajectory. While you can’t control them, understanding their impact is key for precision shooting. For basic sighting, aim for calm conditions.
- Record Your Data: Keep a logbook with details like rifle, optic, ammo type, zeroing distance, weather conditions, and exact adjustments made. This is invaluable over time.
- Clean Your Rifle: A dirty barrel can cause flyers and inconsistent groups. Clean your rifle thoroughly after your sighting session, and periodically during extended shooting.
- Let the Barrel Cool: Rapid firing can heat up your barrel, causing it to expand and sometimes leading to “walking” groups. Give your barrel time to cool between groups, especially if you’re using a thin-profile barrel.
Conclusion: The Path to Precision
Learning how to sight a rifle is a fundamental step in becoming a proficient and responsible shooter. It’s a skill that builds confidence, enhances your safety, and maximizes your enjoyment of firearms. While it might seem daunting at first, breaking it down into manageable steps – from ensuring safety and gathering your gear to understanding your optics and making precise adjustments – makes the process straightforward and rewarding.
Remember, practice makes perfect. The more you work with your rifle and scope, the more intuitive the sighting process will become. Don’t be afraid to take your time, make small adjustments, and focus on consistent shooting fundamentals. With patience and persistence, you’ll be consistently hitting your targets with pinpoint accuracy, turning every trip to the range or the field into a successful and satisfying experience. Happy shooting!
🎥 Related Video: Discovery LHD3-12 #rifle #hunting #rifleshooting #scope #sight #sigh #discovery
📺 Discovery Optics Official Channel
Frequently Asked Questions
How often should I check my rifle’s zero?
You should check your rifle’s zero before every hunting season or critical shooting event. Also, re-check it if you drop your rifle, change ammunition types, modify your scope/mounts, or experience significant temperature or altitude changes, as these factors can affect your point of impact.
Can I sight a rifle without a special shooting bench?
While a dedicated shooting bench and bags offer the best stability, you can effectively sight a rifle using a sturdy table and improvised rests like backpacks, sandbags, or a bipod. The key is to create as stable and consistent a platform as possible to minimize shooter error.
What’s the difference between MOA and MRAD adjustments?
MOA (Minute of Angle) and MRAD (Milliradian) are both angular units of measurement used for scope adjustments. MOA is roughly 1 inch per 100 yards, while MRAD is 3.6 inches per 100 yards. They are simply different units for the same purpose, so stick with whichever unit your scope uses for consistent adjustments.
My groups are inconsistent, even after adjusting. What could be wrong?
Inconsistent groups could stem from several issues: inconsistent shooting fundamentals (breathing, trigger control), loose scope mounts, an inconsistent ammunition batch, a dirty barrel, or even a loose rifle component. Review your technique and systematically check your equipment, starting with the most common culprits like scope mounts.
Should I clean my rifle before sighting it in?
Yes, it’s generally a good idea to clean your rifle thoroughly before sighting it in. A clean bore ensures consistent performance, as fouling can sometimes cause initial shots to deviate. However, be aware that the first few “fouling shots” after a cleaning might group slightly differently until the bore settles.
Can I sight a rifle with iron sights instead of a scope?
Absolutely! The principles of sighting remain the same whether you’re using a scope or iron sights. You’ll still adjust your sights (front or rear, depending on the firearm) to move the point of impact to match your point of aim, usually by moving the rear sight in the direction you want the bullet to go.