Mastering how to put a sling on a rifle is a fundamental skill for any firearm owner, significantly enhancing safety, comfort, and usability. This comprehensive guide walks you through selecting the right sling, understanding attachment hardware, and provides detailed instructions for installing various sling types, ensuring you can confidently and securely carry your rifle.
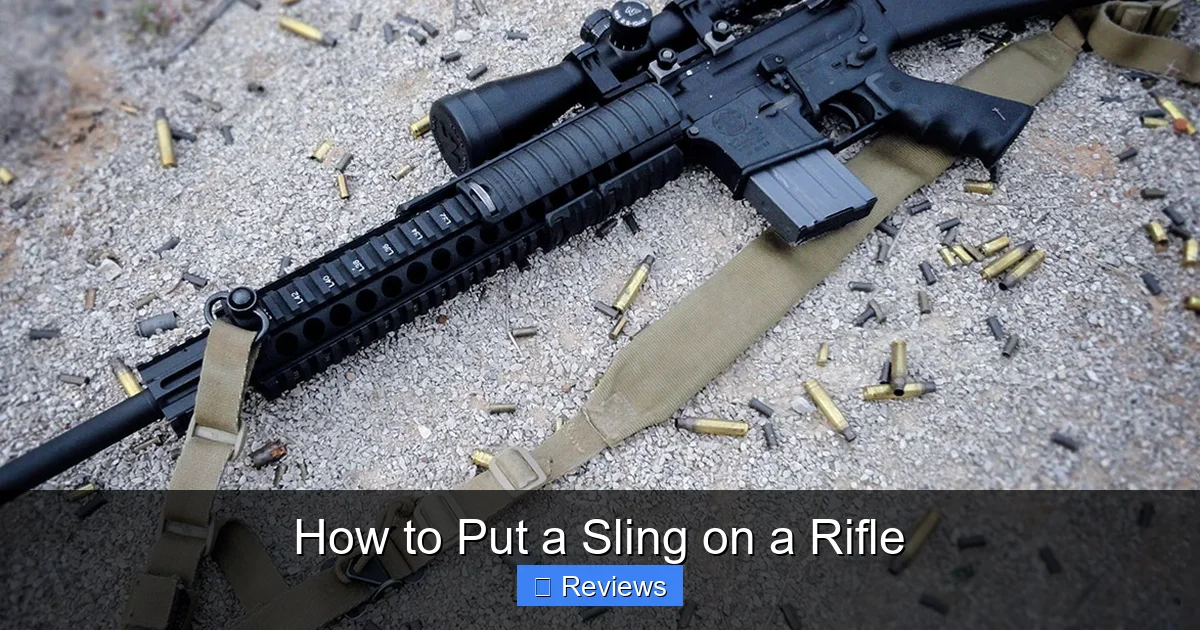
How to Put a Sling on a Rifle
Hey there, fellow firearm enthusiast! Ever wondered how to put a sling on a rifle and why it’s such a big deal? Well, you’re in the right place. A rifle sling isn’t just a fancy accessory; it’s a critical piece of equipment that makes a world of difference in how you carry, handle, and even shoot your firearm. Think of it as your rifle’s best friend – providing support, security, and convenience when you’re out in the field, at the range, or even just moving your rifle around.
Whether you’re a seasoned hunter, a sport shooter, or someone who simply owns a rifle for home defense, understanding how to properly attach and adjust a sling is an essential skill. It enhances safety by preventing accidental drops, frees up your hands when you need them most, and can even improve your shooting stability. But with so many types of slings and attachment methods out there, getting started can feel a bit overwhelming. Don’t worry, we’re here to break it all down for you. This comprehensive guide will walk you through everything you need to know about how to put a sling on a rifle, making the process simple, straightforward, and stress-free.
Key Takeaways
- Safety First: Always ensure your rifle is unloaded and pointed in a safe direction before you begin any sling installation or adjustment.
- Choose the Right Sling: Understand the differences between one-point, two-point, and three-point slings to select the best option for your specific rifle and intended use.
- Identify Attachment Points: Familiarize yourself with your rifle’s sling swivel studs, M-LOK, KeyMod, or QD (Quick Detach) sockets, as these determine the hardware you’ll need.
- Select Proper Hardware: Match your sling’s attachment mechanisms (e.g., traditional swivels, QD mounts, HK-style hooks) to your rifle’s compatible attachment points for a secure fit.
- Step-by-Step Installation: Follow clear instructions for attaching each type of sling, paying close attention to orientation and ensuring all connections are firmly secured.
- Adjust for Comfort and Function: Properly adjust your sling’s length and position for comfortable carrying, quick deployment, and stable shooting support.
- Regular Inspection: Periodically check your sling and its attachments for wear, looseness, or damage to maintain safety and reliability.
Quick Answers to Common Questions
Can I put any type of sling on any rifle?
Not necessarily. While some slings are versatile, you need to ensure the sling’s attachment hardware (like swivels or hooks) is compatible with your rifle’s attachment points (studs, QD sockets, M-LOK slots). Always check compatibility before purchasing.
How tight should a rifle sling be?
For carrying, a sling should be tight enough to hold the rifle securely against your body without excessive swinging, but loose enough to allow you to easily bring the rifle to a shooting position. When used for shooting support, it can be cinched tighter to create tension for stability.
What are QD swivels, and why are they popular?
QD (Quick Detach) swivels are spring-loaded attachment points that lock into specific QD sockets on your rifle. They are popular because they allow for very rapid and tool-free attachment and removal of the sling, offering convenience and versatility.
Can a sling help with shooting accuracy?
Yes, a properly adjusted two-point sling can significantly improve shooting accuracy, especially when shooting unsupported. By creating tension between your body and the rifle, it helps to steady the firearm and reduce natural sway, acting as a brace.
Is it safe to leave a sling attached to my rifle all the time?
Yes, it is generally safe to leave a sling attached to your rifle. However, you should periodically inspect the sling and its attachment points for wear, damage, or looseness, especially before use, to ensure continued safety and reliability.
📑 Table of Contents
Understanding Rifle Slings: Types and Their Uses
Before we dive into the nitty-gritty of how to put a sling on a rifle, let’s talk about the different kinds of slings you might encounter. Each type offers unique advantages, and knowing the differences will help you choose the best one for your rifle and your specific needs.
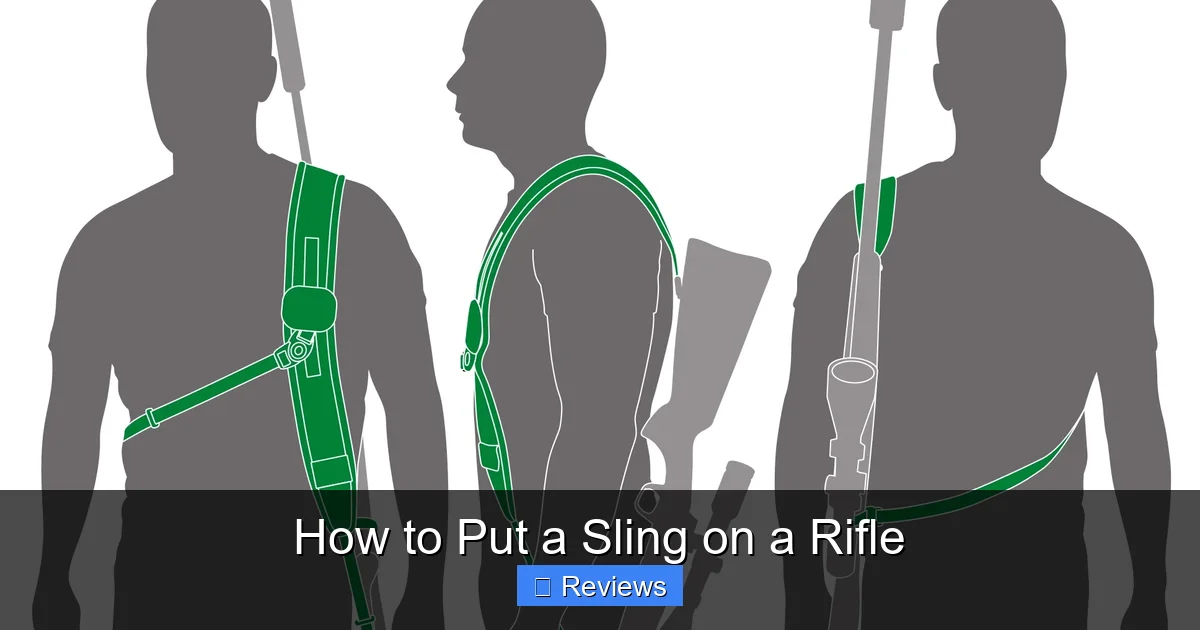
The Versatile Two-Point Sling
The two-point sling is arguably the most common and traditional type. As the name suggests, it attaches to your rifle at two points: usually one near the buttstock and one near the front of the handguard or barrel. This design distributes the rifle’s weight evenly across your body, making it comfortable for long periods of carrying. It allows you to carry the rifle across your chest or back, keeping it relatively secure while still allowing for quick access. This is a fantastic choice for hunting, hiking with your rifle, or general range use.
The Agile One-Point Sling
The one-point sling attaches to your rifle at a single point, typically on the receiver or just behind the magazine well. This setup allows for maximum freedom of movement and very quick transitions between strong-side and weak-side shooting. It’s often favored in tactical situations where rapid weapon manipulation is crucial. The main drawback is that the rifle hangs freely, which can cause it to swing and bounce more than with a two-point sling. If you’re looking for agility and speed, learning how to put a sling on a rifle of this type might be for you.
The Feature-Rich Three-Point Sling
The three-point sling is a bit more complex, using two loops and a main strap to secure the rifle. It attaches to the rifle at two points, much like a two-point sling, but then incorporates a third strap that wraps around the shooter’s body. This design provides excellent retention and keeps the rifle very close to your body, making it ideal for hands-free tasks. However, its complexity can sometimes make it slower to get into a firing position, and it can feel a bit restrictive. While less common today, it’s still an option for those prioritizing maximum retention.
Essential Hardware: What You Need
Knowing how to put a sling on a rifle isn’t just about the sling itself; it’s also about understanding the hardware that connects it to your firearm. Different rifles and slings use different attachment methods, so let’s break down the common components.
Visual guide about How to Put a Sling on a Rifle
Image source: cdn.shopify.com
Swivels and Mounts
Most rifles come equipped with some form of sling attachment points. Traditional rifles often have “sling swivel studs” – small metal posts that protrude from the stock and forend. These studs accept “quick-detach” (QD) swivels that clip onto them. Modern sporting rifles (like AR-15s) and tactical firearms often feature a wider array of attachment options.
QD Mounts vs. Traditional Swivels
QD (Quick Detach) swivels are spring-loaded buttons that lock into special sockets. These sockets can be built directly into the rifle’s receiver, stock, or handguard, or they can be accessories that attach to M-LOK, KeyMod, or Picatinny rails. QD systems are popular because they allow for very fast attachment and removal of the sling. Traditional swivels, on the other hand, usually involve a small plunger that clicks into the stud, and while secure, they can be a bit more fiddly to remove quickly.
Sling Loops and Clips
Some slings come with simple nylon loops that can be threaded through slots on the rifle or tied directly. Others feature metal clips, often HK-style hooks or snap hooks, which can attach to sling loops, D-rings, or specific attachment points on the rifle. The type of attachment mechanism on your sling needs to be compatible with the attachment points on your rifle. Always check this compatibility before you try to put a sling on a rifle.
Pre-Installation Checks and Safety First
Before you even think about attaching anything to your rifle, safety must be your absolute top priority. This isn’t just a suggestion; it’s a non-negotiable rule.
Clear Your Firearm
The very first thing you need to do is ensure your rifle is completely unloaded. Remove the magazine, clear the chamber, and visually and physically inspect the chamber to confirm there are no rounds present. Keep the action open, if possible, throughout the entire process. Always point the muzzle in a safe direction.
Inspect Your Sling and Hardware
Once your rifle is safe, take a moment to examine your sling and its accompanying hardware. Check for any signs of wear, fraying, damage, or manufacturing defects. Make sure all clips, swivels, or buckles operate smoothly and securely. A damaged sling or faulty hardware can fail at a critical moment, leading to an unsafe situation or a damaged rifle.
Step-by-Step Guide: How to Put a Sling on a Rifle
Now, let’s get down to the practical steps of how to put a sling on a rifle. We’ll cover the most common types.
Installing a Two-Point Sling
This is probably the most common installation you’ll encounter. For this example, we’ll assume your rifle has traditional sling swivel studs.
- Attach the Rear Swivel: Locate the sling swivel stud on the buttstock of your rifle. Take one end of your two-point sling, typically the end with a QD swivel or a traditional swivel. If it’s a traditional swivel, press the plunger and hook the “jaws” over the stud. Release the plunger and give it a firm tug to ensure it’s securely locked. If it’s a QD swivel, push the button and insert the swivel into the QD socket on your stock until it clicks into place. Again, tug to verify security.
- Attach the Front Swivel: Move to the front of your rifle, near the handguard or forend. Locate the corresponding sling swivel stud or QD socket. Attach the other end of your sling in the same manner as the rear. Ensure both ends are firmly attached.
- Orient the Sling: Now, orient the sling so that any adjustment buckles or quick-release mechanisms are easily accessible and don’t interfere with your grip or controls. Most people prefer the adjustment hardware to be positioned so they can reach it with their non-shooting hand. Ensure the sling isn’t twisted.
- Adjust Length: Don’t worry too much about perfect length just yet; we’ll fine-tune that later. For now, ensure there’s enough slack to carry the rifle comfortably.
Attaching a One-Point Sling
One-point slings are usually simpler to attach but require a specific attachment point.
- Locate the Attachment Point: The ideal attachment point for a one-point sling is typically at the rear of the receiver, often on a specialized end plate or a built-in QD socket or loop. Some rifles might have a central attachment point near the magazine well on the handguard, but the rear receiver is most common for tactical applications.
- Attach the Sling: Connect the single attachment point of your sling (which is usually a QD swivel, an HK-style hook, or a snap hook) to the designated point on your rifle. For a QD swivel, push the button and insert it into the socket. For a hook, simply clip it onto the loop or ring.
- Verify Security: As always, give the attachment point a good tug to ensure it’s locked and secure.
Setting Up a Three-Point Sling
Three-point slings can be a bit more intricate due to their extra strap.
- Attach Front and Rear Points: Like a two-point sling, start by attaching the two main attachment points to the front (forend/handguard) and rear (buttstock) of your rifle. Use compatible swivels or clips for your rifle’s attachment points.
- Orient the Body Strap: The three-point sling features a third strap that forms a loop for your body. This loop needs to be oriented correctly so it’s comfortable to wear and doesn’t impede rifle manipulation. Generally, the rifle should hang from the loop, with the main strap crossing your chest.
- Connect the Loops: Thread the sling through the various buckles and adjusters to form the body loop. It might take a bit of trial and error to get the routing just right for your body type and rifle. The goal is a secure carry that allows the rifle to transition smoothly when needed.
Checking for Secure Attachment
No matter which type of sling you’re installing, always perform a final check. Pull firmly on each attachment point. Twist and jostle the rifle. You want to be absolutely certain that the sling is not going to detach accidentally. A little extra attention here can prevent serious headaches later on.
Adjusting Your Rifle Sling for Optimal Comfort and Use
Learning how to put a sling on a rifle is only half the battle; proper adjustment is key to maximizing its benefits. An improperly adjusted sling can be uncomfortable, hinder your movements, or even compromise your shooting.
Carrying Comfort
When carrying your rifle, the sling should hold it snugly against your body without being too tight or too loose. If it’s too loose, the rifle will swing around excessively, potentially bumping into things or getting in your way. If it’s too tight, it will dig into your shoulder or neck, becoming uncomfortable quickly. For a two-point sling, aim for a length that allows the rifle to rest across your chest or back without slipping, but still allows you to bring it to a firing position smoothly. For a one-point sling, the rifle should hang low enough to clear your body but not so low that it drags or hits your knees.
Shooting Support
Many slings can also be used to provide shooting support. For instance, with a two-point sling, you can sometimes loop your support arm through the sling to create tension, which helps steady your aim, especially for unsupported standing shots. Experiment with different adjustments to see how the sling can aid your stability. This might mean shortening the sling temporarily when you’re preparing to shoot.
Slinging Up for Readiness
Consider the “readiness” aspect. Can you quickly transition from carrying your rifle to shouldering it and acquiring a target? This is especially important for self-defense or tactical scenarios. Practice shouldering your rifle with the sling adjusted, making sure it doesn’t snag on clothing or gear. If your sling has a quick-adjust feature, learn to use it instinctively to rapidly tighten or loosen the sling as needed.
Common Mistakes to Avoid
Even after learning how to put a sling on a rifle, some common pitfalls can detract from its effectiveness or even create safety issues. Let’s make sure you steer clear of them.
Incorrect Attachment Points
One common mistake is attaching the sling to a non-load-bearing part of the rifle, like a thin section of a handguard that wasn’t designed for it, or to an optic. Always use designated sling attachment points (swivel studs, QD sockets, sling loops). Attaching to the wrong place can damage your rifle, your optic, or cause the sling to fail.
Loose Connections
Failing to double-check that all swivels, clips, and buckles are securely fastened is another frequent error. A loose connection can lead to your rifle falling, which is not only dangerous but can also damage your firearm. Always give a firm tug after attachment and periodically check connections during use.
Improper Adjustment
As mentioned, an improperly adjusted sling can range from annoying to outright dangerous. Too long, and the rifle swings uncontrollably; too short, and it’s uncomfortable and restricts movement. Take the time to adjust your sling for your body and your specific use case. What feels right for carrying might not be ideal for shooting, and vice-versa, so practice adjusting on the fly.
Conclusion
Congratulations! You’ve just learned the ins and outs of how to put a sling on a rifle. It’s more than just a piece of webbing; it’s an indispensable tool that enhances safety, comfort, and the overall usability of your firearm. By understanding the different types of slings, the necessary hardware, and following the step-by-step installation process, you’re well on your way to becoming a more proficient and responsible rifle owner.
Remember, safety is always paramount. Ensure your rifle is unloaded before you begin, and always double-check all connections. Once installed, take the time to properly adjust your sling for your body and intended use. Practice shouldering your rifle and transitioning with the sling on. With a properly installed and adjusted sling, you’ll find carrying your rifle becomes much easier, and you’ll have more confidence in its handling and readiness. Now go forth and enjoy the enhanced functionality your new sling brings!
🎥 Related Video: How To Install Your Q.uick D.etach Swivels To Your AR15/Rifle Sling (BCM QD’s)
📺 Gear And Guns
Frequently Asked Questions
What is the primary benefit of putting a sling on a rifle?
The primary benefit is enhanced portability and hands-free carrying, which increases comfort during prolonged use and frees up your hands for other tasks. It also significantly improves safety by preventing accidental drops and keeps the rifle secure while you’re on the move.
How do I know if my rifle has sling attachment points?
Most rifles have some form of sling attachment points, often small metal studs (sling swivel studs) on the buttstock and forend. Modern rifles may also have QD (Quick Detach) sockets, M-LOK, KeyMod slots, or Picatinny rails which require specific adapters for sling attachment.
Can a one-point sling be used for hunting?
While a one-point sling offers excellent maneuverability for tactical situations, it’s generally not ideal for hunting due to the rifle’s tendency to swing more freely. A two-point sling typically provides better comfort and stability for longer carries and walking through varied terrain commonly encountered during hunting.
Are there slings specifically designed for women or smaller individuals?
While slings are generally adjustable for various body types, some manufacturers offer “compact” or “shortened” versions that might be more suitable for smaller frames. The key is proper adjustment of any sling to fit the user’s body comfortably, ensuring the rifle hangs at an appropriate height without causing strain.
How often should I inspect my rifle sling for wear and tear?
It’s a good practice to inspect your rifle sling every time you prepare to use your rifle or at least periodically, especially after heavy use or exposure to harsh elements. Look for fraying, cuts, tears, stretched material, or any damage to the buckles, swivels, or clips that could compromise its integrity.
Can I install a sling on a rifle without any factory-installed attachment points?
Yes, it is often possible to add attachment points to a rifle that lacks them. This might involve installing screw-in swivel studs, adding rail sections (Picatinny, M-LOK, KeyMod) to the forend for accessory mounts, or replacing an existing stock or end plate with one that includes sling loops or QD sockets. Professional gunsmithing may be required for some modifications.