Properly installing a scope on your rifle is a critical step for achieving accuracy and consistency, transforming your shooting experience. This comprehensive guide walks you through the entire process, from gathering essential tools and preparing your firearm to mounting the scope, setting correct eye relief, and bore sighting. By following these detailed instructions on how to install scope on rifle, you’ll ensure a secure and precise setup, maximizing your shooting performance and confidence on the range or in the field.
Hey there, fellow shooter! So, you’ve got a shiny new scope and a rifle that’s just begging for some enhanced precision, right? Excellent! Whether you’re a seasoned hunter, a competitive sport shooter, or just love spending time at the range, getting your optics set up correctly is absolutely foundational to hitting your targets consistently. A perfectly installed scope can turn a good rifle into a great one, revealing its true accuracy potential.
But let’s be honest, the process can seem a little daunting at first. There are so many parts, so many screws, and specific tolerances to consider. Don’t worry, though! You don’t need to be a professional gunsmith to learn how to install scope on rifle effectively. With a bit of patience, the right tools, and this step-by-step guide, you’ll be able to mount your scope securely and accurately, ready for sighting in. Think of this as your friendly, hands-on tutorial to make sure your scope isn’t just sitting on your rifle, but truly integrated for peak performance.
We’re going to walk through everything from gathering your gear to the final checks, ensuring that when you’re done, your scope is perfectly aligned and ready for the range. Our goal is to demystify the process of how to install scope on rifle, making it approachable and straightforward. Let’s get started on setting up your rifle for maximum accuracy and enjoyment!
Key Takeaways
- Safety First: Always ensure your rifle is unloaded and pointed in a safe direction before you begin any work.
- Gather the Right Tools: Having all necessary tools, including a torque wrench, scope leveling kit, and cleaning supplies, is crucial for a successful installation.
- Clean Everything Thoroughly: Degreasing and cleaning all mating surfaces (receiver, base, rings, scope tube) prevents slippage and ensures a secure, long-lasting mount.
- Prioritize Proper Eye Relief: Correct eye relief is paramount for comfortable, safe, and effective shooting, preventing “scope bite” and providing a full field of view.
- Level the Reticle Precisely: A perfectly level reticle is essential for consistent windage and elevation adjustments, directly impacting accuracy at various distances.
- Use a Torque Wrench: Avoid overtightening or undertightening screws by using a torque wrench set to manufacturer specifications for bases, rings, and scope mounts.
- Bore Sight Before the Range: Bore sighting provides an initial zero, saving time and ammunition at the shooting range for final adjustments.
Quick Answers to Common Questions
What is eye relief?
Eye relief is the optimal distance between your eye and the scope’s ocular (rear) lens where you get a full, clear, and unvignetted image. It’s crucial for shooter comfort and safety, preventing the scope from hitting your brow during recoil.
Why is bore sighting important?
Bore sighting provides a preliminary alignment of your scope’s reticle with the rifle’s bore. This ensures your shots will be “on paper” at a close distance (e.g., 25 yards) when you get to the shooting range, saving you time and ammunition during the final zeroing process.
Can I install a scope without a torque wrench?
While technically possible, installing a scope without a torque wrench is highly discouraged. Overtightening screws can strip threads, damage your scope tube, or warp components, while undertightening can lead to scope slippage and loss of zero under recoil. A torque wrench ensures all screws are tightened to manufacturer specifications for optimal performance and longevity.
What’s the best way to clean scope lenses?
Always use a dedicated lens cleaning solution and a microfiber lens cloth. First, gently brush away any loose dust or debris with a soft brush or compressed air. Then, apply a small amount of lens cleaning solution to the cloth (not directly to the lens) and gently wipe the lens in a circular motion from the center outwards.
How often should I check my scope mounts?
It’s a good practice to periodically check your scope mounts, especially after the first few shooting sessions, after any significant recoil events, or if you notice any unusual shifts in your point of impact. A quick check of all screws with your torque wrench can confirm they are still at the correct specification.
📑 Table of Contents
- Gathering Your Tools and Supplies: The Foundation for Success
- Preparing Your Rifle and Scope: The Crucial First Steps
- Mounting the Base and Rings: Building the Foundation
- Positioning and Leveling the Scope: The Art of Precision
- Final Checks and Bore Sighting: Ready for the Range
- Conclusion: Aim for Accuracy!
Gathering Your Tools and Supplies: The Foundation for Success
Before you even think about touching your rifle, let’s make sure you have everything you need. Trying to install a scope without the proper tools is like trying to bake a cake without flour – it just won’t work out, or at least it won’t be very good! Gathering everything beforehand will save you frustration and ensure a smooth process as you learn how to install scope on rifle.
The Right Scope for Your Rifle
First and foremost, make sure your scope is a good match for your rifle and intended use. A powerful long-range scope might be overkill (and too heavy) for a close-quarters hunting rifle, and vice versa. Consider magnification, objective lens size, reticle type, and overall ruggedness. Most importantly, ensure the scope tube diameter (e.g., 1-inch, 30mm, 34mm) matches the rings you plan to use.
Essential Mounting Hardware
- Scope Base: This is the interface between your rifle’s receiver and your scope rings. Common types include Weaver, Picatinny, and proprietary designs specific to certain rifles (like integral bases). Ensure your base matches your rifle’s receiver and is compatible with your chosen rings. Some rifles come with integrated bases, which simplifies this step.
- Scope Rings: These hold the scope to the base. They come in various heights (low, medium, high, extra-high) and diameters to match your scope tube. The correct height ensures adequate clearance between your scope’s objective lens and the rifle barrel, while also allowing for comfortable eye relief.
- Mounting Screws: These usually come with the base and rings. They are critical!
Tools of the Trade
- Torque Wrench: This is non-negotiable! Overtightening can strip screws, warp scope tubes, or damage your rifle. Undertightening leads to scope slippage and loss of zero. A good torque wrench with various bit sizes is essential for precise installations.
- Hex Key / Torx Bit Set: To fit the screws on your bases and rings.
- Gun Cleaning Kit: Solvent, patches, and a clean cloth for degreasing.
- Degreaser / Rubbing Alcohol: To clean all mounting surfaces.
- Loctite (Blue, non-permanent): Optional, but highly recommended for base screws to prevent them from loosening under recoil. Avoid red Loctite unless you never plan to remove the base.
- Scope Leveling Kit: Can be a specialized two-piece level, a bubble level for your scope, or even a plumb bob and a good eye. This is crucial for keeping your reticle straight.
- Eye Relief Measurement Tool: A ruler or tape measure can work.
- A Sturdy Work Surface: A dedicated workbench with a gun vise is ideal. This keeps your rifle stable during the entire process.
- Lens Cleaning Cloth and Solution: For the scope lenses.
- Bore Sighter: A laser bore sighter or a collimator will get you on paper quickly, saving ammo at the range.
Having these items laid out and ready will make the process of how to install scope on rifle much smoother and more enjoyable.
Preparing Your Rifle and Scope: The Crucial First Steps
With all your gear assembled, it’s time to get your rifle and scope ready for the main event. This preparatory stage is often overlooked, but it’s vital for a secure and accurate installation. Skipping these steps can lead to problems down the road, like a scope that won’t hold zero or screws that loosen unexpectedly.

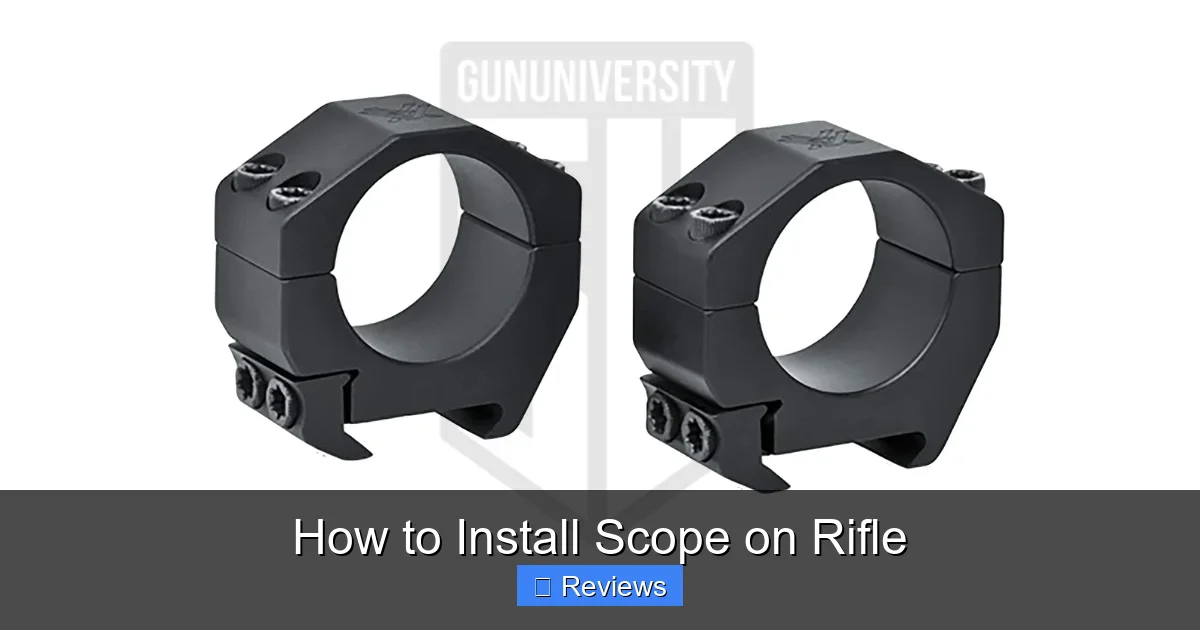
Visual guide about How to Install Scope on Rifle
Image source: img.particlenews.com
Safety First!
Before anything else, always practice proper firearm safety. Point the rifle in a safe direction, remove the magazine (if applicable), open the action, and visually and physically inspect the chamber to ensure it is completely empty. We’re working with a tool, not a toy, so safety is paramount throughout this guide on how to install scope on rifle.
Cleaning and Inspection
Now, let’s get things spotless. Oil, grease, and even residual machining lubricants can prevent your scope base and rings from gripping properly. This leads to slippage and inconsistent accuracy. Using a degreaser or rubbing alcohol:
- Clean the Receiver: Thoroughly clean the top of your rifle’s receiver where the scope base will sit.
- Clean the Base: Wipe down both sides of your scope base.
- Clean the Rings: Clean the inside surfaces of your scope rings – both the bottom and top halves – as well as the contact points for the mounting screws.
- Clean the Scope Tube: Gently wipe the section of your scope’s main tube where the rings will clamp on. Be careful not to get solvents on the lenses or turrets.
While cleaning, take a moment to inspect everything for any burrs, imperfections, or damage. A smooth, clean surface is key for a solid mount. This attention to detail is part of learning how to install scope on rifle correctly.
Understanding Your Scope and Mounts
Take a minute to familiarize yourself with your specific scope and mounting hardware. Read the instruction manuals! They often contain torque specifications for screws, which are absolutely essential. Identify the front and rear ring halves (sometimes they are marked), and understand how the base attaches to your rifle.
Mounting the Base and Rings: Building the Foundation
This is where the magic really starts to happen. Getting the base and rings installed correctly is the backbone of a successful scope mount. Precision here will pay dividends in accuracy later on. We are well on our way to mastering how to install scope on rifle.
Securing the Scope Base
If your rifle has an integrated rail, you can skip this step. Otherwise, grab your scope base and mounting screws.
- Position the Base: Place the scope base on your rifle’s receiver. Ensure it’s oriented correctly (some bases are directional).
- Apply Loctite (Optional but Recommended): Put a tiny drop of blue (non-permanent) Loctite on the threads of each base screw. This helps prevent loosening from recoil. Avoid getting Loctite on the base or receiver itself.
- Start Screws by Hand: Carefully start each screw by hand to avoid cross-threading.
- Finger Tighten: Once all screws are started, finger tighten them.
- Initial Tightening Pattern: Using your hex key or Torx bit, gently tighten the screws in a crisscross or alternating pattern. The goal here is to seat the base evenly without creating stress.
- Final Torque: Now, switch to your torque wrench. Refer to the base manufacturer’s specifications for the exact torque setting (usually around 15-25 inch-pounds). Tighten each screw incrementally in your crisscross pattern until all screws reach the specified torque. Listen for the “click” of the torque wrench.
Once the base is torqued, give it a firm wiggle to ensure it’s solid. It shouldn’t move at all. This is a critical step in knowing how to install scope on rifle.
Attaching the Scope Rings
With the base secure, it’s time for the bottom halves of your scope rings.
- Attach Ring Bottoms: Slide the bottom halves of your scope rings onto the base. If you have two-piece rings, ensure they are spaced appropriately to hold your scope without interfering with turrets or bells. Generally, you want them as far apart as possible for maximum stability, but make sure they don’t block access to the adjustment turrets.
- Loosely Secure Rings: Lightly tighten the side clamps or screws that secure the ring bottoms to the base. You want them just tight enough to hold them in place, but loose enough to allow some minor adjustment later for eye relief. Again, refer to the ring manufacturer’s torque specs for these screws.
We’re keeping things a bit loose for now because the next steps involve fine-tuning the scope’s position. This flexible approach is key when you’re learning how to install scope on rifle correctly.
Positioning and Leveling the Scope: The Art of Precision
This is arguably the most critical stage for shooter comfort and accuracy. Getting your scope’s eye relief and reticle level perfect will make a huge difference in your shooting experience. Take your time here – precision matters!
Achieving Proper Eye Relief
Eye relief is the distance between your eye and the ocular (eyepiece) lens of the scope, at which you get a full, clear, and unvignetted image. Incorrect eye relief can lead to “scope bite” (where the scope hits your eyebrow under recoil) or a restricted field of view.
- Mount the Scope Loosely: Place your scope into the bottom halves of the rings. Don’t put the top halves on yet.
- Position Yourself: With the rifle shouldered naturally (or in your shooting stance if using a bench), close your eyes.
- Open Your Eyes: Open your eyes. Your eye should be perfectly centered behind the scope, providing a full, clear sight picture without any dark crescent shapes (vignetting) around the edges.
- Adjust the Scope: Slide the scope forward or backward in the rings until you find that sweet spot for eye relief. Do this several times, shouldering the rifle, closing and opening your eyes, until you consistently find the correct position. This might require slight adjustments to the ring spacing on the base as well.
- Initial Ring Top Placement: Once eye relief is good, carefully place the top halves of the rings over the scope. Hand-tighten the ring screws just enough to hold the scope in place, but still allow for rotation for the next step.
Remember, proper eye relief ensures you can quickly acquire a full sight picture every time you shoulder the rifle, an essential part of knowing how to install scope on rifle for practical use.
Leveling the Reticle
A perfectly level reticle is non-negotiable for accurate shooting, especially at longer distances. If your reticle is canted, your windage and elevation adjustments won’t be true, leading to shots missing off to the side even if you dial in the correct adjustments.
There are several methods for leveling, choose the one you’re most comfortable with:
- Using a Specialized Leveling Kit: Many kits come with two levels – one for your rifle’s action/Picatinny rail and one for the top of your scope’s turret.
- First, ensure your rifle is perfectly level in your gun vise.
- Place the scope level on top of the scope’s flat turret cap (or a dedicated leveling surface if your scope has one).
- Carefully rotate the scope in the rings until the bubble on the scope level is centered, indicating the reticle is perfectly plumb with your rifle.
- Using a Plumb Bob (The Old-School Way):
- Set up a plumb bob (a string with a weight) several yards away, ensuring it hangs perfectly vertical.
- Place your rifle in the vise and ensure it’s as level as possible.
- Look through the scope and rotate it until the vertical crosshair aligns perfectly with the plumb bob string.
- Using a Flat Surface (Budget Method):
- Ensure your rifle is level.
- Place a small, known-flat object (like a small machinists level or a carpenter’s square) on top of the flat surface of your scope’s elevation turret.
- Rotate the scope until the object is level. This assumes your turret cap is perfectly parallel to your reticle, which is usually the case.
No matter which method you use, double-check it. This precise leveling is paramount when you learn how to install scope on rifle for true accuracy. Take your time to make sure it’s perfect.
Tightening the Ring Screws
Once your eye relief is set and your reticle is perfectly level, it’s time to secure the scope firmly in place. This is where your torque wrench shines again.
- Tighten Ring Bottoms (If Loose): If your ring bottoms were still loose on the base, now is the time to torque them down to the manufacturer’s specification. Ensure the scope’s position (forward/backward) and rotation remain unchanged.
- Tighten Ring Tops Incrementally: Start tightening the screws on the top halves of the rings. Work in a crisscross or alternating pattern, tightening each screw a little bit at a time. The goal is to apply even pressure to the scope tube.
- Final Torque: Refer to your scope ring manufacturer’s torque specifications (typically 15-20 inch-pounds for most rings, but always check!). Use your torque wrench to tighten each screw incrementally until it reaches the specified torque. Again, listen for the “click.” Do not overtighten! Overtightening can damage your scope tube, affecting its internal mechanisms.
As you tighten, keep an eye on your reticle level. Sometimes, tightening can cause slight shifts. If it moves, loosen the rings slightly, re-level, and re-tighten. This meticulous approach is how you truly master how to install scope on rifle with confidence.
Final Checks and Bore Sighting: Ready for the Range
You’re almost there! Your scope is mounted, leveled, and torqued. Now it’s time for some final checks and an initial zeroing step before you hit the range.
Double-Checking Everything
Before you declare victory, go through a quick checklist:
- All Screws Torqued? Go back over every screw – base screws, ring-to-base screws, and ring cap screws – with your torque wrench to ensure they are all at the manufacturer’s specified torque.
- Scope Movement? Give the scope a firm but gentle wiggle. It should feel absolutely solid on the rifle.
- Clear Sight Picture? Shoulder the rifle again, confirm your eye relief is still comfortable, and you have a full field of view.
- Reticle Level? Do a quick visual check or use your leveling tool one last time to ensure the reticle is still perfectly plumb.
- Turret Clearances? Ensure your scope’s adjustment turrets don’t hit the rifle or base when turned.
The Importance of Bore Sighting
Bore sighting is a technique that roughly aligns your scope’s reticle with the rifle’s bore. It won’t get you a perfect zero, but it will get you “on paper” at the range, saving you a ton of frustration and expensive ammunition. There are a few ways to bore sight:
- Laser Bore Sighter: This is the easiest and most common method. A laser is inserted into the rifle’s bore (or attached to the muzzle) and projects a dot onto a target. You then adjust your scope’s windage and elevation turrets until the reticle’s crosshairs align with the laser dot.
- Optical Bore Sighter (Collimator): This device attaches to the muzzle and uses a grid system to align your scope. It’s often considered more precise than a laser for initial alignment.
- Visual Bore Sighting (Bolt-Action Rifles Only): If you have a bolt-action rifle, you can remove the bolt and look directly down the bore at a distant target (e.g., 25-50 yards). Center the target in the bore. Then, without moving the rifle, look through your scope and adjust the reticle until it’s also centered on that same target. This requires a stable gun vise and a steady eye.
Whichever method you choose, remember it’s just an approximation. The final zeroing always happens at the shooting range. Bore sighting is an essential step in how to install scope on rifle efficiently for your first range trip.
Initial Range Adjustments
With your scope bore-sighted, you’re ready for the range! Start at a closer distance (e.g., 25 yards) to ensure you’re hitting the paper. Make your first shots, then adjust your scope’s turrets to bring your point of impact to your point of aim. Once you’re consistently hitting at 25 yards, move back to your desired zeroing distance (e.g., 100 or 200 yards) and fine-tune your zero.
Conclusion: Aim for Accuracy!
Congratulations! You’ve successfully learned how to install scope on rifle, from start to finish. You’ve gathered your tools, meticulously cleaned and prepared your components, carefully mounted the base and rings, and precisely set your eye relief and leveled your reticle. You even took the crucial step of bore sighting your setup.
Remember, patience and precision are your best friends throughout this process. Don’t rush, and always double-check your work. A properly installed scope isn’t just about looking good; it’s about unlocking your rifle’s true accuracy potential and your own confidence as a shooter. Every time you pull the trigger, you’ll know that your optic is securely and correctly mounted, ready to send that round exactly where you want it to go.
Now, grab your ammo, head to the range, and enjoy the fruits of your labor. Happy shooting, and may your groups be tight!
Frequently Asked Questions
Do I need loctite for scope mounts?
For base screws, applying a tiny drop of blue (non-permanent) Loctite is highly recommended. It helps prevent screws from loosening due to recoil and vibrations. However, it’s generally not necessary, and often not recommended, for the scope ring screws themselves.
What if my scope isn’t level after installation?
If you discover your reticle isn’t level after installation, you’ll need to loosen the scope ring screws just enough to allow the scope to rotate. Re-level the reticle using your preferred method, and then carefully re-torque the ring screws in an alternating pattern, ensuring the scope doesn’t shift during tightening.
How much should I spend on scope rings?
The cost of scope rings can vary widely, but generally, it’s wise to invest in quality rings that are at least as good as, if not better than, your scope. High-quality rings ensure a secure mount, prevent damage to your scope, and maintain zero. Avoid cheap, flimsy rings as they are a common point of failure for accuracy.
Can I use any scope on any rifle?
While physically many scopes can be mounted on various rifles, it’s not always ideal. Consider the scope’s magnification and features in relation to the rifle’s caliber and intended use. Also, ensure the scope’s tube diameter matches your rings and that the mounting system (base type) is compatible with your rifle’s receiver.
What’s the difference between a one-piece mount and two-piece rings?
A one-piece mount (often a cantilever or rail mount) combines the base and rings into a single unit, offering maximum rigidity and often preferred for AR-style platforms or rifles needing extended eye relief. Two-piece rings attach individually to a separate scope base (like a Picatinny rail or Weaver-style bases) and offer more flexibility in spacing and positioning on traditional rifles.
How do I know if my scope is damaged?
Signs of a damaged scope include a blurry or inconsistent sight picture, an inability to hold zero despite proper mounting, unresponsive or sticky turrets, visible internal debris, or a reticle that appears canted even after attempting to level it. External damage like dents or cracks in the scope tube can also indicate internal issues.


