Learning how to hold a rifle correctly is absolutely fundamental for both safety and accuracy. This comprehensive guide breaks down the essential techniques, from finding your most stable stance to mastering the subtle nuances of grip, cheek weld, and trigger control. By understanding these core principles, you can significantly enhance your shooting proficiency and overall enjoyment at the range or in the field.
Hey there, shooting buddy! Are you ready to dive deep into one of the most fundamental skills in rifle shooting? We’re talking about something that impacts everything from safety to hitting your target dead center: learning how to hold a rifle correctly. It might sound simple, but there’s a real art and science to it, and mastering this skill can dramatically transform your shooting experience.
Whether you’re new to firearms or looking to tighten up your groups, understanding the right way to handle your rifle is absolutely crucial. A good hold isn’t just about gripping the rifle; it’s about establishing a stable platform with your entire body, managing recoil, and ensuring consistent sight alignment. This isn’t just theory, either; it translates directly into better accuracy, more confidence, and a much safer time at the range or in the field. So, let’s break it all down, step by step, and get you feeling like a pro when you pick up that rifle.
Why Does “How to Hold a Rifle” Even Matter So Much?
Think of it like this: if you’re trying to draw a straight line, but your hand is shaky or your arm isn’t braced, that line isn’t going to be very straight, right? The same principle applies to shooting. Every tiny movement, every twitch, every inconsistency in how you hold a rifle can send your bullet off course. A proper hold minimizes these variables, giving you the best possible chance to place your shots exactly where you want them. Plus, it makes shooting more comfortable, especially with larger calibers, by helping you absorb recoil more effectively. It’s about building a strong foundation, and that foundation starts with your hands and body.
Key Takeaways
- Safety First: Always prioritize the four cardinal rules of firearm safety before even thinking about how to hold a rifle or pick it up.
- Stable Stance is Paramount: A solid, repeatable stance (standing, kneeling, or prone) provides the essential foundation for accuracy, allowing you to control the rifle and manage recoil effectively.
- Consistent Grip is Crucial: Your dominant hand provides control and trigger discipline, while your support hand stabilizes the rifle. Both grips should be firm yet relaxed, avoiding tension that causes shaking.
- Proper Shouldering and Cheek Weld: The rifle butt should seat firmly in your shoulder pocket, and a consistent cheek weld ensures repeatable eye relief and sight alignment for every shot.
- Body Mechanics Matter: Integrate breathing control, smooth trigger press, and a strong follow-through into your shooting sequence to maximize accuracy and consistency.
- Natural Point of Aim: Understanding and adjusting to your natural point of aim allows the rifle to settle naturally on target without muscular effort, reducing fatigue and improving precision.
- Practice and Repetition: Consistently practicing these techniques, both dry firing and live fire, is the only way to build muscle memory and truly master how to hold a rifle effectively.
Quick Answers to Common Questions
What is the most stable rifle shooting position?
The prone position is generally considered the most stable shooting position because your entire body is in contact with the ground, providing maximum support and minimizing movement. It’s excellent for precision shooting.
Should I grip the rifle very tightly?
No, you should grip the rifle firmly but not excessively tight. Too much tension can lead to muscle fatigue and shaking, negatively impacting accuracy. Aim for a consistent, controlled grip that allows for smooth trigger manipulation.
What is “natural point of aim” and why is it important?
Natural Point of Aim (NPOA) is where your rifle naturally settles when your body is relaxed in your chosen stance, without muscular effort. It’s crucial because it helps you align the rifle with the target using your skeletal structure rather than muscle, reducing fatigue and improving consistency.
Where should the rifle buttstock be placed on my shoulder?
The buttstock should be seated firmly in your “shoulder pocket,” which is the fleshy area just inside the bony part of your dominant shoulder, towards your chest. This position helps absorb recoil effectively and provides a stable platform.
Is dry firing really effective for practice?
Yes, dry firing is highly effective for practicing rifle fundamentals like stance, grip, sight alignment, and especially trigger control without using live ammunition. Always ensure no live rounds are present when dry firing.
📑 Table of Contents
The Foundation: Safety First, Always
Before we even talk about specific techniques for how to hold a rifle, let’s hammer home the most important point: safety. A firearm is a tool, and like any tool, it demands respect and responsible handling. There’s no exception to these rules, ever.
The Four Cardinal Rules of Firearm Safety
These aren’t just suggestions; they are ironclad laws that keep you and everyone around you safe. Commit them to memory, live by them, and teach them to others.
- Always treat every firearm as if it were loaded. Even if you “know” it’s unloaded, verify it yourself.
- Never point the muzzle at anything you are not willing to destroy. This is the most crucial rule for preventing accidental injury or death. Keep that barrel pointed in a safe direction at all times.
- Keep your finger off the trigger until your sights are on the target and you have made the decision to shoot. This prevents negligent discharges. Your finger rests alongside the frame until the very last moment.
- Be sure of your target and what is beyond it. Know what you’re shooting at, and what’s behind it. Bullets can travel far and pass through objects.
Remember, understanding how to hold a rifle properly also includes understanding how to handle it safely. Always be aware of your muzzle direction and trigger finger placement.
Finding Your Stance: Stability is Key
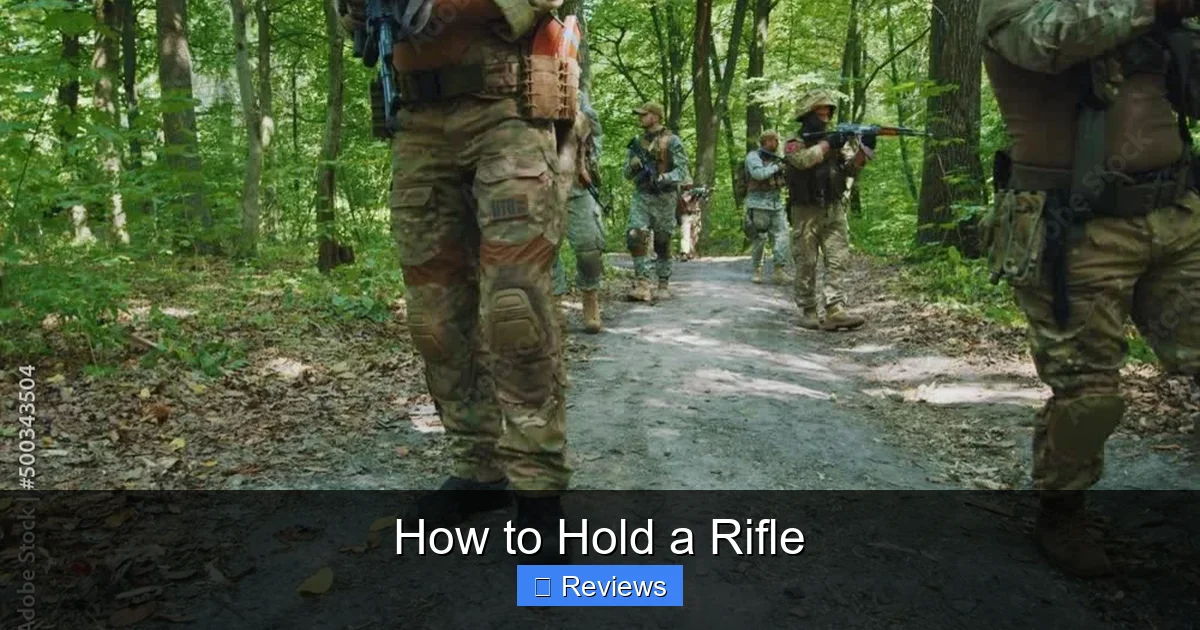
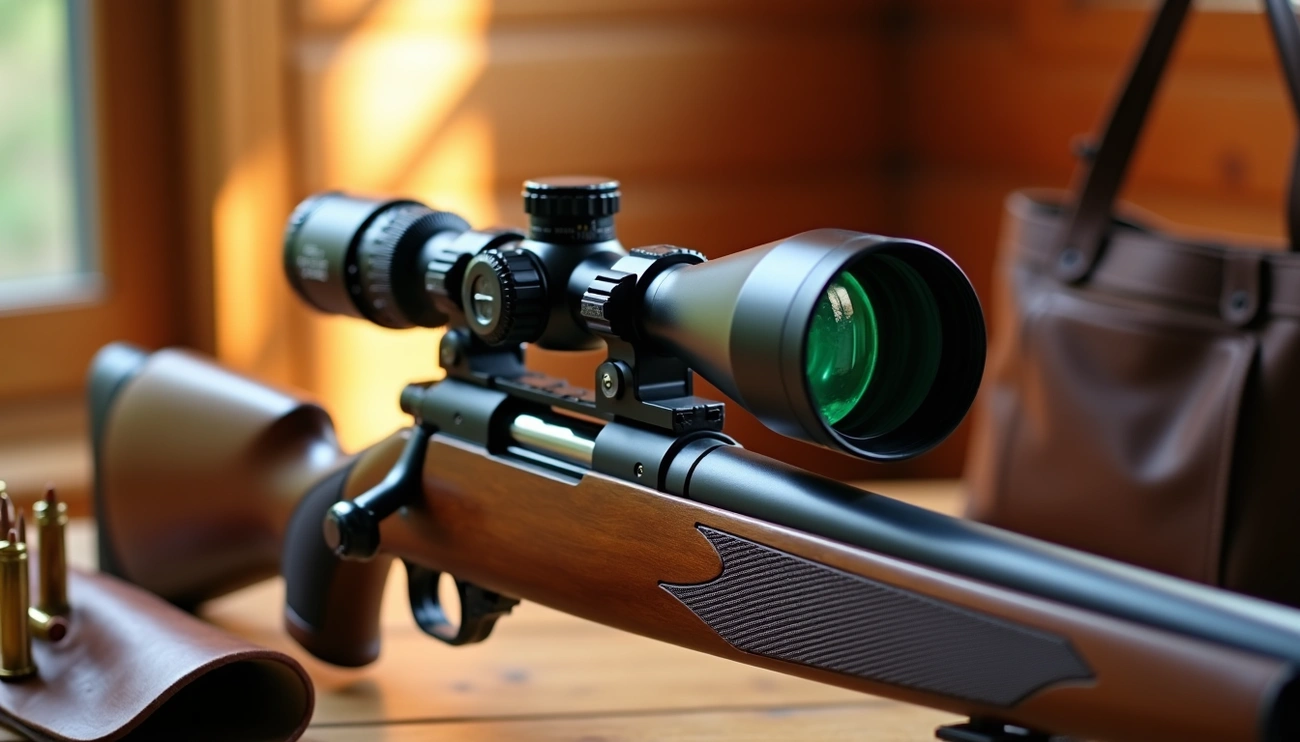
Visual guide about How to Hold a Rifle
Image source: as2.ftcdn.net
Your stance is the bedrock of your shooting. It provides stability, helps manage recoil, and contributes significantly to your accuracy. There isn’t just one “right” way to stand or position yourself; it often depends on the shooting scenario (standing, kneeling, prone) and personal comfort, but the core principles remain the same: stability and repeatability.
The Off-Hand (Standing) Stance
This is often considered the most challenging stance because you have the least amount of support from the ground or external objects.
- Feet Placement: Start with your feet roughly shoulder-width apart. Your non-dominant foot (the one on the same side as your support hand) should be slightly forward.
- Body Angle: Angle your body slightly towards the target, usually about 30-45 degrees. This allows your skeletal structure to support the rifle’s weight rather than just muscle.
- Shoulder Pocket: The rifle butt should seat firmly in the pocket of your dominant shoulder. We’ll talk more about this later, but it’s crucial here.
- Elbows: Your dominant elbow should be up, helping to create the shoulder pocket. Your support elbow can be tucked in towards your body or braced against your torso for added stability, creating a “bone-on-bone” support.
- Head Up: Keep your head relatively upright and bring the rifle to your eye, rather than dipping your head down to meet the rifle.
When learning how to hold a rifle in a standing position, remember that minimal muscle tension is key. You want to feel balanced and relaxed, not straining.
The Kneeling Stance
The kneeling stance offers more stability than standing, as you have contact with the ground.
- Single Knee Down: Typically, your dominant knee is on the ground, with your dominant foot pointing back. Your non-dominant foot is flat on the ground, pointing towards the target.
- Elbow Brace: Your support elbow can rest on your non-dominant knee, providing an excellent stable rest for the rifle. Place your elbow bone directly on your kneecap for maximum support.
- Body Position: Try to keep your spine relatively straight and lean slightly forward, maintaining balance.
This stance significantly improves your ability to hold a rifle steady compared to standing.
The Prone Stance
This is the most stable of the unassisted shooting positions because your entire body is in contact with the ground, providing maximum support.
- Body Flat: Lie flat on your stomach, angled slightly towards the target (again, around 30-45 degrees) to allow your dominant shoulder to form a good pocket.
- Legs Spread: Spread your legs slightly for comfort and stability. Avoid scrunching them up, as this can create tension.
- Elbows Wide: Your dominant elbow will be tucked in, creating the shoulder pocket. Your support elbow should be comfortably splayed out in front of you, forming a solid tripod with your chest and dominant arm.
- Cheek Weld: Ensure a consistent cheek weld, which we’ll discuss in detail, is easy to achieve here.
When you learn how to hold a rifle in the prone position, you’ll quickly notice how much easier it is to keep your sights steady on the target.
Natural Point of Aim (NPOA)
This concept is absolutely vital for consistent accuracy, regardless of your stance. Your Natural Point of Aim is where your rifle naturally points when your body is relaxed and stable in your chosen stance, without any muscular effort to hold it on target.
To find your NPOA: Get into your stance, aim at the target, close your eyes, take a few deep breaths, and then open your eyes. If your sights are off target, *don’t adjust the rifle with muscle*. Instead, shift your entire body slightly until your sights are naturally aligned with the target. This reduces fatigue and prevents you from fighting the rifle with muscle tension. It’s a core principle of how to hold a rifle accurately.
The Crucial Grips: Strong Support, Light Touch
Once you’ve got your stance, it’s time to focus on your hands. How you grip the rifle plays a huge role in control, recoil management, and trigger discipline.
The Strong Hand (Dominant Hand) Grip
This is the hand that operates the trigger and provides primary control over the rifle’s rear.
- High and Firm: Grip the pistol grip (or stock equivalent) high and firm, ensuring the web of your hand is well seated against the tang of the rifle. This gives you maximum control.
- Thumb Position: Your thumb can wrap around the grip, or for some rifles and shooters, ride high along the stock, usually on the same side as your trigger finger. Experiment to find what feels most natural and provides the best control for *you*.
- Trigger Finger Discipline: This is critical for safety and accuracy. Your trigger finger should be completely separate from your other fingers. It should rest *alongside* the receiver until your sights are aligned and you’re ready to shoot. Only then does it move to the trigger.
- Pressure: The strong hand grip should be firm enough for control, but not so tight that it introduces tension or shaking. Imagine squeezing a firm handshake, not crushing an egg.
The Support Hand (Non-Dominant Hand) Grip
Your support hand’s job is to stabilize the rifle, manage muzzle rise, and assist with recoil control.
- Fore-end Grip: Grip the fore-end of the rifle. The exact position can vary.
- Further Out: Gripping further out on the fore-end generally provides more leverage and better control over muzzle rise, especially for follow-up shots.
- Closer In: Gripping closer to the magazine well offers a more compact position and can be beneficial in some stances or when using a rest.
- C-Clamp/Thumb-Over: Many shooters use a “C-clamp” grip, where the thumb wraps over the top of the fore-end. This can provide excellent control and allow you to “pull” the rifle into your shoulder. Another common method is placing your hand under the fore-end, supporting the rifle from below.
- Pressure: Your support hand should provide a consistent, firm pull or push back into your shoulder, actively helping to stabilize the rifle. It’s often the “workhorse” for stability when learning how to hold a rifle.
Consistency in both your strong and support hand grips is vital for repeatable accuracy. Every time you pick up the rifle, strive for the exact same hand placement and pressure.
Shouldering the Rifle: A Solid Connection
Getting the rifle correctly into your shoulder and establishing a consistent cheek weld are game-changers for accuracy. This creates a solid connection between you and the rifle, minimizing movement and ensuring consistent sight alignment.
The Shoulder Pocket
This isn’t just a casual spot; it’s a specific area designed to absorb recoil and provide a stable platform.
- Locating It: The “shoulder pocket” is the fleshy area just inside the bony part of your shoulder, towards your chest. It’s a bit below your collarbone.
- Firm Seating: Seat the buttstock of the rifle firmly into this pocket. You don’t want it resting on your bicep (too low) or on the collarbone (too high and painful).
- “Pulling In”: Many experienced shooters advocate “pulling the rifle in” firmly to your shoulder. This doesn’t mean yanking it back, but rather applying consistent rearward pressure. This helps to absorb recoil more effectively and prevents the rifle from “jumping” as much during the shot, which is key for accurate follow-up shots and understanding how to hold a rifle for control.
Cheek Weld: Eye Relief and Sight Alignment
A consistent cheek weld is one of the most overlooked yet critical aspects of how to hold a rifle correctly. It ensures that your eye is always in the same position relative to your sights or scope.
- Finding the Spot: Rest your cheekbone firmly but comfortably on the stock. The exact spot will depend on your rifle, scope mounting, and face shape. The goal is to get your eye directly behind the optic or iron sights, with proper eye relief.
- Eye Relief: This is the distance between your eye and the rear lens of the scope. Too close, and you risk getting “scope bite” (the scope hitting your eyebrow during recoil). Too far, and you’ll see a dark ring around the image (vignetting). Find the sweet spot where you see a full, clear sight picture.
- Consistency is Key: Every time you shoulder the rifle, you want your cheek to meet the stock in the exact same spot. This ensures that your sight picture is consistent from shot to shot, which is absolutely vital for accuracy. Practice this repetition – it’s a core part of how to hold a rifle precisely.
Head Position Matters
Your head should be relatively upright and relaxed, not craning or tilting excessively. Bring the rifle up to your eye, not your head down to the rifle. This maintains a more natural body alignment and reduces muscle strain, contributing to a more stable hold.
Body Mechanics and Control: Beyond the Grip
Holding a rifle isn’t just about static positions; it’s about dynamic control and execution. These elements integrate with your stance and grip to complete the shooting sequence.
Breathing Techniques
We all breathe, but proper breathing for shooting is a skill unto itself.
- The Respiratory Pause: Most shooters use a technique called the “respiratory pause.” You take a few normal breaths, exhale about two-thirds of the air, and then pause briefly before your next inhale. This is the moment when your body is most still and relaxed.
- Timing Your Shot: Perform your trigger press during this natural pause. Avoid holding your breath for too long, as it can lead to tension and shaking.
Trigger Control: The Surprise Break
This is where many beginners struggle, and it’s arguably the most important factor for accuracy after sight alignment.
- Smooth and Continuous: Your finger should apply slow, continuous, increasing pressure straight back on the trigger. You’re not “pulling” the trigger; you’re *pressing* it.
- The Surprise Break: The goal is for the shot to break as a “surprise.” You shouldn’t know the exact millisecond the rifle will fire. If you anticipate the shot, you’re likely to flinch or jerk the rifle, sending the bullet off target.
- Finger Placement: Generally, the pad of your index finger is used, placing it so the first joint (or slightly before/after, depending on your hand and rifle) is on the trigger. The goal is to press the trigger straight back without disturbing the sights.
Mastering this is a critical component of learning how to hold a rifle steady through the shot.
Follow Through
The shot isn’t over when the bullet leaves the barrel. Follow through is just as important as the setup.
- Maintain Position: After the shot breaks, continue to hold the rifle in position, maintain your sight picture, and keep pressing the trigger for a brief moment. This prevents you from immediately relaxing or jerking the rifle as the shot fires.
- Observe and Reset: Watch where your shot lands (if possible), cycle the action if necessary, and then reset your hold for the next shot.
Good follow-through ensures that any minor movements *after* the shot don’t affect where the bullet *was* going.
Managing Recoil
Recoil is the backward force generated when a firearm discharges. It’s an unavoidable part of shooting, but how you manage it makes a big difference.
- Lean Forward: A slight forward lean in your stance helps you absorb recoil into your body, rather than being pushed straight back.
- Pulling In: As mentioned, firmly seating and “pulling in” the rifle to your shoulder helps distribute the recoil over a larger area of your body.
- Consistent Stance: A repeatable, stable stance allows your body to absorb recoil consistently, making it easier to get back on target for follow-up shots.
Learning how to hold a rifle effectively includes learning to manage its kick.
Practice Makes Perfect: Drills and Tips
Knowing *how* to hold a rifle is one thing; consistently doing it correctly is another. Only practice will build the muscle memory and mental discipline required.
Dry Firing
This is an incredibly valuable practice tool that can be done safely at home.
- No Live Ammo: Ensure absolutely no live ammunition is present in your practice area. Use snap caps if your rifle’s firing pin can be damaged by dry firing.
- Focus on Fundamentals: Practice your stance, grip, shouldering, cheek weld, breathing, and most importantly, your trigger press. Watch your front sight or reticle as you press the trigger; it shouldn’t move.
- Repetition: Dry fire frequently, even for just a few minutes a day. It builds muscle memory without the cost or noise of live ammunition.
Live Fire Practice
There’s no substitute for sending actual rounds downrange.
- Focus on One Skill: Don’t try to master everything at once. Dedicate a range session to perfecting your prone stance, or focusing purely on trigger control, or ensuring a consistent cheek weld.
- Vary Conditions: Practice in different stances, at different distances, and maybe even with slightly different lighting conditions to build adaptability.
- Analyze Your Shots: Pay attention to where your shots are landing. If you’re consistently shooting low and left (for a right-handed shooter), it might indicate you’re jerking the trigger or anticipating recoil. Learn to diagnose your misses.
Seeking Professional Guidance
Don’t be afraid to ask for help! A certified instructor can quickly spot flaws in your technique that you might not even notice. They can provide personalized feedback on how to hold a rifle, fine-tune your stance, and improve your overall shooting mechanics. A few hours with a good instructor can save you months of trial and error.
Consistency Over Force
A crucial tip for learning how to hold a rifle: aim for consistency, not brute force. You’re not trying to wrestle the rifle into submission. Instead, you’re building a stable, repeatable, and relaxed platform from which it can perform its job. Every time you pick up the rifle, try to replicate your successful holds. This consistency is the true secret to accuracy.
Wrapping things up, understanding how to hold a rifle is more than just a physical act; it’s a mindful process. It combines physical posture, hand placement, breathing, and mental focus into a coherent system. By dedicating time to practice these fundamentals, you’ll not only become a safer and more accurate shooter but also gain a deeper appreciation for the art and science of marksmanship. So, take these tips to the range, practice diligently, and enjoy the journey of becoming a truly proficient rifleman!
🎥 Related Video: How To Hold A Rifle
📺 Johnny Q
Frequently Asked Questions
What’s the best stance for a beginner learning how to hold a rifle?
For beginners, starting with the prone position is often recommended. It provides the most stability, making it easier to focus on other fundamentals like sight alignment and trigger control without struggling with body stability. Once comfortable, you can progress to kneeling and standing.
How does proper rifle hold help with recoil management?
A proper rifle hold, including a firm shoulder pocket placement and a slight forward lean, helps distribute the recoil energy across a larger part of your body. This makes the “kick” feel less jarring, allows for quicker sight recovery, and prevents the rifle from shifting excessively, thus improving overall control.
Should my support hand grip the rifle’s magazine or the fore-end?
Generally, your support hand should grip the rifle’s fore-end, not the magazine. Gripping the magazine can introduce inconsistencies or even malfunctions. The fore-end provides a stable point to control the rifle, and gripping further out often offers more leverage for stability and muzzle control.
How can I ensure a consistent cheek weld every time I hold my rifle?
Practice is key. When you bring the rifle to your shoulder, consciously try to place your cheekbone on the exact same spot on the stock. You can even add a small piece of tape or a marker if allowed, to help find that consistent spot. This repetitive action builds muscle memory for reliable sight alignment.
What if I find it uncomfortable to hold a rifle in one of the recommended stances?
Individual body mechanics vary, so slight adjustments for comfort are fine, as long as they don’t compromise stability or safety. Experiment with minor changes in foot placement, body angle, or elbow position. If discomfort persists, consider seeking advice from a certified instructor who can offer personalized tips on how to hold a rifle effectively for your build.
Does the type of rifle affect how I should hold it?
Yes, to some extent. While the fundamental principles of how to hold a rifle remain the same (safety, stance, grip, cheek weld, trigger control), the specific ergonomics of different rifles (e.g., AR-style platforms vs. traditional bolt-action rifles) might require slight variations in hand placement or body angle. Always adapt the core techniques to fit your specific firearm comfortably and effectively.
