Learning how to clean a rifle properly is essential for safety, accuracy, and prolonging your firearm’s life. This comprehensive guide walks you through every step, from gathering the right supplies to meticulous cleaning of the barrel, bolt, and receiver. Follow our practical tips to ensure your rifle remains reliable, performing at its best, and always ready for your next adventure.
Cleaning your rifle isn’t just a chore; it’s a fundamental part of responsible firearm ownership. Think of it as essential maintenance, much like changing the oil in your car. A well-maintained rifle is a reliable rifle, and reliability translates directly to safety and performance. Whether you’re a seasoned hunter, a competitive shooter, or simply enjoy target practice, understanding how to clean a rifle properly is a skill every rifle owner should master.
Perhaps you’ve just come back from the range, your rifle a little dusty and perhaps a bit dirty from spent powder. Or maybe your rifle has been in storage for a while, and you want to ensure it’s in top shape before its next outing. Whatever your reason, this comprehensive guide will walk you through the entire process, step-by-step, ensuring your rifle remains accurate, safe, and ready for action for years to come. We’ll cover everything from gathering your supplies to meticulous cleaning techniques and proper lubrication.
So, grab your cleaning supplies, find a well-ventilated area, and let’s dive into the world of rifle cleaning. By the end of this guide, you’ll feel confident in your ability to keep your firearm pristine, ensuring its longevity and optimal performance. Let’s learn how to clean a rifle the right way!
Key Takeaways
- Safety First: Always ensure your rifle is unloaded and pointed in a safe direction before you begin any cleaning or maintenance.
- Gather Your Tools: Having the right cleaning kit, including solvents, oils, brushes, and patches, makes the process much more efficient and effective.
- Focus on the Bore: The barrel’s bore is crucial for accuracy. Clean it thoroughly from breech to muzzle using a bore guide to protect the rifling.
- Don’t Forget the Bolt and Receiver: Carbon and debris build up in these areas can cause malfunctions. Disassemble and clean them according to your rifle’s manual.
- Lubrication is Key: After cleaning, apply a thin layer of appropriate lubricant to moving parts to prevent rust and ensure smooth operation.
- Regular Cleaning: Establish a routine for cleaning your rifle, especially after each use or extended storage, to maintain its reliability and performance.
- Consult Your Manual: Always refer to your rifle’s owner’s manual for specific disassembly, cleaning, and reassembly instructions for your particular model.
Quick Answers to Common Questions
How often should I clean my rifle?
You should perform at least a basic cleaning after every shooting session, especially if you’ve fired a significant number of rounds. A more thorough cleaning, as described in this guide, is recommended every few hundred rounds or before long-term storage.
Can I use automotive oil or cleaner on my rifle?
No, it’s strongly advised to use products specifically designed for firearms. Automotive products might contain additives that are harmful to firearm finishes, plastics, or can gum up in the intricate mechanisms.
What’s the most important part of a rifle to clean?
The barrel’s bore is arguably the most critical component to clean for maintaining accuracy. However, ensuring the bolt and receiver are free of carbon buildup is also vital for reliable function.
Do I need to clean a brand-new rifle?
Yes, it’s a good practice to clean a new rifle before its first use. Manufacturers often apply a protective preservative that should be removed and replaced with appropriate gun oil before firing.
Is it possible to over-clean a rifle?
While generally beneficial, aggressive over-cleaning with harsh brushes or improper techniques, especially from the muzzle end, can potentially cause wear or damage to the rifling or crown over a long period. Focus on thorough, gentle cleaning from the breech, and avoid excessive scrubbing.
📑 Table of Contents
Why Bother Cleaning Your Rifle? The Core Reasons
You might be tempted to skip cleaning after a quick range trip, but doing so can have serious consequences. Understanding the “why” behind cleaning your rifle can motivate you to stick to a regular maintenance schedule. It’s more than just aesthetics; it’s about performance and safety.
Enhance Safety and Prevent Malfunctions
Carbon, copper, and lead residues from firing can build up in the bore, chamber, and action. This gunk can interfere with the smooth operation of moving parts, leading to malfunctions like failures to feed, extract, or eject. A jammed rifle in a critical moment is not only frustrating but potentially dangerous. Regular cleaning removes these obstructions, ensuring all parts move freely and correctly, significantly reducing the risk of a misfire or other dangerous malfunction. Proper cleaning helps ensure your rifle operates as intended, every time.
Maintain Accuracy
For many shooters, accuracy is paramount. Fouling in the barrel is the enemy of accuracy. As bullets travel down the bore, they leave behind tiny deposits of copper jacketing, lead, and gunpowder residue. These deposits can change the internal dimensions of the barrel, affecting the bullet’s flight path and consistency. A clean barrel allows the bullet to engage the rifling uniformly, resulting in tighter groupings and consistent point of impact. If you want your rifle to shoot true, learning how to clean a rifle effectively is non-negotiable.
Extend Lifespan and Preserve Value
Firearms are an investment. Like any mechanical device, they require care to last. Rust and corrosion are major threats to a rifle’s lifespan. Moisture, fingerprints, and acidic residues from gunpowder can all lead to rust if not cleaned and protected. Regular cleaning removes corrosive elements and allows for the application of protective oils, safeguarding the metal components. This not only keeps your rifle looking good but also preserves its mechanical integrity and resale value over time.
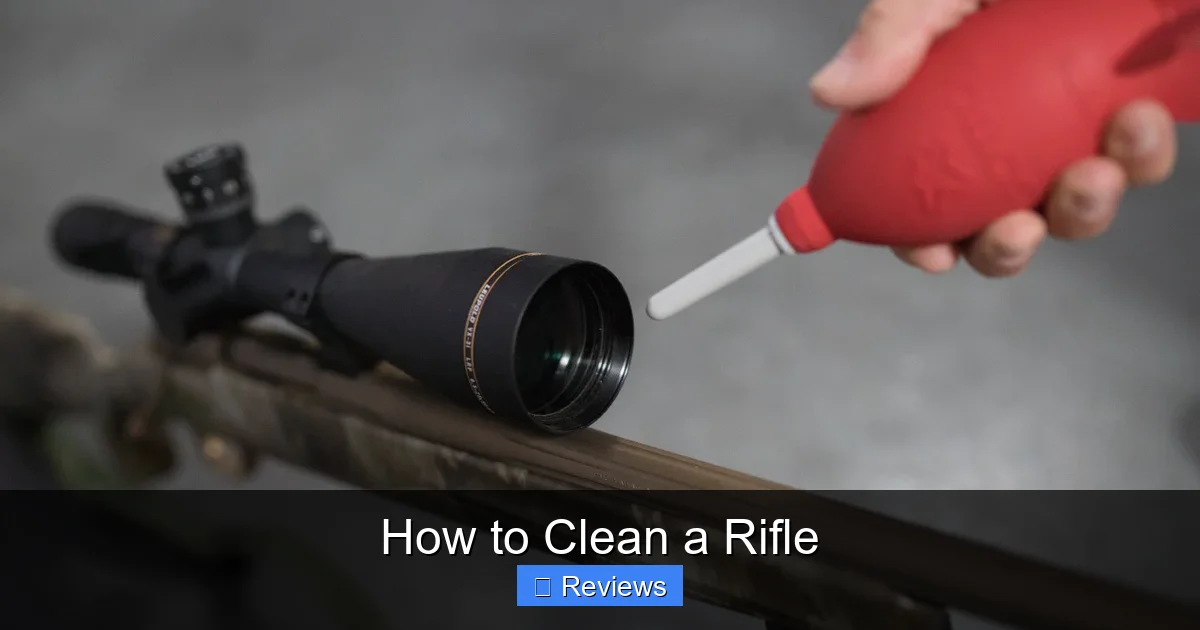
Gathering Your Rifle Cleaning Supplies
Visual guide about How to Clean a Rifle
Image source: media.pelican.com
Before you even think about starting, you need the right tools. Having everything laid out and ready will make the cleaning process smoother and more efficient. Don’s skimp on quality here; good tools make a big difference when you need to clean a rifle thoroughly.
The Essential Cleaning Kit
A basic rifle cleaning kit usually includes:
- Cleaning Rod: A sturdy, one-piece rod is best to avoid scratching the bore. Choose one that’s slightly longer than your rifle’s barrel.
- Bore Brushes: Copper or nylon brushes specific to your rifle’s caliber are used to scrub away fouling.
- Patches: Cotton patches in the correct size for your caliber are crucial for applying solvent and wiping away residue.
- Jags: A pointed jag helps push patches through the bore, ensuring full contact.
- Slotted Tip: An alternative to the jag for pushing patches.
- Bore Guide: This is highly recommended! It protects the rifle’s chamber and bore from being damaged by the cleaning rod.
- Chamber Brush: Specifically designed to clean the chamber area.
- Utility Brush: A stiff nylon brush for scrubbing external parts and hard-to-reach areas.
Cleaning Solvents and Oils
These are the chemicals that do the heavy lifting.
- Bore Solvent: Designed to break down carbon, copper, and lead fouling. There are many types; choose one that targets the fouling you encounter most.
- Gun Oil/Lubricant (CLP – Cleaner, Lubricant, Protectant): A good CLP can act as a light cleaner, lubricant, and rust preventative all in one. Alternatively, you might use separate dedicated gun oil and rust inhibitor.
- Grease (Optional): For specific high-friction points like bolt lugs on some rifles, a light gun grease might be recommended by the manufacturer.
Other Handy Items
- Cleaning Mat/Work Surface: Protects your table and catches drips.
- Good Lighting: Essential for inspecting your work.
- Cotton Swabs/Q-Tips: Great for small nooks and crannies.
- Lint-Free Cloths: For wiping down exterior surfaces.
- Safety Glasses: Protect your eyes from solvent splashes.
- Nitrile Gloves: Protect your hands from harsh chemicals and prevent transferring skin oils to the metal.
Pre-Cleaning Safety Checks and Setup
Before any cleaning begins, safety must be your absolute top priority. This is not a step to rush or overlook.
Unload and Verify
First and foremost, unload your rifle. Remove the magazine (if applicable), then cycle the action several times to ensure the chamber is empty. Visually inspect the chamber and magazine well. Physically feel the chamber. Confirm there are no rounds in the chamber or magazine. Keep all ammunition away from your cleaning area. This is the single most important safety rule when handling firearms. Always treat every firearm as if it’s loaded, even after you’ve cleared it.
Choose Your Workspace
Find a well-lit, well-ventilated area. Gun solvents can have strong fumes. A garage or workshop is ideal. Lay down your cleaning mat or old newspapers to protect your work surface from solvents and oils. Having a dedicated space makes it easier to clean a rifle without making a mess.
Field Strip Your Rifle (If Applicable)
Consult your rifle’s owner’s manual for instructions on field stripping. Field stripping involves disassembling your rifle into its major components (e.g., barrel assembly, receiver, bolt carrier group) for easier access to internal parts. You don’t usually need to fully detail strip it for a routine cleaning, but taking it down to its main components allows for thorough cleaning of the bolt and receiver.
The Step-by-Step Rifle Cleaning Process
Now that you’re safe and prepared, it’s time to get down to the actual cleaning. This section will guide you through how to clean a rifle from barrel to buttstock.
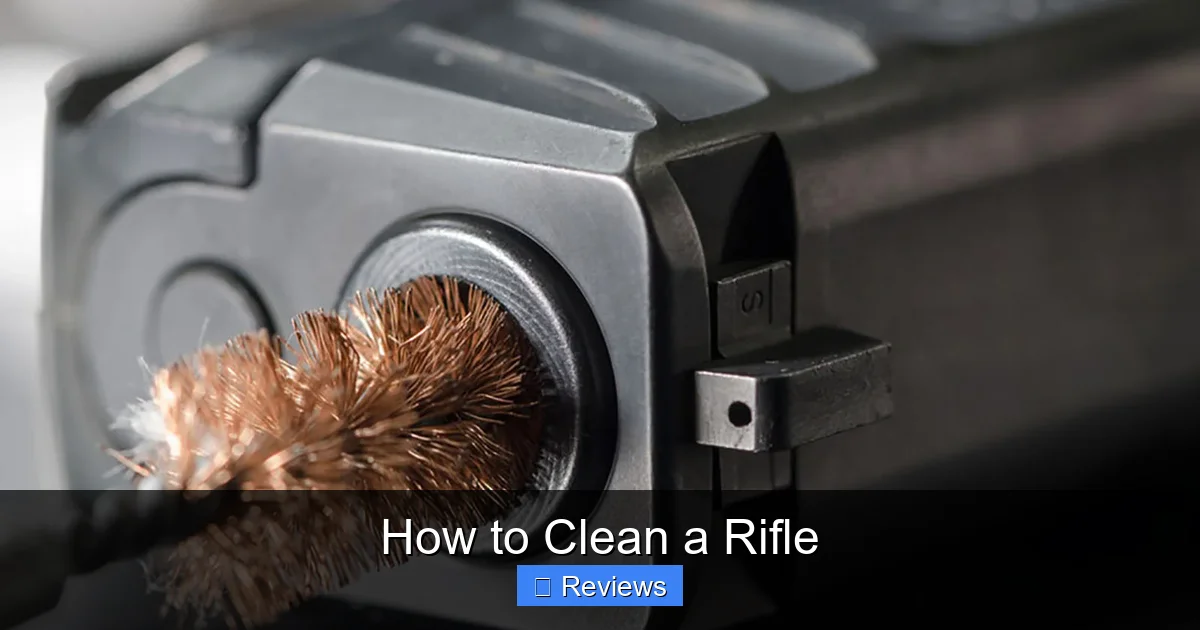
1. Cleaning the Barrel (The Heart of Accuracy)
The barrel is arguably the most critical part to clean for accuracy. Always clean from the breech (where the bullet enters) to the muzzle (where it exits) if possible, using a bore guide to protect the chamber and crown.
Initial Solvent Application
Attach a patch to your jag, saturate it with bore solvent, and push it slowly through the barrel from breech to muzzle. Let it sit for a few minutes to allow the solvent to work on the fouling. Repeat with one or two more solvent-soaked patches.
Scrubbing the Bore
Attach a bore brush (caliber-specific) to your cleaning rod. Push it through the barrel from breech to muzzle. Do not pull the brush back through the barrel from the muzzle end; this can damage the crown, which is vital for accuracy. Instead, push it all the way through, unscrew it from the rod, pull the rod back, reattach the brush, and push it through again. Repeat this 5-10 times, depending on how fouled your barrel is.
Patching Out Fouling
After brushing, push several clean, dry patches through the barrel using your jag until they come out mostly clean. The first few patches will likely be black or green/blue (indicating copper fouling). If they’re still very dirty, repeat the solvent application and brushing steps.
Checking for Fouling
Use a bore light to inspect the barrel from both ends. Look for any remaining carbon, copper streaks, or lead deposits. If you see any, target those areas with more solvent and brushing. Continue cleaning until the bore shines and is free of visible fouling.
2. Cleaning the Chamber
The chamber is where the cartridge sits before firing, and it can accumulate carbon, which can cause extraction issues.
Using a Chamber Brush
Attach your chamber brush to the cleaning rod. Dip it in bore solvent and insert it into the chamber. Rotate and scrub the chamber thoroughly, working it back and forth several times.
Wiping Down the Chamber
Use cotton swabs or patches wrapped around a small tool, dipped in solvent, to clean the hard-to-reach areas of the chamber. Follow up with dry swabs or patches until clean.
3. Cleaning the Bolt and Bolt Carrier Group (If Applicable)
The bolt and its carrier (in semi-automatic rifles) are complex parts that get heavily fouled and need meticulous cleaning to ensure reliable cycling.
Disassembly and Degreasing
Disassemble the bolt carrier group according to your rifle’s manual. Use a bore solvent or dedicated carbon cleaner on a utility brush to scrub away carbon deposits from the bolt face, lugs, extractor, and bolt carrier. Cotton swabs are excellent for intricate parts.
Scraping Carbon
Some areas, especially on gas-operated rifles like the AR-15, will have stubborn carbon buildup. Specialized carbon scrapers are available for specific rifle types, or a small flat-head screwdriver (used gently!) can help dislodge caked-on carbon. Be careful not to scratch metal surfaces unnecessarily.
Wipe Down and Inspect
Wipe all components clean with a lint-free cloth. Inspect each part for wear, cracks, or damage. Ensure the extractor and ejector move freely.
4. Cleaning the Receiver and Trigger Group
The receiver houses the action, and the trigger group controls firing. Both need attention.
Wiping Out the Receiver
Use a utility brush, cotton swabs, and solvent to clean out any carbon, dirt, or debris from inside the receiver. Pay attention to rails, locking surfaces, and any areas where the bolt carrier group makes contact.
Cleaning the Trigger Group
Use cotton swabs and a light application of solvent to clean around the hammer, sear, and trigger components. Avoid flooding the trigger group with solvent, as it can flush out factory lubrication or collect debris. For most routine cleanings, a light wipe-down is sufficient. If you suspect heavy fouling in the trigger group, consult a gunsmith for a detailed disassembly.
5. Cleaning the Exterior Surfaces
The outside of your rifle needs care too, especially if it’s been exposed to the elements or your skin oils.
Wiping Down Metal Surfaces
Use a lint-free cloth lightly dampened with gun oil or CLP to wipe down all external metal surfaces. This cleans off fingerprints, dust, and provides a protective layer against rust.
Cleaning Stock and Forend
If your rifle has a synthetic stock, wipe it down with a damp cloth or a mild cleaner. For wood stocks, use a specialized wood cleaner and protector, or simply a dry cloth. Avoid getting solvents on wood or synthetic parts unless they are specifically designed for it.
Post-Cleaning Care, Lubrication, and Storage
You’ve done the hard work of cleaning; now it’s time to protect your investment and prepare it for storage. This step is crucial after you clean a rifle.
Lubrication
Proper lubrication is vital for smooth operation and rust prevention.
Applying Gun Oil
Apply a *thin* layer of gun oil or CLP to all moving metal-on-metal parts. This includes the bolt carrier rails, bolt lugs, cam pin, firing pin, and any other points of friction. A little goes a long way; excess oil can attract dirt and debris. Refer to your rifle’s manual for specific lubrication points.
Grease for High-Friction Areas (If Recommended)
For some rifles, particularly those with heavy-duty actions or specific designs, a small amount of gun grease might be recommended on certain high-pressure contact points. Again, consult your manual.
Reassembly and Function Check
Once lubricated, reassemble your rifle according to your owner’s manual. Once fully reassembled, perform a function check:
- Ensure the safety mechanism works.
- Check that the trigger resets correctly.
- Cycle the action multiple times to ensure smooth operation.
This confirms you’ve reassembled it correctly and that all components are working as they should after you clean a rifle.
Final Wipe Down
Give the exterior a final wipe down with a clean, dry, lint-free cloth to remove any excess oil or fingerprints.
Proper Storage
Store your clean, lubricated rifle in a safe, secure location. A gun safe or cabinet is ideal. Consider using a silicone-treated gun sock for added protection against moisture if storing in a humid environment. Ensure the storage area is dry and has stable temperature.
Conclusion: The Reward of a Clean Rifle
Congratulations! You’ve successfully learned how to clean a rifle thoroughly and safely. This detailed process might seem daunting at first, but with practice, it becomes a routine and even a satisfying ritual. Remember, a clean rifle isn’t just about aesthetics; it’s about ensuring safety, maintaining peak accuracy, and extending the life of your valuable firearm.
Make rifle cleaning a regular part of your shooting regimen. After every range trip, or even just after handling, take the time to perform at least a basic cleaning. For more intensive use or before long-term storage, follow the comprehensive steps outlined here. By dedicating a little time and effort to proper maintenance, you ensure your rifle remains a reliable, accurate, and trustworthy companion for all your shooting endeavors. Happy shooting, and always stay safe!
🎥 Related Video: How to Clean a Rifle (The Right Way)
📺 Outdoor Life
Here’s the best way to clean a rifle thoroughly but without spending more time and effort than necessary. To make the process …
Frequently Asked Questions
What is “field stripping” a rifle?
Field stripping refers to the basic disassembly of a firearm into its major components, usually without the need for tools, for the purpose of cleaning and basic maintenance. It allows access to the critical internal parts like the bolt and receiver, making it easier to remove carbon and fouling. Always refer to your rifle’s owner’s manual for specific field stripping instructions.
Why is a bore guide important when cleaning the barrel?
A bore guide is crucial because it protects the chamber and the crown of your rifle’s barrel from wear and tear caused by the cleaning rod. It ensures the rod enters the bore perfectly straight, preventing damage to the rifling at the chamber end and maintaining the critical geometry of the muzzle crown, which significantly impacts accuracy.
What’s the difference between bore solvent and gun oil?
Bore solvent is specifically formulated to chemically break down and loosen gunpowder residue (carbon), copper fouling, and lead deposits inside the barrel and chamber. Gun oil, on the other hand, is primarily for lubricating moving metal parts to reduce friction and for preventing rust and corrosion on metal surfaces. Some products are a “CLP” (Cleaner, Lubricant, Protectant) designed to do all three functions to a lesser degree.
How can I tell if my rifle barrel is clean enough?
After pushing several dry patches through, they should come out relatively clean, with no significant black, green, or blue streaks. Using a bore light to visually inspect the inside of the barrel is the best way to confirm cleanliness. The bore should appear bright and free of visible carbon, copper, or lead streaks.
Should I lubricate every part of my rifle?
No, you should only lubricate moving metal-on-metal parts or areas prone to rust. Over-lubricating can attract dirt, dust, and carbon, creating a gritty paste that can hinder operation. Refer to your rifle’s owner’s manual for specific lubrication points and the appropriate amount of oil or grease to apply.
What precautions should I take regarding cleaning solvents?
Always work in a well-ventilated area to avoid inhaling fumes from cleaning solvents. Wear safety glasses to protect your eyes from splashes and nitrile gloves to protect your skin from harsh chemicals. Read the safety data sheet (SDS) for any product you use and follow all manufacturer recommendations for safe handling and disposal.


