Building an AR rifle offers incredible customization, cost savings, and a deep understanding of your firearm. This comprehensive guide walks you through every step, from selecting the right components and gathering essential tools to the detailed assembly of both the lower and upper receivers. We emphasize the importance of understanding legal requirements and adhering to safety protocols throughout your exciting AR build journey.
Ever dreamt of owning an AR rifle that’s perfectly tailored to your exact specifications? Maybe you want a specific barrel length for precision shooting, a unique handguard for tactical applications, or a trigger that feels just right for competition. Whatever your vision, learning how to build an AR rifle from scratch is not only incredibly rewarding but also a fantastic way to deepen your understanding of this popular and versatile platform. It’s like building a high-performance LEGO set, but with more serious tools and, well, real-world implications!
Beyond the satisfaction of creating something with your own hands, building an AR can often be more cost-effective than buying a factory-assembled rifle, especially if you’re looking for high-end components. Plus, you get an intimate knowledge of every single part, which makes maintenance, troubleshooting, and future upgrades a breeze. If you’ve ever found yourself wondering what each pin, spring, and lever does inside an AR, this journey will answer all your questions and then some. So, grab your safety glasses, clear some workspace, and let’s dive into the exciting world of building your very own AR rifle!
This guide is designed to be your friendly companion through the entire process. We’ll cover everything from the crucial legal considerations you need to know *before* you even buy your first part, to selecting components, gathering your tools, and walking you through the assembly of both the lower and upper receivers. We’ll break down each step into easy-to-understand instructions, offering tips and best practices along the way. Remember, safety, patience, and attention to detail are your best friends in this endeavor. Let’s get started on building an AR rifle you’ll be proud of!
Key Takeaways
- Understand Legality First: Before starting your AR rifle build, thoroughly research and comply with all federal, state, and local firearms laws, especially concerning receivers and specific components.
- Customization is Key: Building an AR allows for unparalleled personalization, enabling you to select every component to perfectly match your shooting style, budget, and intended use.
- Gather the Right Tools: Proper specialized tools, such as an armorer’s wrench, torque wrench, punches, and a bench vise, are essential for a safe and successful assembly.
- The Lower Receiver is the “Firearm”: The lower receiver is the legally regulated part of the AR. Understanding whether you’re starting with a stripped lower or an 80% lower is crucial.
- Follow Step-by-Step Assembly: Both the lower and upper receivers have specific assembly sequences that, when followed carefully, ensure proper function and safety.
- Safety and Function Checks are Paramount: After assembly, perform thorough function checks to ensure all mechanisms work correctly and safely before ever loading live ammunition.
- Patience and Attention to Detail: Building an AR rifle is a rewarding project that requires patience, attention to detail, and a commitment to learning. Don’t rush the process.
Quick Answers to Common Questions
What’s the hardest part about building an AR rifle?
For most first-time builders, dealing with the tiny springs and detents in the lower receiver can be the most frustrating part. They have a tendency to fly away if not handled carefully!
Do I need a gunsmith to build an AR rifle?
No, many people successfully build their own AR rifles with the right tools and patience. However, a gunsmith can be helpful for headspace checks or if you encounter a persistent issue.
How much money can I save by building instead of buying?
Savings vary greatly depending on the components you choose. You can often save a few hundred dollars compared to a similarly equipped factory rifle, especially when opting for premium parts.
What’s the minimum barrel length for an AR rifle?
For an AR to be legally considered a “rifle” without NFA paperwork (like a Short-Barreled Rifle or SBR), it must have a barrel at least 16 inches long, or an overall length of 26 inches or more.
What’s the most important safety check after building an AR rifle?
Performing a headspace check on a new barrel and bolt carrier group is critically important to ensure safe operation and prevent dangerous malfunctions.
📑 Table of Contents
Understanding the AR Platform and Legalities
Before you even think about buying a single part for your AR rifle, it’s absolutely essential to understand the legal landscape. The AR platform is modular, meaning it’s made up of many interchangeable parts. However, one part, the lower receiver, is legally considered the “firearm” by federal law. Everything else is just a part. This distinction is incredibly important when you are planning to build an AR rifle.
The Lower Receiver: The Heart of the Matter
The lower receiver houses the fire control group (trigger, hammer, safety), the magazine well, and connects to the buffer tube and stock. When you buy a stripped lower receiver from a dealer, it requires a background check, just like buying a complete firearm. It will also have a serial number. This is the most common and straightforward path for most first-time builders.
Another option is an 80% lower receiver. This is a lower receiver that is *not yet* finished to the point of being considered a firearm. It lacks crucial machining, like the trigger pocket and pinholes. While federally legal to buy and complete for personal use without a serial number or background check (as of the time of writing, laws are subject to change), this path requires specialized tools (like a milling jig and router) and significantly more work. Once finished, it *becomes* a firearm. Always check the latest ATF regulations and your local laws regarding 80% lowers, as some states have restricted or outright banned them. For this guide, we will focus on assembling a commercially purchased, serialized lower receiver, as it’s the simplest entry point for most people looking to build an AR rifle.
Federal, State, and Local Laws
Firearms laws can be complex and vary wildly. What’s legal in one state might be a felony in another.
- NFA (National Firearms Act): Be aware of potential NFA implications. Building an AR rifle with a barrel shorter than 16 inches, or an overall length less than 26 inches, usually classifies it as a Short-Barreled Rifle (SBR), which requires a tax stamp and federal registration.
- Pistol Braces: The legal status of AR pistols (ARs with barrels shorter than 16 inches that utilize a pistol brace instead of a stock) has been a hot topic. Always consult the latest ATF rulings regarding pistol braces and their classification.
- State-Specific Bans/Restrictions: Some states have “assault weapon” bans that might restrict certain cosmetic features (like pistol grips, adjustable stocks, flash hiders) or magazine capacities. Others require specific compliance features, such as “featureless” builds or fixed magazines.
Your absolute first step should be to research the firearms laws specific to your state, county, and city. Consult local firearms retailers or legal experts if you have any doubts. Compliance is non-negotiable when you build an AR rifle.
Gathering Your Tools and Workspace
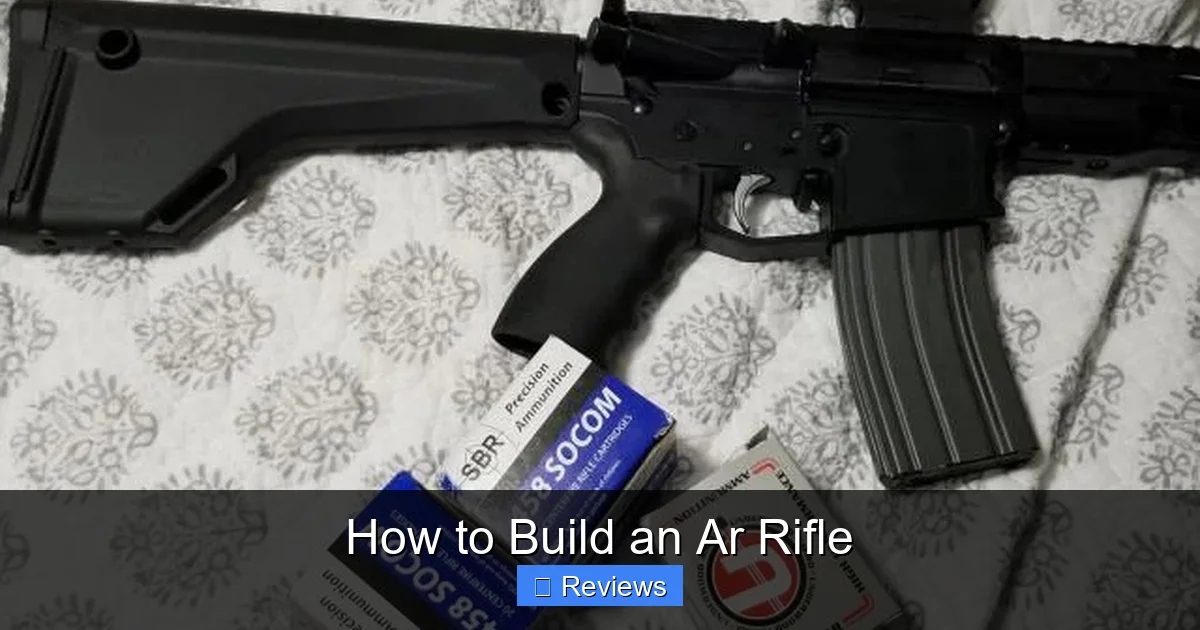
Visual guide about How to Build an Ar Rifle
Image source: content.osgnetworks.tv
Before you even think about cracking open component bags, you need the right environment and the right gear. Think of it like cooking: you wouldn’t start a gourmet meal without the right utensils and a clean kitchen! A dedicated, well-lit, and clean workspace is crucial for preventing lost tiny springs and ensuring a smooth build.
Essential Tools for Your AR Rifle Build
You don’t need an entire gunsmith’s workshop, but a few specialized tools will make your life a lot easier and prevent damage to expensive parts.
- Armorer’s Wrench: This is a multi-tool specifically designed for ARs, essential for installing barrel nuts, castle nuts, and some muzzle devices.
- Torque Wrench: Absolutely critical for achieving the correct torque on components like the barrel nut and buffer tube castle nut. Overtightening or undertightening can lead to major issues.
- Bench Vise with Upper/Lower Receiver Blocks: These blocks fit into your receivers and allow you to secure them firmly in a vise without scratching or deforming them. They are indispensable for applying torque.
- Punch Set (Roll Pin and Standard): You’ll be driving a lot of small pins. A good set of steel and brass punches is a must.
- Small Hammer (Brass/Nylon/Rubber Mallet): For driving those pins.
- Pliers (Needle-Nose, Snap Ring, etc.): Handy for grasping small parts or springs.
- Small Screwdrivers/Hex Key Set: For various screws on handguards, grips, etc.
- Safety Glasses: ALWAYS wear eye protection. Springs have a tendency to fly.
- Bench Block: A sturdy block with holes for supporting receivers while driving pins.
- Lubricant/Grease: For threads (barrel nut) and some moving parts. Anti-seize compound is often recommended for barrel nuts.
- Degreaser/Brake Cleaner: For preparing surfaces.
- Masking Tape/Electrical Tape: To protect finishes when using punches or tools.
Having these tools readily available will prevent frustration and potential damage to your valuable components when you build an AR rifle.
Choosing Your Components: The Core of Customization
This is where the fun really begins! The AR platform’s modularity means you have an incredible array of choices for every single part. Your choices here will define the performance, ergonomics, and aesthetic of your finished AR rifle. Think about your budget, intended use (range plinking, hunting, competition, home defense), and desired features.
Key Components You’ll Need
To build an AR rifle, you’ll generally need the following:
- Lower Receiver: As discussed, this is the serialized “firearm.” Most people start with a stripped lower (just the bare metal receiver).
- Lower Parts Kit (LPK): This includes all the small springs, pins, detents, the fire control group (trigger, hammer, disconnector), safety selector, magazine release, and bolt catch. Many come with a basic pistol grip.
- Buffer Tube Assembly: Consists of the buffer tube (receiver extension), buffer spring, buffer, castle nut, and receiver end plate.
- Stock: Attaches to the buffer tube. Options range from fixed to adjustable (carbine) and specialized precision stocks.
- Upper Receiver: This can be stripped (just the receiver) or complete (with forward assist and dust cover installed).
- Barrel: The heart of accuracy. Consider caliber (most commonly 5.56/.223), length (16 inches minimum for a rifle without NFA paperwork), twist rate, profile, and material.
- Gas System:
- Gas Block: Channels gas from the barrel. Can be fixed or adjustable.
- Gas Tube: Connects the gas block to the upper receiver, cycling the action. Length depends on barrel length (carbine, mid-length, rifle).
- Handguard/Rail: Covers the barrel and provides mounting points for accessories. Free-float handguards are popular for accuracy as they don’t touch the barrel.
- Bolt Carrier Group (BCG): The “engine” of the AR, responsible for chambering rounds, firing, and extracting spent casings. Choose a quality one; it’s a critical component.
- Charging Handle: Used to cycle the action manually. Ambidextrous options are popular.
- Muzzle Device: Attaches to the end of the barrel. Options include flash hiders, compensators, muzzle brakes, or simply a thread protector.
- Sights/Optics: While not strictly part of the “build,” you’ll need a way to aim!
Research each component. Read reviews, watch videos, and compare brands. Don’t cheap out on critical components like the barrel, BCG, and trigger, as they significantly impact performance when you build an AR rifle.
Assembling the Lower Receiver: The Foundation
The lower receiver is where you’ll start your AR rifle build. It’s often considered the most fiddly part due to all the tiny springs and detents, but with patience, it’s very manageable. Take your time, work on a clean surface, and keep those safety glasses on!
Step-by-Step Lower Receiver Assembly
1. Magazine Catch: Insert the magazine catch button from the left side of the receiver. Thread the magazine catch spring onto the magazine catch, then screw the magazine release into the spring. Depress the button and turn the release until it’s flush or slightly recessed.
2. Trigger Guard: If your lower doesn’t have an integral trigger guard, you’ll install a separate one. One end typically pivots in place, and the other secures with a roll pin. Use a roll pin punch and hammer, supporting the receiver on a bench block.
3. Pivot Pin: This is the front takedown pin. Place the pivot pin detent spring into its hole, then drop the detent on top. Carefully slide the pivot pin into place, depressing the detent. Use a piece of tape to hold the detent in while you slide the pin through.
4. Bolt Catch: Place the bolt catch spring, plunger, and then the bolt catch itself into position. Drive the bolt catch roll pin through the receiver and bolt catch, again using a roll pin punch and a hammer. Protect your receiver with tape if needed.
5. Fire Control Group (FCG): This includes the trigger, hammer, and disconnector.
- Trigger: Insert the trigger with its spring, then the disconnector and its spring. Align the holes and drive in the trigger pin.
- Hammer: Place the hammer with its spring. Align the holes and drive in the hammer pin.
Perform a quick function check: pull the trigger, the hammer should fall. Hold the trigger back, reset the hammer manually, then slowly release the trigger—you should feel a “reset” click.
6. Safety Selector: Insert the safety selector detent spring into its hole, then the detent. Carefully slide the safety selector into its position while pressing down on the detent.
7. Takedown Pin: This is the rear takedown pin. This process is similar to the pivot pin. Insert the takedown pin detent spring into its hole in the receiver end plate, then the detent. Hold these in place as you slide the takedown pin into the receiver.
8. Buffer Tube Assembly:
- Slide the receiver end plate over the buffer tube, followed by the castle nut (threaded side facing the end plate).
- Carefully depress the takedown pin detent and spring (from the previous step) with the end plate, ensuring the spring slides into the end plate hole.
- Thread the buffer tube into the back of the receiver. Ensure the buffer tube’s index slot aligns with the small tab on the receiver end plate.
- Once fully seated (usually 1-2 turns past snug), tighten the castle nut firmly with your armorer’s wrench. Many recommend staking the castle nut to prevent loosening, which involves deforming a small part of the castle nut into a notch on the end plate.
- Insert the buffer spring into the buffer tube, followed by the buffer.
9. Pistol Grip: Attach your chosen pistol grip. This usually involves a screw through the bottom of the grip into the receiver, and often a spring and detent for the safety selector that seat inside the grip.
10. Stock: Slide your chosen stock onto the buffer tube. If it’s an adjustable carbine stock, ensure it locks into position.
Congratulations, your lower receiver is complete! You’ve just finished a significant part of your AR rifle build.
Assembling the Upper Receiver: The Business End
The upper receiver assembly involves fewer small parts but requires precise torque specifications, especially for the barrel nut. This is where your bench vise and receiver blocks become truly indispensable.
Step-by-Step Upper Receiver Assembly
1. Forward Assist and Dust Cover (if stripped upper): If you started with a stripped upper, you’ll need to install these.
- Dust Cover: Install the spring and rod, then snap the dust cover into place.
- Forward Assist: Insert the spring and plunger into the forward assist body, then push it into the receiver and drive the roll pin through to secure it.
2. Barrel Installation: This is a critical step.
- Apply anti-seize compound or grease to the threads of the upper receiver.
- Slide the barrel into the upper receiver, ensuring the index pin on the barrel extension aligns with the corresponding notch in the upper receiver.
- Thread the barrel nut onto the upper receiver over the barrel. Tighten by hand, then use your armorer’s wrench and torque wrench to tighten to the manufacturer’s specified torque (usually between 30-80 ft-lbs), often requiring multiple cycles of tightening and loosening to “seat” the threads.
3. Gas Block and Gas Tube Installation:
- Insert the gas tube into the gas block. Secure it with the roll pin (use a punch and hammer).
- Slide the gas block onto the barrel, ensuring it aligns perfectly over the gas port hole in the barrel. Many gas blocks have alignment marks or use a jig.
- Secure the gas block. This is typically done with set screws that engage dimples on the barrel, or by cross-pins.
- Insert the free end of the gas tube into the hole in the upper receiver.
4. Handguard Installation:
- If you have a free-float handguard, it will typically attach to a proprietary barrel nut (which you installed in step 2) or clamp directly to the barrel nut. Follow the manufacturer’s instructions carefully for proper alignment and securing.
- Drop-in handguards simply snap into place, usually around a delta ring (if present) and the front sight base/gas block.
5. Muzzle Device Installation:
- Apply a thin layer of grease to the barrel threads.
- If using a crush washer or shims (common for flash hiders/compensators), ensure they are correctly oriented.
- Thread the muzzle device onto the barrel. Tighten with your armorer’s wrench, torquing it to the manufacturer’s specifications. Ensure it’s timed correctly if needed (e.g., ports facing specific directions).
6. Bolt Carrier Group (BCG) and Charging Handle Insertion:
- Ensure the BCG is clean and lightly lubricated.
- Hold the charging handle and slide it into the upper receiver until it stops.
- Insert the BCG behind the charging handle, aligning the gas key with the gas tube. Push it fully forward until it locks into place.
Your upper receiver is now complete! Now you’re just a step away from a fully built AR rifle.
Final Checks, Testing, and Safety
You’re almost there! Before you head to the range with your newly built AR rifle, there are a few critical steps to ensure everything functions correctly and, most importantly, safely. Never skip these checks.
Function Checks
1. Safety Selector Check:
- With the hammer cocked (pull the charging handle back and release), place the safety selector on “SAFE.”
- Pull the trigger firmly. The hammer should *not* fall.
- Move the safety selector to “FIRE.”
- Pull the trigger. The hammer *should* fall.
2. Trigger Reset Check:
- With the hammer cocked, pull the trigger and hold it back (the hammer should fall).
- While holding the trigger, manually reset the hammer by pushing it back until it clicks.
- Slowly release the trigger. You should hear and feel a distinct “reset” click. If you then pull the trigger again, the hammer should fall.
3. Magazine Catch Check: Insert an empty magazine. It should lock firmly into place. Press the magazine release button; the magazine should drop freely.
4. Bolt Catch Check: Insert an empty magazine and pull the charging handle fully to the rear. The bolt catch should engage, holding the bolt open. Press the top of the bolt catch; the bolt should release forward.
5. Takedown/Pivot Pins: Ensure these pins move freely and fully engage and disengage the upper and lower receivers.
Headspace Check
This is a crucial safety check. Headspace refers to the distance between the face of the bolt and the chamber shoulder in the barrel. Incorrect headspace can lead to dangerous malfunctions, including ruptured casings or even catastrophic failures.
- If you installed a new barrel and bolt carrier group, it is *highly* recommended to check headspace.
- This requires specialized tools: “GO” and “NO-GO” headspace gauges.
- If you’re unsure how to perform this, have a qualified gunsmith check it for you. This is not a step to overlook when you build an AR rifle.
Range Testing
When you take your AR rifle to the range for the first time:
- Start Slow: Load only one round into the magazine for the very first shot. This way, if there’s a problem, it’s easily contained.
- Observe: Pay close attention to how the rifle cycles. Does it extract and eject spent casings properly? Is the recoil manageable?
- Break-in: Many barrels benefit from a “break-in” procedure, which typically involves shooting a few rounds, cleaning, and repeating. Follow your barrel manufacturer’s recommendations.
- Accuracy: Zero your sights or optic. Then, start testing for accuracy.
Safety Always
Remember, you’ve just built a firearm. Treat it with the utmost respect.
- Always follow the four rules of firearm safety:
- Treat every firearm as if it were loaded.
- Never point the muzzle at anything you are not willing to destroy.
- Keep your finger off the trigger until your sights are on the target.
- Be sure of your target and what is beyond it.
- Always wear eye and ear protection when shooting.
- Store your rifle safely and securely, unloaded, and separate from ammunition.
Building an AR rifle is a journey, not just a destination. Enjoy the process, learn from it, and always prioritize safety. You’ve now got a custom AR rifle that you built with your own hands – that’s something to be proud of!
🎥 Related Video: How an AR-15 Works
📺 Matt Rittman
A 3D animation showing how an AR-15 works. Cinema 4D was used to create each individual part, as well as animating …
Frequently Asked Questions
Is it legal for anyone to build an AR rifle?
Generally, it is federally legal for individuals to build an AR rifle for personal use, provided they are not legally prohibited from owning firearms. However, state and local laws vary greatly, with some jurisdictions having specific restrictions on certain features or requiring serialization even for personally manufactured firearms. Always check your local laws first.
What’s the difference between a stripped lower and an 80% lower?
A stripped lower receiver is a completed, serialized firearm (by federal law) that requires a background check to purchase. An 80% lower receiver is an unfinished piece of metal that requires machining to become a functional firearm and is not legally considered a firearm until completed. Completing an 80% lower requires more tools and skills.
Can I mix and match parts from different manufacturers?
Yes, the AR platform is highly standardized, allowing for significant interoperability between parts from various manufacturers. This modularity is one of its biggest advantages, enabling extensive customization. However, always ensure parts are compatible and designed for the AR-15 platform.
How long does it take to build an AR rifle?
The actual assembly time for an experienced builder can be as little as 1-2 hours. For a first-time builder, it might take 4-8 hours or even longer, especially with careful learning and troubleshooting. Gathering parts and research can take much longer.
Do I need special tools for every step?
While some steps can be done with basic household tools, specialized AR-specific tools like an armorer’s wrench, receiver vise blocks, and a good set of punches are highly recommended. These tools prevent damage to components, ensure proper torque, and make the process significantly easier and safer.
What if a part doesn’t fit or I run into problems?
It’s common to encounter minor fitment issues or challenging steps. Don’t force anything. Consult online forums, watch instructional videos, or seek advice from experienced builders or a qualified gunsmith. Patience and careful troubleshooting are key to a successful build.

