Bore sighting your rifle is a crucial first step before heading to the shooting range, especially with a new scope. It involves aligning your scope’s reticle with the rifle’s bore, effectively getting your shots “on paper” at a close distance. This guide will walk you through various methods and important tips to bore sight a rifle efficiently, saving you time and ammunition.
How to Bore Sight a Rifle
So, you’ve just mounted a brand-new scope on your trusty rifle, or maybe you’re prepping an old favorite for hunting season after a long off-season. You’re excited to hit the range, but there’s a problem: your scope isn’t aligned with your barrel. If you just start shooting, you could waste a lot of expensive ammunition trying to figure out where your shots are landing, or worse, miss the target entirely. That’s where bore sighting comes in!
Bore sighting your rifle is a super smart first step that almost every shooter, from beginner to seasoned pro, should do. Think of it as a preliminary alignment, a way to get your scope’s crosshairs roughly pointed in the same direction as your barrel before you ever fire a live round. It won’t perfectly zero your rifle – that still needs live fire at the range – but it will ensure your initial shots land somewhere on the target paper, saving you a ton of frustration and costly ammo.
In this guide, we’re going to break down exactly how to bore sight a rifle using various methods. We’ll cover everything from the basic visual technique to using modern laser tools. We’ll also share some essential tips to make sure your bore sighting process is as accurate and painless as possible. So, grab a cup of coffee, get comfortable, and let’s get your rifle ready for some precision shooting!
Key Takeaways
- What Bore Sighting Is: Bore sighting is the process of mechanically aligning your rifle’s bore (the barrel’s center) with your scope’s reticle, ensuring that your first shots at the range will be close to the target.
- Why It’s Essential: It saves significant time and ammunition by getting your rifle “on paper” quickly, preventing the frustration of completely missing the target during initial zeroing.
- Multiple Methods Available: You can bore sight using a visual (manual) method by looking through the bore, or with specialized tools like laser bore sighters (chamber or muzzle-mounted) and optical collimators.
- Safety First Always: Before beginning any bore sighting process, always ensure your rifle is unloaded and the chamber is clear. Safety is paramount.
- Proper Scope Mounting is Key: For accurate bore sighting and subsequent zeroing, your scope must be mounted correctly, securely, and with proper eye relief.
- Bore Sighting is Not Zeroing: Remember, bore sighting gets you close; it’s a starting point. Final zeroing always requires live fire at the shooting range to account for bullet ballistics and actual point of impact.
- Patience and Precision Pay Off: Take your time with each step. A careful bore sight will make your range day much more productive and enjoyable.
Quick Answers to Common Questions
Can I bore sight a rifle without special tools?
Yes, you can bore sight a bolt-action rifle using the visual or “manual” method. This involves removing the bolt and looking directly through the bore to align it with a target, then adjusting your scope to that same point. It’s effective and costs nothing.
How far away should I place the target for bore sighting?
For bore sighting, place your target at a relatively close distance, typically 25 yards. The goal is to get “on paper” at close range before you move to longer distances for final zeroing.
Is bore sighting the same as zeroing?
No, bore sighting is not the same as zeroing. Bore sighting is a preliminary step to mechanically align your scope and barrel, getting you close to the target. Zeroing is the final process of fine-tuning your scope with live ammunition at the range to achieve a precise point of impact at a specific distance.
Do I need to bore sight my rifle every time I shoot?
No, you generally only need to bore sight your rifle when you install a new scope, remount an existing scope, or if you suspect your scope’s alignment has been significantly knocked off (e.g., after a fall or rough travel). Once zeroed, minor adjustments might be needed, but a full bore sight is usually not required.
Can a bore sighter damage my rifle or scope?
When used correctly, bore sighters should not damage your rifle or scope. Ensure chamber-mounted lasers are inserted and removed carefully. For muzzle-mounted types, make sure they are properly sized and not forced onto the barrel. Always follow the manufacturer’s instructions for any bore sighting tool.
📑 Table of Contents
- Understanding Bore Sighting: What It Is and Why It Matters
- Safety First: Preparing Your Rifle and Workspace
- Mounting Your Scope Correctly: A Crucial Prerequisite
- Method 1: Visual (Manual) Bore Sighting – The Classic Approach
- Method 2: Using a Laser Bore Sighter – Modern Convenience
- Method 3: Using an Optical Collimator – The Professional’s Choice
- Fine-Tuning at the Range: From Bore Sight to Zero
- Common Mistakes to Avoid When You Bore Sight a Rifle
- Conclusion: Setting Yourself Up for Success
Understanding Bore Sighting: What It Is and Why It Matters
Before we dive into the “how-to,” let’s clarify what bore sighting really is and why it’s such a critical step. Simply put, bore sighting is the process of aligning your scope’s reticle (the crosshairs) with the center of your rifle’s bore (the inside of the barrel). The goal is to make sure that when you look through your scope, your point of aim is very close to where the bullet will exit the barrel.
Why You Should Always Bore Sight Your Rifle
- Saves Ammunition: This is arguably the biggest benefit. Without bore sighting, your first shots could be wildly off target. You might spend a dozen or more rounds just trying to get on the paper. Bore sighting drastically reduces this, often getting you within a few inches of the bullseye on your very first shot.
- Saves Time at the Range: Less time spent finding the target means more time fine-tuning your zero, practicing your shooting fundamentals, or just enjoying your range session.
- Reduces Frustration: There’s nothing worse than shooting at a target and seeing no bullet holes. It’s frustrating and can quickly sour a fun day. Bore sighting prevents this “where did my shot go?” mystery.
- Ensures You’re “On Paper”: Even if you’re not going for a perfect zero at 100 yards immediately, bore sighting ensures your shots will at least hit the target at a closer range, like 25 yards. This makes the next step of live-fire zeroing much, much easier.
- Identifies Scope Mounting Issues: If you struggle to bore sight a rifle, it can sometimes highlight a problem with how your scope is mounted, such as loose rings or a misaligned base.
When to Bore Sight Your Rifle
You don’t need to bore sight every time you go to the range, but it’s essential in a few key situations:
- New Scope Installation: This is the most common reason. Any time you put a new scope on your rifle, you need to bore sight it.
- Remounting an Existing Scope: If you’ve removed your scope for cleaning or maintenance and then put it back on, it’s a good idea to bore sight a rifle again.
- Dropping or Bumping Your Rifle: A hard knock or fall can shift your scope’s zero. Bore sighting can help confirm if it’s still roughly aligned.
- Traveling with Your Rifle: If your rifle goes through rough handling during travel, bore sighting can be a quick check before a hunt or shooting competition.
Safety First: Preparing Your Rifle and Workspace
Before you even think about how to bore sight a rifle, safety must be your absolute top priority. We’re talking about firearms here, so treat them with the respect they demand.
Essential Safety Steps
- Unload the Firearm: This is non-negotiable. Remove the magazine, clear the chamber, and visually and physically inspect the chamber to ensure it’s completely empty.
- Point in a Safe Direction: Always keep the muzzle pointed in a safe direction, away from people and anything you don’t intend to destroy.
- Verify Safety Engaged: While the rifle should be unloaded, double-check that the safety mechanism is engaged.
- Remove Ammunition from Workspace: It’s a good practice to keep all live ammunition out of your bore sighting area to prevent accidental loading.
Setting Up Your Workspace
You’ll need a stable, well-lit area to bore sight your rifle.
- Stable Platform: A sturdy workbench or table is ideal. You’ll need to keep the rifle absolutely still, so a good rifle rest, sandbags, or a shooting vise are invaluable. The more stable your rifle, the more accurate your bore sight will be.
- Target: For visual bore sighting, you’ll need a clear, contrasting target placed at a suitable distance. A simple piece of paper with a dark cross or circle works great.
- Tools: Depending on the method, you might need an Allen wrench or screwdriver for scope adjustments, a laser bore sighter, or an optical collimator.
Mounting Your Scope Correctly: A Crucial Prerequisite
Before you bore sight a rifle, you must ensure your scope is mounted correctly. A poorly mounted scope will give you endless headaches, no matter how well you bore sight.
Key Scope Mounting Steps
- Choose the Right Mounts: Ensure your scope rings and base are compatible with your rifle and scope.
- Secure the Base: Mount the scope base (if applicable) to your rifle’s receiver. Use the manufacturer’s recommended torque settings.
- Attach the Rings: Place the bottom halves of your scope rings onto the base.
- Position the Scope: Gently place your scope into the bottom rings. Adjust it forward or backward to achieve proper eye relief. This is critical for comfortable and safe shooting. Eye relief is the distance between your eye and the scope’s eyepiece where you get a full, clear sight picture without any “scope shadow” (a dark ring around the edge).
- Level the Reticle: This is a big one. Use a scope leveling kit or a simple plumb bob to ensure your scope’s reticle is perfectly level. An unlevel reticle will cause your shots to drift horizontally as you adjust for elevation, especially at longer ranges.
- Tighten Rings Evenly: Place the top halves of the rings over the scope. Tighten the screws evenly in a criss-cross pattern, gradually increasing torque until you reach the manufacturer’s specified setting. Do not overtighten, as this can damage your scope tube.
- Final Check: Give your scope a gentle wiggle to ensure it’s firmly mounted and doesn’t move.
Method 1: Visual (Manual) Bore Sighting – The Classic Approach
This method is old-school, effective, and requires no special tools other than your eyes. It works best with bolt-action rifles where you can easily remove the bolt and look straight down the barrel.
Step-by-Step Visual Bore Sighting
- Secure Your Rifle: Place your unloaded rifle on a stable rest or in a vise. Make sure it’s absolutely rock-solid and won’t move during the process. This is paramount to accurately bore sight a rifle.
- Remove the Bolt (Bolt-Action Rifles): For bolt-action rifles, carefully open the action and remove the bolt. This allows you to look directly through the bore.
- Establish a Target: Set up a target (a piece of paper with a contrasting dot or cross works well) at a relatively close distance, typically 25 yards. The closer the better for initial alignment.
- Look Through the Bore: Position yourself behind the rifle and look directly through the center of the bore (the barrel). You’ll see the target downrange.
- Align the Bore with the Target: Carefully adjust your rifle’s position (using the rest or vise) until the exact center of the barrel’s opening is perfectly centered on your target. Once aligned, *do not move the rifle*. It must remain absolutely still.
- Adjust Your Scope Reticle: Now, without moving the rifle, shift your gaze from the bore to your scope. Look through the scope and you’ll likely see your crosshairs are *not* on the target. This is normal! Using your scope’s windage (horizontal) and elevation (vertical) adjustment turrets, carefully move the reticle until it is perfectly superimposed over the target point you centered in your bore.
- Verify and Repeat: Once you think you’re aligned, look back through the bore to ensure it’s still centered on the target. Then, look through the scope again to check the reticle. If everything lines up, you’ve successfully bore sighted your rifle visually!
- Reinstall Bolt: For bolt-action rifles, carefully reinsert the bolt.
Practical Tip: A spotter can be incredibly helpful here. One person can look through the bore and instruct the other on where to move the rifle, and then the first person can adjust the scope.
Visual guide about How to Bore Sight a Rifle
Image source: knowpreparesurvive.com
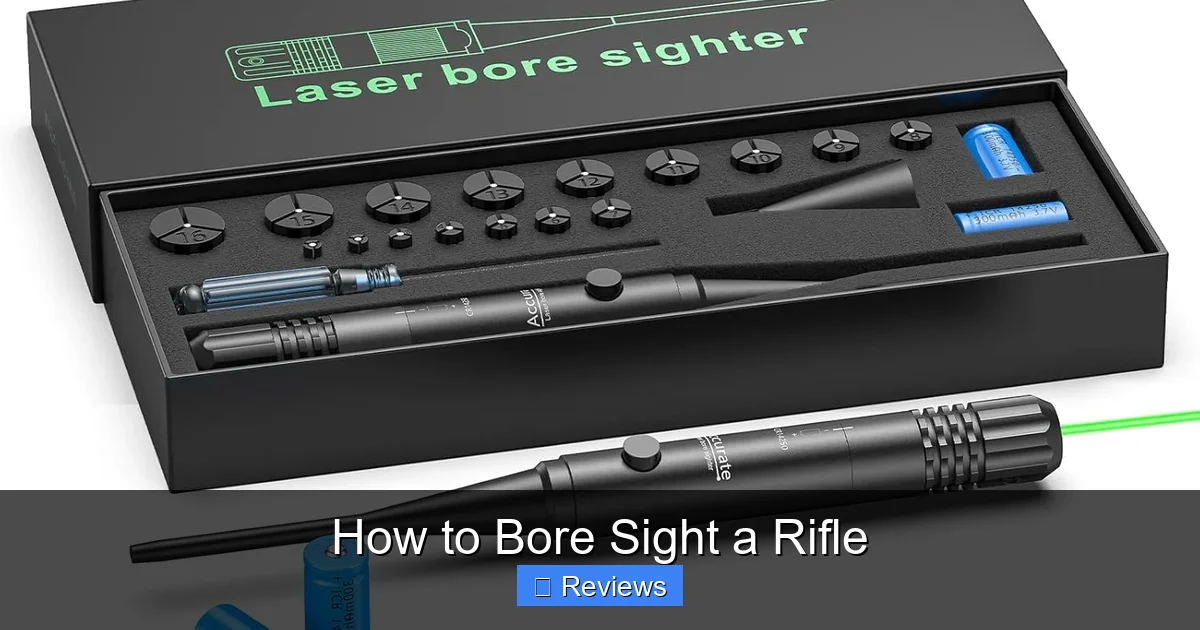
Method 2: Using a Laser Bore Sighter – Modern Convenience
Laser bore sighters are a popular and convenient way to bore sight a rifle, especially for semi-automatic rifles or lever-action rifles where removing the bolt to look through the bore isn’t as straightforward. They project a laser dot that indicates where the bullet would theoretically hit.
Types of Laser Bore Sighters
- Chamber-Mounted: These look like a cartridge and are inserted into the rifle’s chamber. They are specific to a caliber.
- Muzzle-Mounted: These attach to the end of the barrel and typically use a magnetic or expanding arbor system to fit various calibers.
Step-by-Step Laser Bore Sighting
- Secure Your Rifle: Just like with visual bore sighting, your unloaded rifle must be held absolutely steady in a rest or vise.
-
Install the Laser Bore Sighter:
- For Chamber-Mounted: Ensure the rifle is unloaded. Carefully insert the laser bore sighter into the chamber, just like a cartridge. The laser will project out of the barrel.
- For Muzzle-Mounted: Attach the bore sighter to the muzzle of your rifle. Ensure it’s straight and securely fastened, as any misalignment here will throw off your bore sight.
- Power On: Activate the laser. You should see a bright red (or green) dot projected onto your target at 25 yards.
- Adjust Your Scope Reticle: Look through your scope. Your goal is to move your scope’s reticle (crosshairs) until they are perfectly centered on the laser dot projected on the target. Use your windage and elevation adjustment turrets to achieve this.
- Remove Bore Sighter: Once the reticle is aligned with the laser dot, carefully remove the laser bore sighter from your rifle.
- Confirm Safety: Ensure the rifle is still unloaded and safe.
Practical Tip: Laser bore sighters can sometimes be slightly off-center. To check for this, rotate a muzzle-mounted laser 180 degrees and see if the dot shifts. If it does, average the position or consider a higher quality unit.
Method 3: Using an Optical Collimator – The Professional’s Choice
Optical collimators are another type of bore sighting tool often used by gunsmiths and serious enthusiasts. They attach to the muzzle and project a grid pattern into your scope, which you then align your reticle to. They don’t require power and aren’t affected by ambient light as much as lasers.
Step-by-Step Collimator Bore Sighting (Brief)
- Secure Your Rifle: Again, an unloaded and stable rifle is essential.
- Attach the Collimator: Select the correct arbor (a tapered rod) for your rifle’s caliber and insert it into the bore sighter. Then, attach the collimator to the muzzle of your rifle. It should sit squarely and securely.
- Look Through the Scope: Gaze through your rifle scope. You’ll see a grid pattern projected into the scope’s field of view. There will often be a central cross or dot within this grid.
- Adjust Scope Reticle: Using your scope’s windage and elevation turrets, move your reticle until it perfectly aligns with the central point or cross on the collimator’s grid.
- Remove Collimator: Once aligned, carefully remove the collimator and ensure the rifle is safe.
Practical Tip: Collimators are generally very precise but can be more expensive than basic laser bore sighters. They’re excellent for quickly checking alignment.
Fine-Tuning at the Range: From Bore Sight to Zero
Remember, bore sighting is just the first step. It gets you “on paper.” The real magic happens at the shooting range with live ammunition, where you will actually zero your rifle.
What to Expect at the Range
- Set Up at a Close Distance: Start at 25 yards for your initial zeroing shots. Because you bore sighted, your shots should be very close to the bullseye, if not in it.
- Shoot a Group: Fire a 3-shot group. This will show you your rifle’s point of impact.
-
Adjust Your Scope: Based on where your group landed relative to your aiming point, adjust your scope’s windage and elevation turrets. Most scopes adjust in MOA (Minutes of Angle) or MIL (Milliradians).
- MOA Example: If your scope adjusts in 1/4 MOA clicks, and you’re shooting at 25 yards, each click moves your bullet’s impact roughly 1/16 of an inch. At 100 yards, it’s 1/4 inch per click. You’ll need to do some math!
- MIL Example: If your scope adjusts in 0.1 MIL clicks, at 25 yards, each click moves the impact roughly 0.09 inches. At 100 yards, it’s 0.36 inches per click.
A good rule of thumb for close range: if you’re shooting at 25 yards and your shots are 1 inch low, you’d need to adjust your elevation “up” by 4 MOA (or 16 clicks if it’s 1/4 MOA per click). Check your scope’s manual for specific click values.
- Repeat: Fire another 3-shot group after adjustments. Continue this process until your shots are consistently hitting your desired point of impact.
- Move to Your Desired Zero Distance: Once you’re zeroed at 25 yards, you can move back to your preferred zero distance (e.g., 100, 200 yards) and repeat the process for a final, precise zero.
Practical Tip: Always use the same ammunition for zeroing that you intend to use for hunting or target shooting, as different bullet weights and types can impact your point of impact.
Common Mistakes to Avoid When You Bore Sight a Rifle
Even with the best instructions, it’s easy to make small errors that can throw off your bore sight. Here are some common pitfalls to watch out for:
- Not Securing the Rifle Properly: Any movement of the rifle during bore sighting will lead to an inaccurate alignment. It needs to be rock-solid.
- Ignoring Eye Relief and Reticle Leveling: These steps are crucial during scope mounting. If your reticle isn’t level, your scope adjustments won’t be true, making zeroing a nightmare. If eye relief is off, you won’t see a clear picture.
- Forgetting Safety Checks: Getting complacent with firearm safety is never okay. Always confirm the rifle is unloaded.
- Using a Wobbly Workbench: A stable platform is key. Don’t try to bore sight on a rickety table.
- Not Checking Laser Bore Sighter Accuracy: Some cheaper laser bore sighters can be off-center. Always try to verify their alignment by rotating them if possible.
- Confusing Bore Sighting with Zeroing: Remember, bore sighting is the preliminary step. It saves you ammo, but it’s not a substitute for live-fire zeroing.
- Rushing the Process: Take your time. Precision now means less frustration later. Each click of the scope turret matters.
Conclusion: Setting Yourself Up for Success
Learning how to bore sight a rifle is a fundamental skill for any rifle owner with an optic. It’s the essential bridge between mounting a new scope and achieving a perfect zero at the range. By taking the time to properly bore sight your rifle, you’re not just saving money on ammunition; you’re also dramatically improving your efficiency and enjoyment at the shooting range.
Whether you opt for the classic visual method, the convenience of a laser bore sighter, or the precision of a collimator, the principles remain the same: align your barrel with your scope’s reticle. With patience, a stable setup, and attention to detail, you’ll be consistently “on paper” with your first shots, ready to fine-tune your zero and hit your targets with confidence. So go ahead, practice these steps, and enjoy the satisfaction of a well-sighted rifle!
🎥 Related Video: How to Zero a Riflescope in 3 Shots or Less
📺 Vortex Optics
Can it be done? Save ammo and be more efficient at the range using these tips from Ryan Muckenhirn. Learn how to use your …
Frequently Asked Questions
What exactly does it mean to be “on paper”?
Being “on paper” means that your shots are consistently hitting the target paper at a specific distance, even if they aren’t precisely in the bullseye yet. Bore sighting helps ensure your initial shots will land somewhere on the paper, making it easier to adjust your scope for a perfect zero.
Are laser bore sighters accurate enough?
Laser bore sighters are generally accurate enough to get your rifle “on paper” and save you significant ammunition. However, the quality can vary. High-quality laser bore sighters are very precise, but even the best ones are only a starting point, and live-fire zeroing is always necessary for final accuracy.
What if my scope adjustments don’t move the reticle enough during bore sighting?
If your scope adjustments don’t move the reticle enough to align with the bore or laser dot, it could indicate a problem with your scope mounting, such as misaligned scope rings or bases. You might need to adjust the scope’s position in the rings or check the base installation. Some scopes also have limited internal adjustment range.
Can I bore sight a rifle with iron sights?
While bore sighting is primarily for scoped rifles, the principle of aligning the bore with your point of aim is similar for iron sights. You can visually align the bore with a target, then adjust your front and rear iron sights to that same point. However, this is more commonly referred to as “rough zeroing” iron sights.
How does temperature affect bore sighting?
Temperature changes primarily affect bullet ballistics and the rifle barrel’s point of impact, which is addressed during live-fire zeroing. Bore sighting itself, as a mechanical alignment process, is not significantly affected by ambient temperature. Just ensure your rifle and bore sighter are at a stable temperature during the alignment.
Why is it important to level the scope’s reticle before bore sighting?
Leveling the scope’s reticle is crucial because if it’s canted, your windage and elevation adjustments won’t work in a true vertical or horizontal line. This means that as you adjust your scope for elevation, your point of impact will also shift horizontally, making it very difficult to achieve a precise zero, especially at longer ranges.

