Attaching a rifle sling correctly is essential for safe handling, comfortable carrying, and quick deployment. This comprehensive guide walks you through the process, covering various sling types like 1-point and 2-point slings, the necessary hardware such as swivels and quick disconnect mounts, and detailed, easy-to-understand instructions. You’ll learn the best practices for secure attachment and proper adjustment, ensuring your rifle is always ready when you are.
Ever found yourself juggling your rifle, trying to keep it steady while also managing other gear or navigating tricky terrain? Or maybe you’ve been at the range, wanting to transition quickly between positions without laying your rifle down? If so, you already know the incredible value of a well-attached rifle sling. A sling isn’t just a simple strap; it’s a vital piece of equipment that enhances safety, comfort, and tactical efficiency for any rifle owner.
Think of your rifle sling as an extra hand, always there to support your firearm. It frees up your hands for other tasks, distributes the weight of your rifle more comfortably, and can even act as a shooting aid to improve stability. But getting the most out of a sling starts with one fundamental step: knowing how to attach a rifle sling correctly. This isn’t just about looping some webbing around your gun; it’s about understanding the different types of slings, the hardware involved, and the secure methods that will keep your rifle exactly where it needs to be. Don’t worry, it’s easier than you might think, and we’re here to guide you every step of the way!
In this friendly, step-by-step guide, we’ll walk you through everything you need to know about how to attach a rifle sling. We’ll cover the most popular sling types, discuss the various hardware options you might encounter, and provide clear instructions to help you get your sling securely mounted. Whether you’re a seasoned shooter or just getting started, mastering this skill will make a significant difference in your rifle handling experience. Let’s get your sling attached and ready for action!
Key Takeaways
- Understanding Sling Types: Knowing the difference between 1-point, 2-point, and 3-point slings is crucial, as each has distinct attachment methods and benefits for carrying and deployment.
- Essential Hardware: Proper sling attachment relies on the right hardware, primarily sling swivels (like Uncle Mike’s style or quick detach/QD swivels) and their corresponding mounting points on your rifle.
- Safety First: Always ensure your firearm is unloaded and pointed in a safe direction before you begin any work on it, including attaching a rifle sling.
- Two-Point Sling Attachment: The most common method involves connecting one end of the sling near the stock and the other near the rifle’s forearm, offering balanced carry and stability.
- One-Point Sling Attachment: Typically attaches to a single point on the rifle, often near the receiver, allowing for rapid weapon manipulation and transitions, though it may swing more freely.
- Proper Adjustment is Key: After attaching, adjusting the sling length for your body and intended use (e.g., carrying, shooting support) is vital for comfort, stability, and quick access.
- Check for Security: Always double-check all attachment points to ensure they are securely fastened and won’t unexpectedly detach during use.
Quick Answers to Common Questions
What’s the main difference between a 1-point and 2-point sling?
A 1-point sling attaches to a single point on the rifle, usually near the receiver, offering maximum maneuverability. A 2-point sling attaches at two points (front and rear), providing better stability and comfort for carrying.
Can I use any sling swivel with any rifle?
No, sling swivels must match your rifle’s attachment points. Traditional swivels fit sling studs, while QD (Quick Detach) swivels fit QD ports. Ensure compatibility before trying to attach a rifle sling.
Where are the best attachment points for a 2-point sling?
Typically, one point is near the buttstock (rear) and the other is on the forend or handguard (front) of the rifle. This setup provides balanced support.
Do I need tools to attach a rifle sling?
Usually, no specialized tools are needed for attaching the sling itself if your rifle already has the proper mounting points. However, you might need a screwdriver or hex wrench if you need to install new sling studs or rail-mounted QD sockets.
How tight should a rifle sling be?
A rifle sling should be tight enough to keep the rifle secure and prevent excessive bouncing, but loose enough to allow you to comfortably shoulder the rifle and transition positions quickly. Adjustment is key for personal comfort and use.
📑 Table of Contents
- Why Every Shooter Needs a Rifle Sling
- Understanding Rifle Sling Types and Attachment Points
- Gathering Your Tools: What You’ll Need to Attach a Rifle Sling
- Step-by-Step Guide: How to Attach a 2-Point Rifle Sling
- Step-by-Step Guide: How to Attach a 1-Point Rifle Sling
- Tips for Optimal Sling Adjustment and Maintenance
- Common Mistakes to Avoid When Attaching a Rifle Sling
Why Every Shooter Needs a Rifle Sling
Before we dive into the “how-to,” let’s quickly chat about why a rifle sling is such a game-changer. It’s more than just a piece of nylon or leather. It’s a fundamental accessory that offers a host of benefits, making your shooting experience safer, more comfortable, and more efficient. Understanding these benefits will highlight why learning how to attach a rifle sling properly is so important.
Improved Comfort and Portability
Carrying a rifle for extended periods, especially during hunting trips, range sessions, or tactical training, can be tiring. A sling helps distribute the weight across your body, usually over a shoulder or around your neck, making it much more comfortable to carry your firearm. This frees up your hands to carry other gear, climb, or simply rest your arms.
Enhanced Safety
A properly worn sling keeps your rifle secure and close to your body. This reduces the chances of accidentally dropping it, which could lead to damage or, more importantly, an unintentional discharge. By having your rifle attached to you, you maintain better control over its muzzle direction, even when moving. Knowing how to attach a rifle sling correctly is the first step in leveraging this safety benefit.
Quick and Efficient Deployment
Imagine needing to bring your rifle to bear quickly. With a sling, your rifle is always accessible. You can transition from carrying to a shooting position much faster than if your rifle were laid down or held in an awkward manner. This is particularly crucial in hunting or defensive scenarios where seconds count.
Shooting Support and Stability
Many shooters use their slings as a shooting aid. By creating tension between your body and the rifle, a sling can help stabilize your aim, especially when shooting from unsupported positions like standing or kneeling. This can lead to tighter groups and more accurate shots. It’s a simple trick that can dramatically improve your marksmanship.
Understanding Rifle Sling Types and Attachment Points
Not all slings are created equal, and understanding the different types is key to knowing how to attach a rifle sling effectively. Each type offers unique advantages for carrying and deployment, and they often require different attachment strategies. We’ll mainly focus on the most common types: 1-point and 2-point slings.
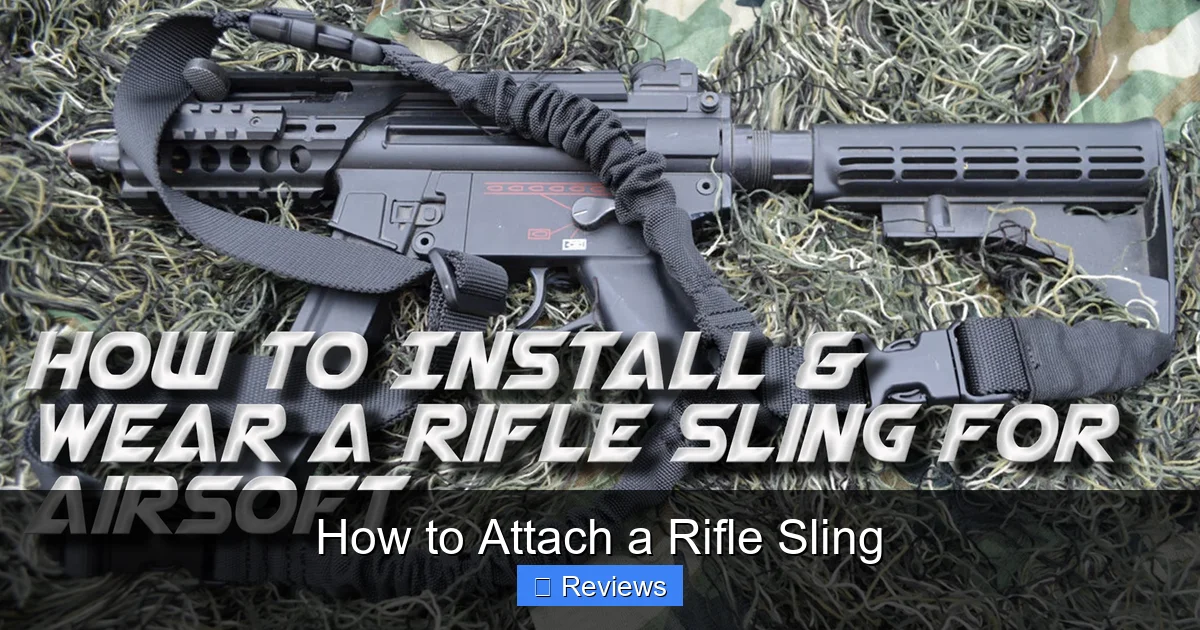
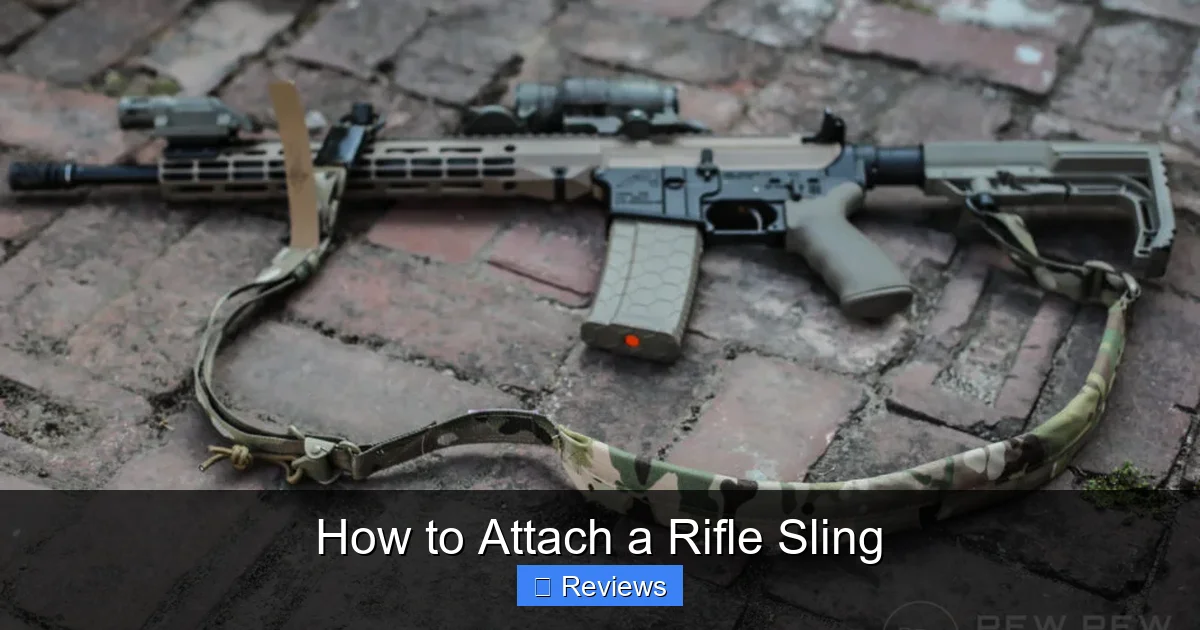
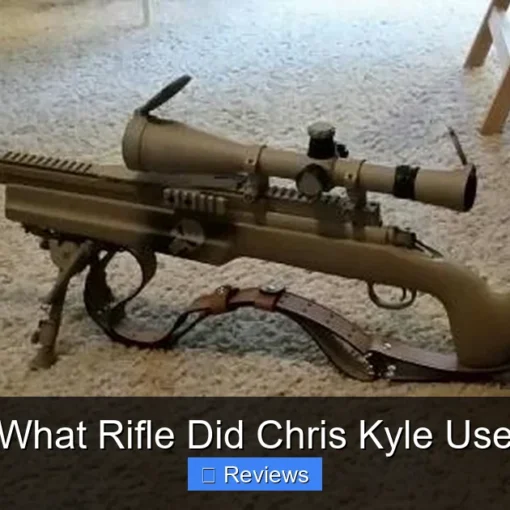
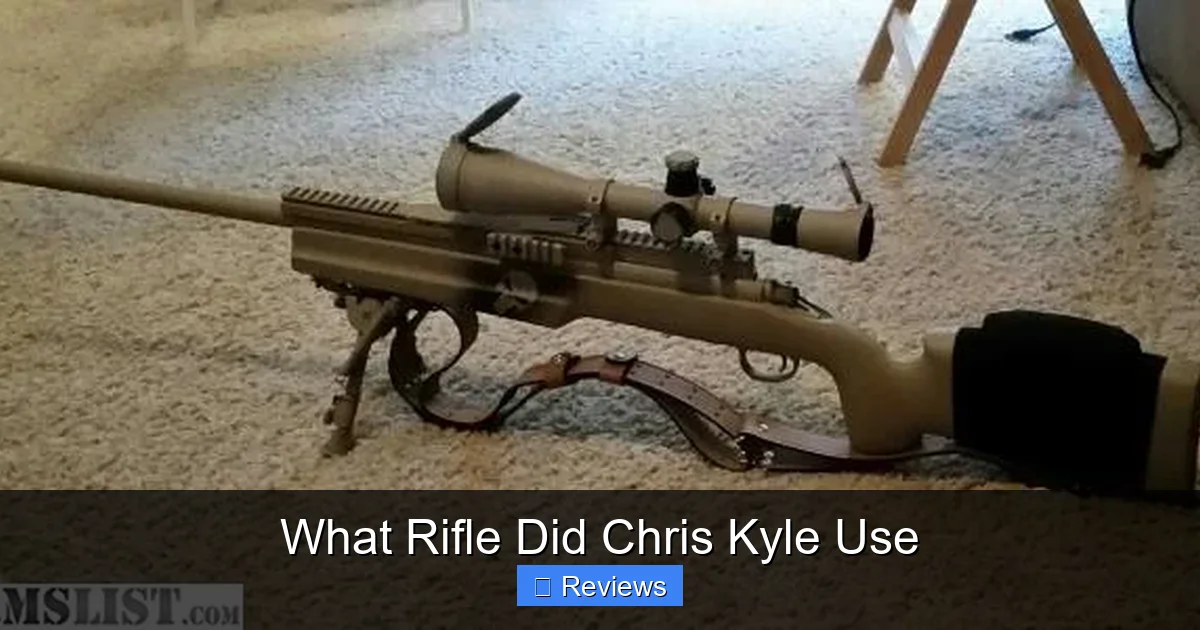
Visual guide about How to Attach a Rifle Sling
Image source: redwolfairsoft.com
1-Point Slings
A 1-point sling attaches to your rifle at a single point, usually located on the receiver, often directly behind the pistol grip on an AR-15 style rifle. The main advantage of a 1-point sling is the maximum freedom it offers for weapon manipulation. Your rifle can swing freely to your front, allowing for very quick transitions from your strong side to your weak side, and vice versa. It’s great for close-quarters combat or situations requiring quick transitions. However, because the rifle hangs from a single point, it can swing and bounce more, which some find less comfortable for long carries or vigorous movement.
- Common Hardware: Often uses a QD (Quick Detach) swivel or a hook that attaches to a single-point sling plate or end plate on the rifle.
2-Point Slings
The 2-point sling is arguably the most common and versatile type. It attaches to your rifle at two separate points: one near the buttstock and another near the front of the rifle (forearm or handguard). This design distributes the rifle’s weight more evenly, making it very comfortable for extended carry. It keeps the rifle snug against your body, reducing swinging and bouncing. 2-point slings can also be used effectively as a shooting aid for stability. The main drawback is that transitions might be slightly slower than with a 1-point sling, but modern designs have greatly improved this.
- Common Hardware: Typically uses two sling swivels (either traditional “Uncle Mike’s” style or QD swivels) that connect to corresponding studs or mounts on the rifle.
3-Point Slings (Less Common Today)
While less common in modern use, 3-point slings attach at two points on the rifle (similar to a 2-point) but then loop around the shooter’s body, creating a continuous loop. They were designed to offer excellent retention and quick deployment, but can often be complex to adjust and sometimes feel “busy” or restrictive. For simplicity and effectiveness, most shooters now prefer 1-point or 2-point systems, making the process of how to attach a rifle sling simpler.
Understanding Sling Mounts and Swivels
Regardless of your sling type, you’ll need hardware to connect it to your rifle. This usually means swivels and mounting points on the rifle itself.
- Sling Swivels: These are the connectors.
- Traditional/Push-Button Swivels (e.g., Uncle Mike’s Style): These have a button that you push to open a gate, allowing them to clip onto a swivel stud.
- Quick Detach (QD) Swivels: These are incredibly popular for their ease of use. You push a button, insert the swivel into a QD port (a small circular hole), and release. They lock securely and can be removed in a second.
- Clips/Hooks: Some slings, especially 1-point designs, use metal clips or hooks that attach to a sling plate or loop.
- Sling Mounts on the Rifle: Your rifle needs corresponding points for the swivels.
- Sling Studs: Common on traditional hunting rifles, these are small metal posts that traditional swivels clip onto.
- QD Ports: Found on many modern rifles, especially AR-15s, these are built-in holes where QD swivels lock. You might find them on handguards, stocks, and receiver end plates.
- Sling Loops/Plates: Some rifles or accessories might have metal loops or specialized end plates designed for hook-style slings.
- M-LOK / KeyMod / Picatinny Rail Mounts: If your rifle has these rail systems, you can buy adapters (e.g., QD sockets, sling loops) that attach to the rails, giving you attachment points.
Gathering Your Tools: What You’ll Need to Attach a Rifle Sling
Before you start, gather everything you’ll need. This ensures a smooth and frustration-free process for how to attach a rifle sling.
- Your Rifle: Make sure it’s unloaded! Double-check the chamber and magazine well.
- Your Sling: The sling itself, whether 1-point or 2-point.
- Sling Swivels/Hardware: Ensure you have the correct swivels (e.g., QD, traditional) that match your sling and your rifle’s mounting points. Often, slings come with their own swivels, but sometimes you buy them separately.
- Small Tools (Optional, but helpful):
- Flathead screwdriver or hex wrench: If you need to install new sling studs or rail-mounted QD sockets.
- Work surface: A clean, well-lit area where you can safely work.
Safety First!
This is paramount. Before doing ANYTHING with your firearm, always follow the four universal rules of gun safety:
- Treat every firearm as if it were loaded.
- Never point the muzzle at anything you are not willing to destroy.
- Keep your finger off the trigger until your sights are on the target.
- Be sure of your target and what is beyond it.
For this task, specifically, ensure your rifle is completely unloaded and the chamber is clear. Work in a safe direction and avoid distractions. Safety is always the top priority when learning how to attach a rifle sling.
Step-by-Step Guide: How to Attach a 2-Point Rifle Sling
The 2-point sling is the most common, so we’ll start here. The process of how to attach a rifle sling of this type is straightforward.
Step 1: Identify Your Attachment Points
Most 2-point slings attach one end to the rear of the rifle (near the buttstock) and the other end to the front (on the handguard or forend). Locate these points on your rifle. They will typically be:
- Rear Attachment: A sling stud on the buttstock, or a QD port/loop on the stock or a receiver end plate.
- Front Attachment: A sling stud on the forend, a QD port on the handguard, or a rail-mounted sling loop/QD socket.
Step 2: Attach the Rear Swivel
Take one of your sling swivels and connect it to the rear attachment point on your rifle.
- For Traditional Swivels: Squeeze the small lever or button on the swivel, align the prongs with the sling stud, and release the lever to lock it in place. Give it a gentle tug to ensure it’s secure.
- For QD Swivels: Press the button on the QD swivel, insert the swivel into the QD port until it clicks, and then release the button. Again, test it with a tug.
Step 3: Feed the Sling Through the Rear Swivel
Most slings have an adjustable buckle or a tri-glide fitting on each end. Take one end of your sling (the end that will attach to the rear swivel) and feed the webbing through the loop of the swivel you just attached. Then, thread the webbing back through the tri-glide or buckle on the sling itself to form a secure loop. This creates the adjustable segment for length.
Pro Tip: Pay attention to how the sling is oriented. You want it to lay flat against the rifle and your body without twisting once it’s fully attached and adjusted.
Step 4: Attach the Front Swivel
Now, take the other sling swivel and attach it to the front attachment point on your rifle. Use the same method as you did for the rear swivel (traditional or QD).
Step 5: Feed the Sling Through the Front Swivel
Just like with the rear, take the remaining free end of your sling and feed it through the loop of the front swivel. Then, loop it back through the tri-glide or buckle on that end of the sling to create a second secure and adjustable segment.
By following these steps, you’ve successfully learned how to attach a rifle sling of the 2-point variety!
Step-by-Step Guide: How to Attach a 1-Point Rifle Sling
Attaching a 1-point sling is usually even simpler, as there’s only one main attachment point. Let’s look at how to attach a rifle sling of this type.
Step 1: Locate the Single Attachment Point
For a 1-point sling, you’ll need a single, central attachment point on your rifle. This is most commonly found:
- On a specialized ambidextrous receiver end plate (often called a “sling plate”) that sits between the receiver and the buffer tube on an AR-15.
- A QD port on the rear of the receiver or near the pistol grip.
- A sturdy loop on a tactical stock designed for single-point attachment.
Step 2: Attach the Sling Swivel/Hook
Take the single swivel or hook that comes with your 1-point sling.
- For QD Swivels: Press the button, insert the swivel into the QD port until it clicks, and release the button. Tug to confirm security.
- For Hooks/Clips: Open the hook and clip it securely onto the sling plate or loop designed for it. Make sure the gate fully closes.
Step 3: Adjust the Sling Length
Since a 1-point sling hangs freely, proper length adjustment is crucial for comfortable carry and quick access. Once attached, slip the sling over your head and one shoulder (or around your neck, depending on preference). Adjust the length so the rifle hangs comfortably at a natural ready position, allowing you to easily bring it to your shoulder without snagging or feeling too tight.
And just like that, you know how to attach a rifle sling using the 1-point method!
Tips for Optimal Sling Adjustment and Maintenance
Attaching the sling is only half the battle. To truly get the most out of it, you need to adjust it properly and take care of it. These tips will help you once you’ve learned how to attach a rifle sling.
Adjust for Your Body and Use
The “perfect” sling length isn’t universal. It depends on your body type, the clothing you’re wearing, and how you intend to use the sling. Experiment with different lengths. For carrying, you want it snug enough that the rifle doesn’t bounce excessively, but loose enough to comfortably shoulder the rifle. For shooting support, you might want it a bit tighter to create more tension.
- Try different carry positions: Over one shoulder, across your back, or front-mounted.
- Practice drawing the rifle: Ensure you can smoothly bring it to a shooting position without fighting the sling.
- Consider a Quick-Adjust Sling: Many modern slings (especially 2-point designs) feature a quick-adjust tab or buckle, allowing you to rapidly tighten or loosen the sling on the fly. This is incredibly useful for transitioning from carrying to shooting support.
Prevent Twists and Tangles
When feeding the webbing through the swivels and buckles, make sure it lies flat and doesn’t get twisted. A twisted sling is uncomfortable and can hinder quick adjustments or deployment. Sometimes, a swivel can rotate, causing the sling to twist. Periodically check your sling to ensure it’s untwisted.
Check All Attachment Points Regularly
Over time, with use and movement, sling swivels or mounts can sometimes loosen. Before each use, give your sling attachments a good tug and visual inspection. Ensure swivels are fully locked into place and any screws holding mounts are tight. This is a crucial safety check.
Clean and Maintain Your Sling
Just like your rifle, your sling benefits from occasional cleaning. If it’s made of nylon or synthetic webbing, you can often hand wash it with mild soap and water, then air dry. Leather slings might require specific leather conditioners. Keeping your sling clean and free of debris helps prolong its life and ensures smooth operation.
Experiment and Train
The best way to get comfortable with your new sling setup is to use it! Go to the range and practice transitioning, carrying, and using it for stability. This hands-on experience will help you fine-tune adjustments and build muscle memory, truly mastering how to attach a rifle sling and use it effectively.
Common Mistakes to Avoid When Attaching a Rifle Sling
While learning how to attach a rifle sling is pretty straightforward, there are a few common pitfalls that people encounter. Avoiding these will save you headaches and ensure your sling performs as intended.
Using Incompatible Hardware
One of the biggest mistakes is trying to force a traditional swivel onto a QD port, or vice versa. Ensure your sling swivels are compatible with the mounting points on your rifle. If your rifle only has sling studs, you need traditional swivels. If it has QD ports, you need QD swivels. Don’t mix and match or try to make something fit that clearly doesn’t belong.
Incorrect Sling Orientation
It’s easy to attach a sling only to realize it’s twisted, upside down, or simply uncomfortable. Before fully cinching down the webbing through the buckles, do a test fit. Put the sling on and shoulder your rifle. Does it feel natural? Does the sling lie flat? If not, adjust the orientation of the swivels or re-thread the webbing until it’s comfortable and untwisted.
Leaving Too Much Loose Webbing
Once you’ve adjusted your sling length, you’ll often have some excess webbing hanging off. While a little is fine, too much can get snagged on gear, branches, or even your own body, creating a safety hazard. Most slings have elastic keepers or Velcro tabs to manage excess webbing. Use them! If your sling doesn’t have them, you can use electrical tape or purchase aftermarket keepers.
Not Testing Security
After you’ve attached the sling, don’t just assume it’s secure. Give each attachment point a firm tug. Try to pull the sling away from the rifle. If there’s any give or if you hear a suspicious click, re-examine the attachment. A sling coming loose unexpectedly can be a major inconvenience or, worse, a safety issue.
Ignoring the “Break-In” Period (Especially for Leather Slings)
New slings, especially those made of stiff nylon or leather, might feel a bit rigid at first. Give them some time and use to break in. Leather slings will become more pliable and comfortable over time. Don’t be too quick to make drastic adjustments until you’ve used the sling a bit.
Mastering how to attach a rifle sling is an essential skill for any rifle owner. It transforms your rifle from a burden to a comfortable, readily accessible tool. By understanding the different sling types, choosing the correct hardware, and following our clear, step-by-step instructions, you can confidently attach your sling and enjoy all the benefits it brings. Remember to always prioritize safety, double-check your work, and adjust your sling for optimal comfort and performance. Happy shooting!
🎥 Related Video: How To Install Your Q.uick D.etach Swivels To Your AR15/Rifle Sling (BCM QD’s)
📺 Gear And Guns
Frequently Asked Questions
What are the safety precautions to take before attaching a rifle sling?
Before you begin to attach a rifle sling, always ensure your firearm is completely unloaded. Visually and physically check the chamber and magazine well. Always point the rifle in a safe direction and keep your finger off the trigger to prevent any accidents.
What type of sling is best for hunting?
For hunting, a 2-point sling is generally preferred. Its two attachment points distribute the rifle’s weight more evenly, making it comfortable for long treks through the field, and it keeps the rifle snug against your body to prevent snagging on brush.
Can a rifle sling be used for shooting support?
Absolutely! Many shooters use a 2-point rifle sling to create tension between their body and the rifle, significantly improving stability when shooting from unsupported positions like standing or kneeling. This technique can lead to greater accuracy.
How do I prevent my rifle sling from twisting?
When you attach a rifle sling, thread the webbing through the swivels and buckles carefully, ensuring it lies flat and doesn’t get bunched up or twisted. Periodically check your sling for twists during use and straighten them out to maintain comfort and function.
Is it possible to convert a 2-point sling into a 1-point sling?
Yes, some modular sling systems are designed to convert between 1-point and 2-point configurations using quick-release buckles or adapters. However, a standard 2-point sling typically cannot be converted into a 1-point sling without specialized conversion hardware or a new sling designed for dual use.
How often should I inspect my rifle sling attachments?
It’s a good practice to inspect your rifle sling attachments every time you take your rifle out for use. Give each swivel and mounting point a firm tug to ensure they are securely fastened. Regular checks prevent unexpected detachment and ensure continued safety and reliability.
