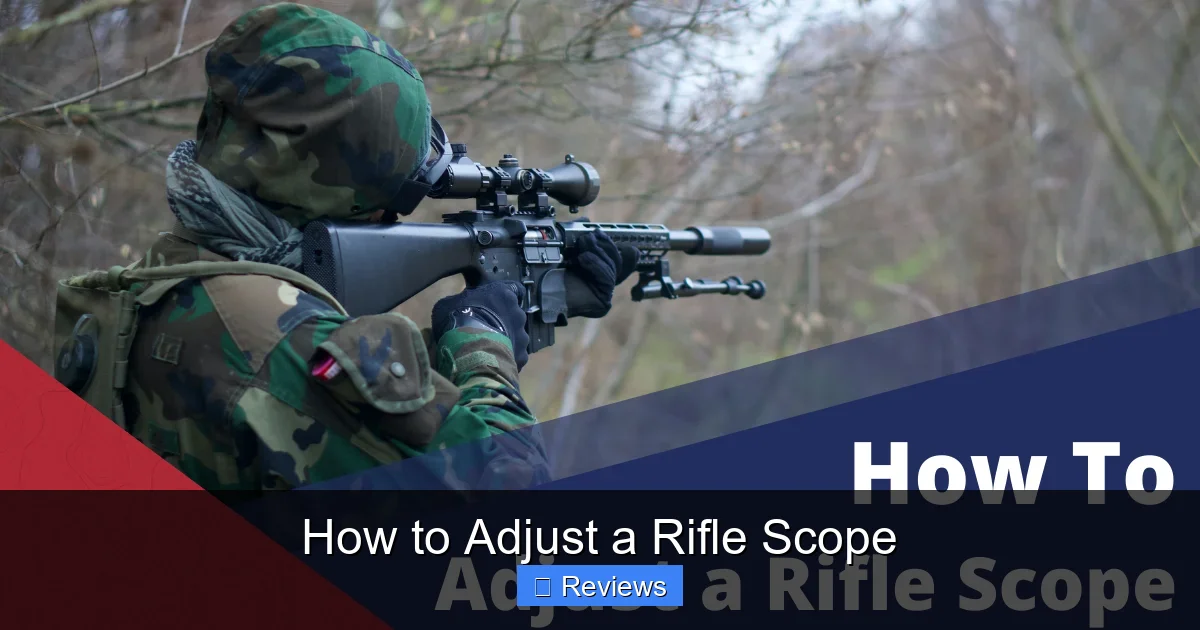
Mastering how to adjust a rifle scope is crucial for pinpoint accuracy and confidence in your shooting. This guide breaks down the essential steps, from proper mounting and bore-sighting to fine-tuning windage, elevation, and parallax settings. By understanding each adjustment, you can ensure your rifle hits exactly where you aim, making every shot count.
There’s nothing quite like the satisfaction of a perfectly placed shot. Whether you’re a seasoned hunter, a competitive shooter, or just enjoy hitting targets at the range, precision is the name of the game. But even the best rifle in the world won’t shoot straight if its scope isn’t properly aligned. That’s where knowing how to adjust a rifle scope comes in.
Many new shooters, and even some experienced ones, find the idea of adjusting a scope a bit intimidating. With all those knobs and numbers, it can seem like a complex puzzle. But I promise you, it’s not. It’s a fundamental skill that, once learned, will unlock your rifle’s true potential and significantly improve your shooting experience. Think of me as your friendly guide, walking you through each step of how to adjust a rifle scope with ease and confidence.
This comprehensive guide will demystify the process, breaking down every essential adjustment. We’ll cover everything from understanding your scope’s parts to the critical steps of zeroing your rifle and fine-tuning for ultimate accuracy. By the time you’re done, you’ll not only know how to adjust a rifle scope but also understand why each adjustment matters. Let’s get started on the path to tighter groups and more successful shots!
Key Takeaways
- Proper Mounting is First: Securely mount and level your scope before any adjustments. A stable foundation is vital for consistent accuracy.
- Bore-Sighting Saves Ammo: Always bore-sight your rifle first. This gets your shots “on paper” at a close range, drastically reducing the number of rounds needed for zeroing.
- Understand Turret Clicks: Know your scope’s click values (e.g., 1/4 MOA or 0.1 MIL). This tells you how much your point of impact moves with each click, simplifying windage and elevation adjustments.
- Zero at Your Intended Distance: Adjust windage (horizontal) and elevation (vertical) turrets to make your point of impact match your point of aim at your primary shooting distance.
- Parallax is for Clarity and Accuracy: Adjust the parallax knob to eliminate reticle shift and achieve a clear image, especially at higher magnifications or varying distances.
- Diopter Adjusts Reticle Focus: Use the diopter adjustment on the eyepiece to ensure the reticle itself is sharp and clear for your individual eyesight, regardless of target focus.
- Practice and Documentation are Key: Consistently practice your adjustments and keep a logbook of your scope settings and results. This builds skill and helps troubleshoot issues.
Quick Answers to Common Questions
How often should I adjust my rifle scope?
You should adjust your rifle scope (re-zero) whenever you change ammunition types, after significant rifle maintenance (like removing the barrel), if you drop the rifle, or before any critical shooting activity (like hunting season) to confirm your zero. Minor adjustments for range or wind might be made more frequently.
What does MOA or MIL mean on my scope?
MOA (Minute of Angle) and MIL (Milliradian) are angular measurements used to quantify scope adjustments. MOA is roughly 1 inch per 100 yards, while MIL is 3.6 inches per 100 yards. Your scope’s turrets will click at specific fractions of MOA or MIL (e.g., 1/4 MOA or 0.1 MIL per click).
Can I adjust my scope without bore-sighting?
Yes, you *can* adjust your scope without bore-sighting, but it will be much harder and more expensive. Without bore-sighting, your initial shots are likely to miss the target entirely, requiring many more rounds and trial-and-error to get “on paper.” Bore-sighting is a highly recommended first step.
What is parallax and why is it important to adjust?
Parallax is an optical illusion where the reticle appears to shift against the target if your eye isn’t perfectly centered behind the scope. Adjusting for parallax aligns the target image and reticle on the same focal plane, eliminating this shift and preventing aiming errors, which is crucial for precision, especially at longer distances.
Why do my shots keep hitting low after adjusting?
If your shots consistently hit low, ensure you are turning the elevation turret in the “UP” direction (often counter-clockwise, but check your scope’s markings). Also, double-check your shooting form, ensure your scope mounts are tight, and confirm that your zeroing distance matches your target distance.
📑 Table of Contents
Understanding Your Scope’s Anatomy
Before you can start twisting knobs, it’s helpful to know what each part of your rifle scope does. Think of it like learning the controls of a new car. Knowing your scope’s anatomy is the first step in understanding how to adjust a rifle scope effectively.
The Main Tube and Objective Lens
The main tube is the body of the scope, housing all the internal optics. At the front, you’ll find the objective lens. This is the largest lens, and its primary job is to gather light, which helps create a bright, clear image of your target. A larger objective lens generally gathers more light, making it better in low-light conditions.
Eyepiece and Diopter Adjustment
At the back of the scope, closest to your eye, is the eyepiece. Around the eyepiece, you’ll often find a ring that rotates. This is your diopter adjustment. Its purpose is to bring the reticle (the crosshairs or aiming point inside the scope) into sharp focus for your individual vision. It doesn’t focus the target; it focuses the reticle so it appears crisp against the background.
Magnification Ring
If your scope has variable magnification, there will be a rotating ring on the main tube, usually near the eyepiece. This is the magnification ring. Turning it allows you to zoom in (increase magnification) or zoom out (decrease magnification) on your target. Higher magnification makes the target appear larger but also narrows your field of view.
Elevation Turret (Top)
The elevation turret is the knob typically found on top of the main tube. This is a critical adjustment when you’re learning how to adjust a rifle scope. It controls the vertical (up and down) movement of your point of impact. If your shots are hitting too low, you’ll adjust the elevation turret to move them up. If they’re too high, you’ll move them down.
Windage Turret (Side)
The windage turret is usually located on the right side of the main tube. This knob controls the horizontal (left and right) movement of your point of impact. If your shots are consistently hitting to the left of your aim, you’ll adjust the windage turret to move them to the right, and vice-versa.
Parallax Adjustment (Side Focus or Adjustable Objective)
Some scopes have a third turret, usually on the left side, or a rotating ring around the objective lens. This is the parallax adjustment. Parallax is an optical phenomenon that can cause your reticle to appear to shift relative to the target if your eye isn’t perfectly centered behind the scope. Adjusting for parallax ensures that the reticle and target are on the same focal plane, eliminating this shift and improving accuracy, especially at longer distances and higher magnifications.
Essential Pre-Adjustment Steps for Success
Before you even think about twisting those turrets, there are a few crucial steps that will save you a lot of headache and ammunition. These foundational steps are vital for anyone looking into how to adjust a rifle scope effectively.
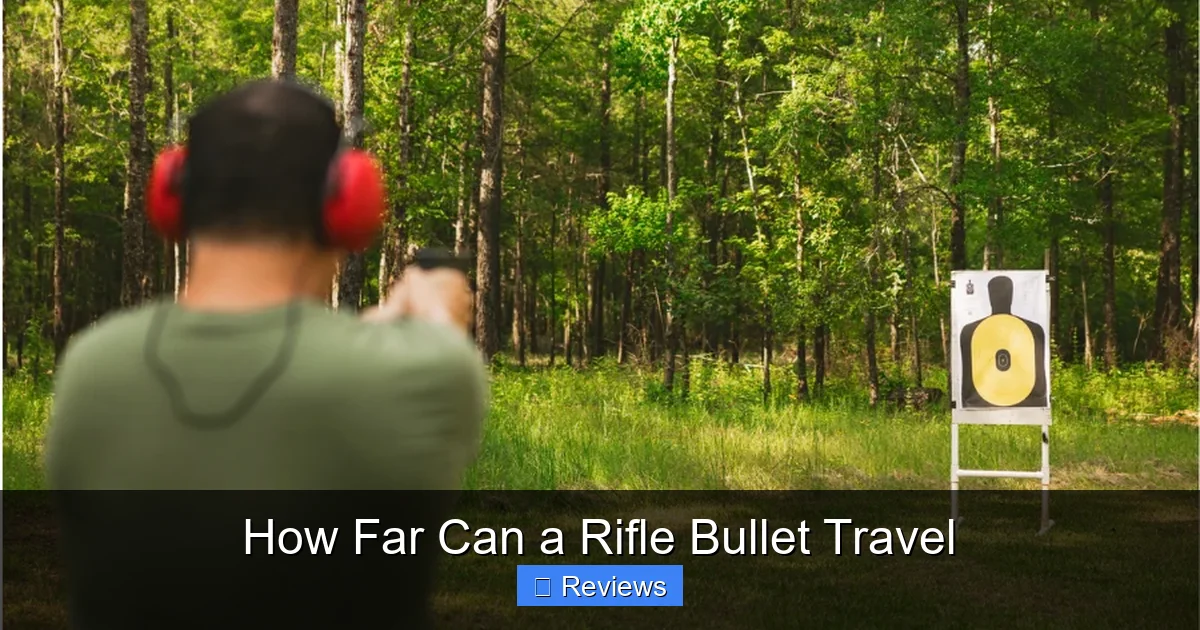
Visual guide about How to Adjust a Rifle Scope
Image source: huntingmark.com
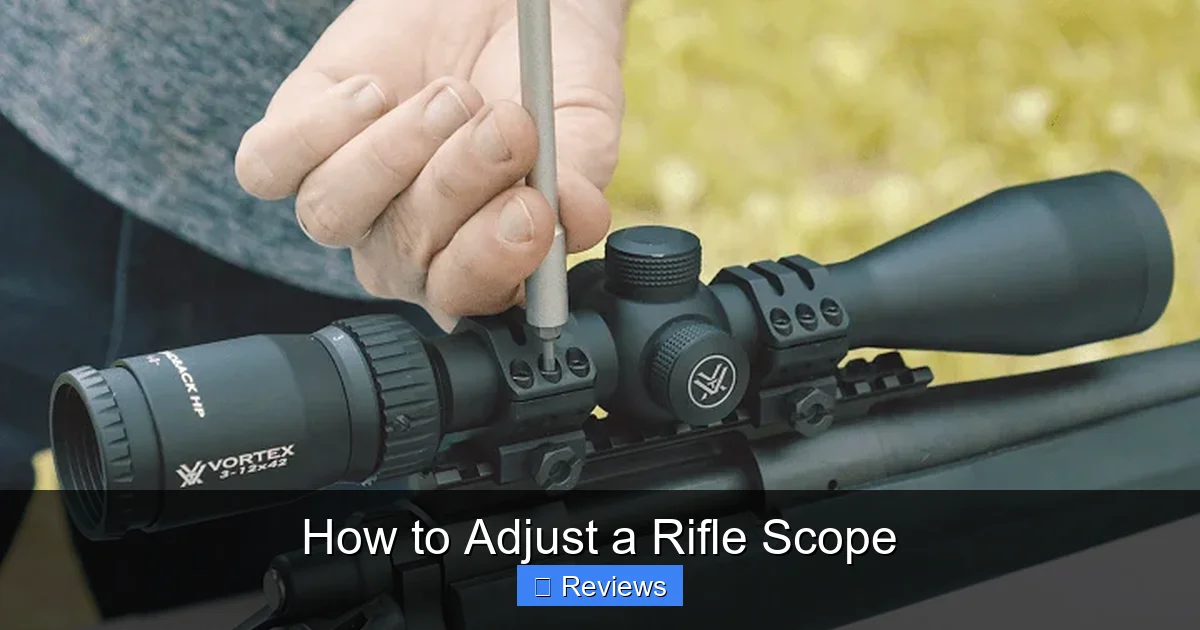
Proper Mounting and Ring Placement
Your scope needs to be securely mounted to your rifle. Loose mounts or rings are a primary cause of inconsistent accuracy. Ensure your scope rings are appropriate for your scope’s tube diameter and your rifle’s mounting rail (Picatinny, Weaver, dovetail, etc.). Tighten all screws to the manufacturer’s recommended torque settings. Over-tightening can damage the scope, while under-tightening can lead to movement.
Leveling Your Scope
This step is often overlooked but incredibly important. If your scope isn’t level (i.e., the reticle isn’t perfectly vertical and horizontal when the rifle is level), it will introduce “cant” errors. This means your bullet will not only move up or down but also subtly left or right when adjusting elevation, especially at longer ranges. Use a scope leveling kit or a set of small bubble levels to ensure your scope’s reticle is perfectly plumb with your rifle’s action. This is a crucial detail for anyone serious about how to adjust a rifle scope for maximum precision.
Bore-Sighting Your Rifle
Bore-sighting is the process of roughly aligning your scope’s reticle with your rifle’s bore (the inside of the barrel). This step is a huge ammo-saver! Without bore-sighting, your first shots could be wildly off-target, possibly missing the paper entirely. You can bore-sight using a laser bore-sighter inserted into the barrel, an optical bore-sighter that attaches to the muzzle, or by manually looking down the bore (if your rifle allows it).
To manually bore-sight: First, ensure your rifle is unloaded and safe. Remove the bolt. Place the rifle securely on a rest, pointing at a target about 25 yards away. Look through the bore and center the target in the middle of the barrel. Without moving the rifle, look through the scope and adjust the windage and elevation turrets until the reticle’s center is also aligned with the target. This gets you very close to “on paper” for your initial zeroing shots.
Choosing the Right Ammunition
Rifles can be surprisingly picky about ammunition. Different bullet weights, manufacturers, and types can produce significantly different points of impact. To effectively learn how to adjust a rifle scope, you need consistency. Choose one specific load of ammunition and stick with it during the zeroing process. Once your scope is zeroed for that load, switching to a different type of ammo will likely require re-zeroing.
Setting Up Your Shooting Range
A stable shooting platform is essential. Use a solid bench rest, sandbags, or a bipod to eliminate as much shooter error as possible. Ensure you have a safe backstop and a target placed at your desired zeroing distance. For initial zeroing, 25 or 50 yards is often recommended to get on paper quickly, then you can move to 100 yards for fine-tuning. A grid-style target (like one with 1-inch squares) is very helpful for measuring adjustments.
The Zeroing Process: Adjusting Windage and Elevation
Now we get to the core of how to adjust a rifle scope: the zeroing process. This is where you align your scope’s point of aim with your rifle’s point of impact. Patience and methodical adjustments are key here.
What is “Zeroing”?
Zeroing your rifle means adjusting your scope so that where your reticle aims is where your bullet hits at a specific distance. This distance is called your “zero distance.” Most commonly, rifles are zeroed at 100 yards, but hunters might choose 200 yards, and rimfire shooters might prefer 50 yards. Your zero distance depends on your primary use for the rifle.
Preparing for Your First Shots
Once your rifle is bore-sighted, set up your target at your initial zeroing distance (e.g., 25 or 50 yards). Load your rifle and get into a comfortable, stable shooting position. Remember, consistency in your shooting form is just as important as the scope adjustments themselves. Focus on breath control, proper trigger pull, and a consistent cheek weld.
The Three-Shot Group Method
The best way to determine your point of impact is by shooting groups, not single shots. A three-shot group is usually sufficient for initial adjustments. After shooting a group:
- **Shoot a Group:** Fire three shots at the center of your target, aiming carefully each time. Try to make each shot as consistent as possible.
- **Analyze the Group:** Don’t adjust after every shot. Look at where the group landed. Find the center of the group (often called the Mean Point of Impact, or MPI).
- **Measure the Deviation:** Measure how far the MPI is from your aiming point, both horizontally and vertically.
Understanding MOA and MIL Clicks
Your scope’s turrets will likely have markings indicating their adjustment value per click. This is usually expressed in Minutes of Angle (MOA) or Milliradians (MIL). Knowing this is vital for how to adjust a rifle scope precisely.
- MOA (Minutes of Angle): One MOA equals approximately 1.047 inches at 100 yards. Most MOA scopes have 1/4 MOA clicks. This means each click moves the point of impact about 1/4 inch at 100 yards. At 50 yards, a 1/4 MOA click moves it 1/8 inch. At 200 yards, it moves 1/2 inch.
- MIL (Milliradians): One MIL equals exactly 3.6 inches at 100 yards. Most MIL scopes have 0.1 MIL clicks. This means each click moves the point of impact about 0.36 inches at 100 yards. At 50 yards, it moves 0.18 inches. At 200 yards, it moves 0.72 inches.
To calculate the number of clicks needed, use this simple formula:
Clicks = (Distance you need to move in inches / (Click value in inches at your target distance))
Example: You’re shooting at 100 yards with a 1/4 MOA scope. Your group is 2 inches low and 1 inch left.
- To move up 2 inches: You need to move 2 inches. Each 1/4 MOA click moves 0.25 inches at 100 yards. So, 2 / 0.25 = 8 clicks UP.
- To move right 1 inch: You need to move 1 inch. Each 1/4 MOA click moves 0.25 inches at 100 yards. So, 1 / 0.25 = 4 clicks RIGHT.
Making Elevation Adjustments
The general rule for adjusting your rifle scope is: “Move the impact toward the point of aim.” If your shots are hitting low, you want to move the impact up. So, you’ll turn your elevation turret in the direction marked “UP” or clockwise, depending on your scope. If your shots are hitting high, turn it “DOWN” or counter-clockwise.
After making your calculated clicks, fire another three-shot group to see the change. Repeat this process until your shots are consistently hitting the bullseye at your chosen zero distance.
Making Windage Adjustments
Similarly, for windage: if your shots are hitting to the left, you want to move the impact to the right. Turn your windage turret in the direction marked “RIGHT” or clockwise. If they are hitting to the right, turn it “LEFT” or counter-clockwise.
Again, shoot a group, measure, adjust, and repeat until your windage is dialed in.
Fine-Tuning and Confirming Your Zero
Once you’re consistently hitting the bullseye at your initial zero distance (e.g., 25 or 50 yards), move your target out to your final zero distance (e.g., 100 yards). Repeat the three-shot group method, making smaller, more precise adjustments as needed. Always confirm your zero with several groups to ensure consistency. It’s often helpful to shoot a “cold bore” shot after the rifle has cooled down to see if your first shot after a break is still on target.
Mastering Parallax Adjustment
Parallax is one of those scope features that often confuses new shooters, but understanding it is key to how to adjust a rifle scope for maximum precision, especially at longer ranges or with higher magnification.
What is Parallax?
Imagine holding your finger up and looking at a distant object. If you close one eye and then the other, your finger appears to jump. This is parallax. In a scope, parallax occurs when the image of the target and the reticle are not focused on the same plane within the scope. If your eye isn’t perfectly centered behind the eyepiece, this can cause the reticle to appear to shift against the target, leading to aiming errors even if your scope is perfectly zeroed.
Identifying Parallax Error
To check for parallax, aim at a distinct point on your target at your chosen distance. While keeping your rifle absolutely still (use a rest), subtly move your head a few millimeters up, down, left, and right behind the scope. If the reticle appears to move relative to your aiming point on the target, you have parallax error.
Adjusting for Parallax
If your scope has a parallax adjustment (either a third turret on the side or an adjustable objective ring at the front), you’ll use it to eliminate this error. Simply turn the parallax knob or ring until the reticle no longer appears to shift when you perform the “head bob” test. Often, these adjustments are marked with distance increments (e.g., 50, 100, 200 yards). While these markings are a good starting point, always fine-tune by performing the head bob test at your actual shooting distance.
When to Adjust Parallax
You should adjust parallax every time you change your shooting distance significantly, or if you notice any reticle shift. For instance, if you zeroed your rifle at 100 yards with parallax set to 100 yards, and then you move to shoot at 300 yards, you’ll need to re-adjust your parallax to 300 yards to maintain accuracy. This is a critical element of how to adjust a rifle scope for different ranges.
Diopter, Magnification, and Environmental Factors
Beyond the primary adjustments, there are other considerations that contribute to a clear sight picture and accurate shooting.
Adjusting the Diopter for Your Eye
The diopter adjustment ring on the eyepiece focuses the reticle itself, not the target. Here’s how to set it:
- Point the scope at a clear, bright area (like the sky or a blank wall), but NOT directly at the sun.
- With your rifle safely unloaded, quickly glance through the scope. Don’t stare. Your eye will try to “accommodate” and force the reticle into focus if you stare.
- While quickly glancing, turn the diopter ring until the reticle appears as sharp and crisp as possible. Once set for your eye, you typically won’t need to adjust it again unless your eyesight changes or someone else uses the scope.
Using Magnification Effectively
Your magnification ring allows you to zoom in on your target. While higher magnification makes small targets easier to see, it also reduces your field of view and exaggerates any movement, including natural body sway. For initial zeroing, a moderate magnification (e.g., 6x-10x) is often sufficient. When hunting or shooting at moving targets, a lower magnification might be preferred for a wider field of view. For long-range precision, higher magnification helps with target identification and precise aiming, but always adjust parallax accordingly.
Accounting for Environmental Factors
While your scope adjustments primarily correct for bullet drop and windage, environmental factors also play a role. Wind is the most significant. Learning to “read” the wind and make hold-over or hold-off corrections (or dial in windage adjustments) is an advanced skill. Temperature and humidity can subtly affect bullet trajectory, but for most recreational shooting, these are less critical than proper scope adjustment and wind. Knowing your bullet’s ballistic data for different conditions can help.
Drifting Zero and Troubleshooting
What if your zero seems to “drift” or change over time?
- **Check Mounts:** The most common culprit is loose scope rings or mount screws. Retorque them to spec.
- **Ammunition:** Are you using consistent ammunition? Switching brands or bullet weights can shift your zero.
- **Barrel Heating:** For some rifles, point of impact can shift as the barrel heats up significantly. Allow your barrel to cool between groups.
- **Damage:** Has the scope been dropped or subjected to heavy recoil without proper mounting? Internal damage can occur.
- **Shooting Form:** Inconsistent cheek weld, grip, or follow-through can lead to apparent “zero shift.”
Advanced Tips and Maintaining Your Scope
Once you’ve mastered how to adjust a rifle scope, there are still ways to refine your skills and ensure your equipment lasts.
Document Your Settings
Keep a small logbook or use an app to record your zero settings (clicks for elevation and windage), the ammunition used, the zero distance, and any environmental conditions. This log becomes invaluable for reference, especially if you travel or switch ammo. You might also record specific adjustments for different distances (e.g., “3 clicks up for 200 yards”).
Practice Good Shooting Fundamentals
No amount of scope adjustment can compensate for poor shooting form. Consistently practice your stance, grip, breath control, and trigger squeeze. A solid shooting foundation makes it much easier to diagnose whether a miss is due to the shooter or the scope.
Cleaning and Maintenance
Regularly clean your scope’s exterior lenses with a soft lens brush and specialized lens cleaning solution and cloth. Avoid harsh chemicals or abrasive materials. Check your scope rings and mount screws periodically to ensure they remain tight. Store your rifle and scope in a dry, safe place away from extreme temperatures and impacts. Proper care extends the life and reliability of your scope.
Understanding Bullet Drop Compensators (BDCs) or Turret Dials
Some scopes come with BDC reticles or custom-etched turrets that are calibrated for specific bullet trajectories. These can simplify long-range shooting by providing aiming points or click values for different distances. However, they are typically designed for a specific caliber, bullet weight, and muzzle velocity, so they still require a precise zero and understanding of your specific ammunition’s ballistics.
Conclusion
Learning how to adjust a rifle scope is an indispensable skill for any shooter. It’s the gateway to precision, consistency, and ultimately, greater enjoyment of your shooting sports. We’ve walked through every critical aspect, from understanding your scope’s anatomy to the detailed process of zeroing, mastering parallax, and fine-tuning for environmental factors.
Remember, patience is your best friend during this process. Don’t rush your adjustments, and always confirm your changes with careful groups. As you gain experience, adjusting your rifle scope will become second nature, and you’ll appreciate the confidence that comes with knowing your shots will land exactly where you intend.
So, take this knowledge to the range. Practice these steps diligently. You’ll not only see your groups tighten but also develop a deeper connection with your rifle and a greater appreciation for the art and science of accurate shooting. Happy shooting, and may your aim always be true!
Frequently Asked Questions
What is the ideal distance to zero a rifle scope?
The ideal distance to zero a rifle scope depends on its primary use. For general hunting and target shooting, 100 yards is a common and versatile zero. If you’re primarily shooting closer ranges (e.g., rimfire rifles), 50 yards might be more appropriate. Long-range shooters might opt for a 200-yard zero, understanding their bullet’s trajectory.
How do I know if my scope needs adjustment?
Your scope needs adjustment if your rifle’s point of impact doesn’t match your point of aim at your desired zero distance. You’ll notice this when your shots consistently land high, low, left, or right of the bullseye. Inconsistent groupings or a noticeable shift in impact after transporting or dropping the rifle are also clear signs.
Can I zero my scope in my backyard?
Zeroing your scope in your backyard is generally not recommended and often illegal, unless you have a designated, safe shooting range with an adequate backstop and adhere to all local laws and safety regulations. Most backyards do not meet the safety requirements for discharging firearms, even for zeroing purposes.
What does “zero stop” mean on some scope turrets?
A “zero stop” feature on a scope turret prevents the elevation turret from being dialed below your established zero setting. This is incredibly useful for long-range shooters who dial in elevation for different distances, as it allows them to quickly and confidently return to their exact zero without needing to count clicks or look at the turret markings.
Should I remove my scope for cleaning?
You typically do not need to remove your scope from the rifle for routine cleaning. Only remove the scope if you need to access the rifle’s action for deep cleaning or maintenance, or if you suspect an issue with the mounting. Removing and reattaching the scope usually requires re-zeroing, so avoid it unless necessary.
What causes a rifle scope to lose its zero?
A rifle scope can lose its zero due to several factors, including loose scope rings or mount screws, internal damage from drops or impacts, heavy recoil, temperature changes, or inconsistent shooting form. Using different types of ammunition or even a new batch of the same ammunition can also slightly shift the point of impact, requiring minor adjustments.
